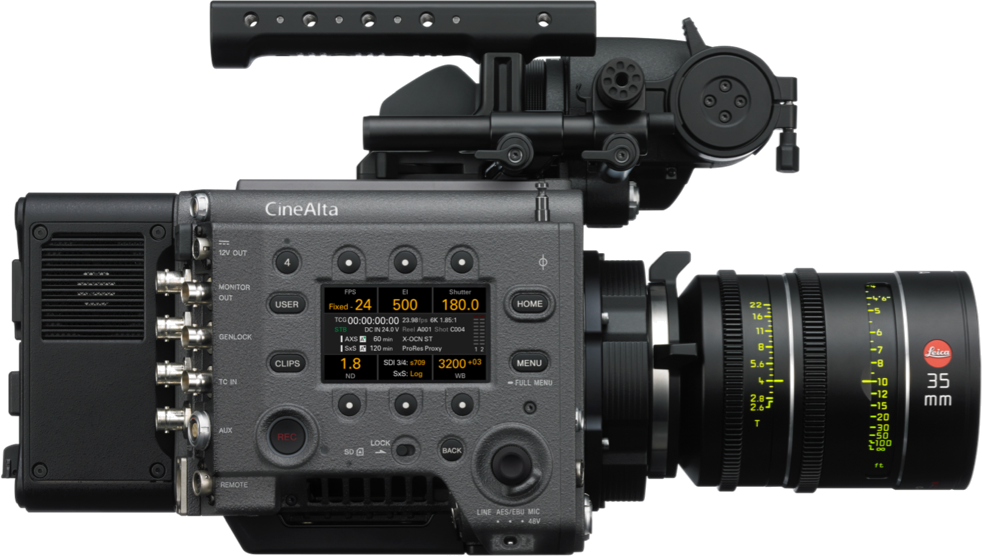
Sony Venice
Compatible models
- Sony Venice 1
- Sony Venice 2
Overview
This video show the RCP controlling the Sony Venice in IP mode:
Controls
We have 2 protocols:
- Sony Venice Serial : typical Sony Venice multicam workflow.
- Sony Venice IP : if you're working in SLog and don't want/need the camera control using the
RCPpaint mode.
| Control | Sony Venice IP | Sony Venice serial |
|---|---|---|
| Exposure (Iris, Gain, Shutter1, ND filter2) | ✔3 | ✔4 |
| White balance (Color temp and tint) | ✔5 | ✔6 |
| Black balance (R/B and Master) | ✔ | |
| Avanced shading (Flare, Detail, Matrix, Multi Matrix) | ✔7 | |
| REC (start/stop) | ✔ | ✔ |
| Other controls (ISO base8, APR, pattern, flip horizontal/vertical, replay9, User Keys10, TC) | ✔ | |
| Tally | ✔11 | |
| Lens (zoom, focus)12 | ✔ | |
| Scene file : save/recall | ✔ | ✔ |
Wiring
We can control the camera in two modes:
- Sony Venice IP : we control the camera over IP (works best for SLog based workflow, RCP/paint mode is disabled)
- Sony Venice Serial : we control the camera over remote (8 pins) port, when using the RCP Paint mode in the camera.
We can control the camera locally (LAN) using just the RCP for IP, adding a CI0 for serial.
And we can control the camera wirelessly (4G, RF, Wi-Fi) using a RIO for IP and serial (Steadycam, robotics, etc.).
Sony Venice IP (LAN)

- RCP powered by PoE or 12V PSU
- RCP talks directly to camera over IP
Can work through simple Ethernet switch or fiber like Ereca CAM Racer, etc.
Sony Venice Serial (LAN)

- RCP powered by PoE or 12V PSU
- CI0 or RIO powered by camera using the cable (no D-TAP required)
- cable : CY-CBL-SONY-8P-03 (controls the camera and power the CI0/RIO)
Can work through simple Ethernet switch or fiber like Ereca CAM Racer, etc.
Some people prefer to keep the CI0/RIO on camera side and then it's simply ethernet between the RCP and CI0/RIO.
Some people will prefer to keep the CI0/RIO on the RCP side and connect the serial through Ereca (pro: clean setup on camera side, cons: you lose the flexibility of the RIO with external motors/lens control, etc.)
Sony Venice IP (Wireless)

- RCP powered by PoE or 12V PSU, connected to internet
- RIO powered by D-TAP
- RIO connected to camera using ethernet
- RCP talks to RIO over internet (using 4G, Rf, Wi-Fi, etc.)
Video needs to be HF, we just do the telemetry.
Sony Venice Serial (Wireless)

- RCP powered by PoE or 12V PSU, connected to internet
- RIO powered by D-TAP
- RIO connected to camera using the cable CY-CBL-SONY-8P-03
- RCP talks to RIO over internet (using 4G, Rf, Wi-Fi, etc.)
Video needs to be HF, we just do the telemetry.
Camera setup
Venice IP
- Setup IP/mask, in
Technical > Network > Setting:- set
SettingtoLAN - in
LANsubmenu:- set
DHCPtoOff - set
IP Addressto desired cam IP (here10.192.10.100) - set
Subnet Maskto desired cam subnet (here255.255.0.0)
- set
- set
- Setup login/password in
Technical > Authentication(UsernamandPassword) - In
Technical > Special Configuration: setRM / RCP Paint ContoOff
Venice Serial
In Technical > Special Configuration: set RM / RCP Paint Con to On
RCP setup
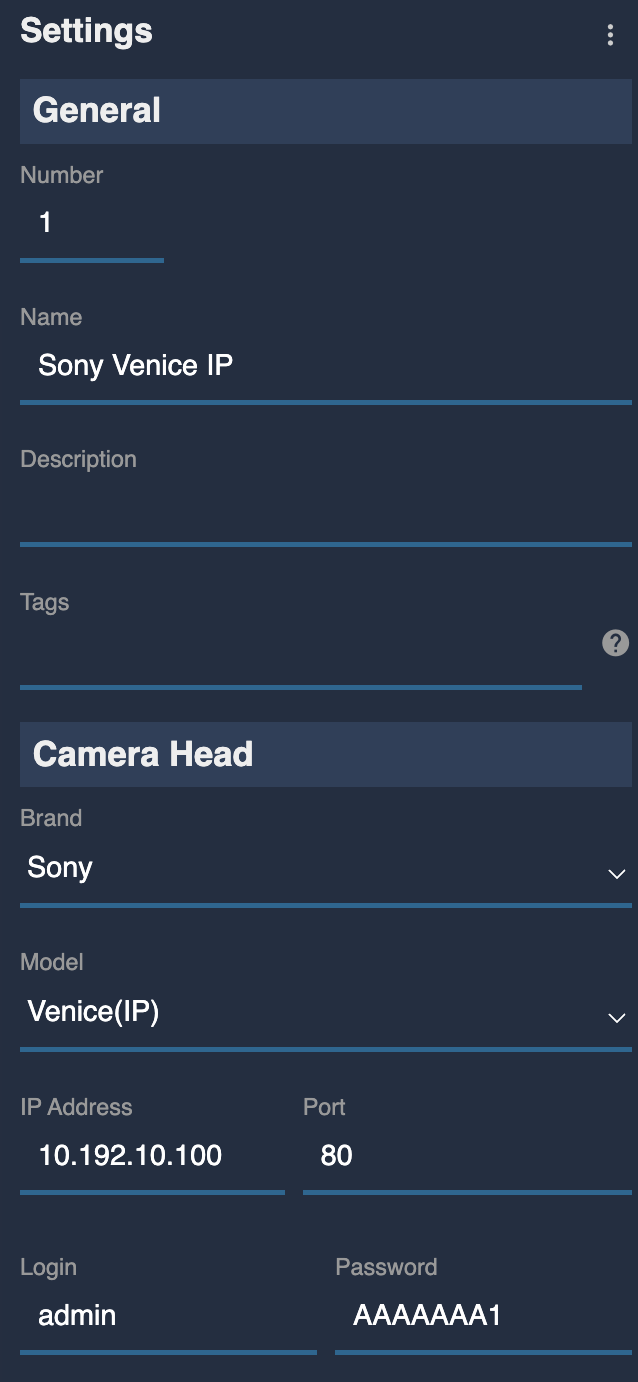
Set up a new camera via the RCP Configuration UI:
Venice IP
- Enter a custom number, name, etc.
- Select Sony brand
- Select Sony Venice(IP) for the protocol
- Enter the IP of your camera
- Enter the login/password of your camera

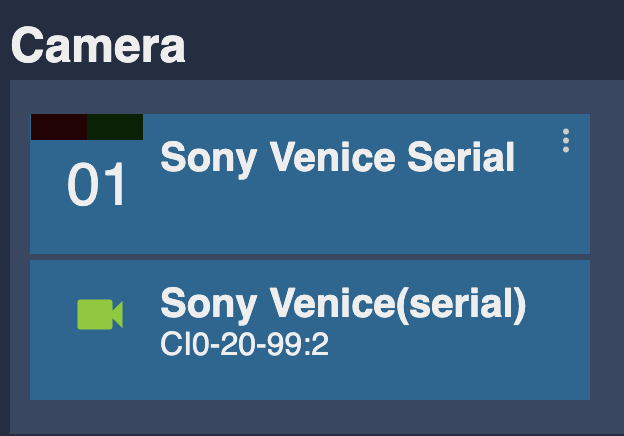
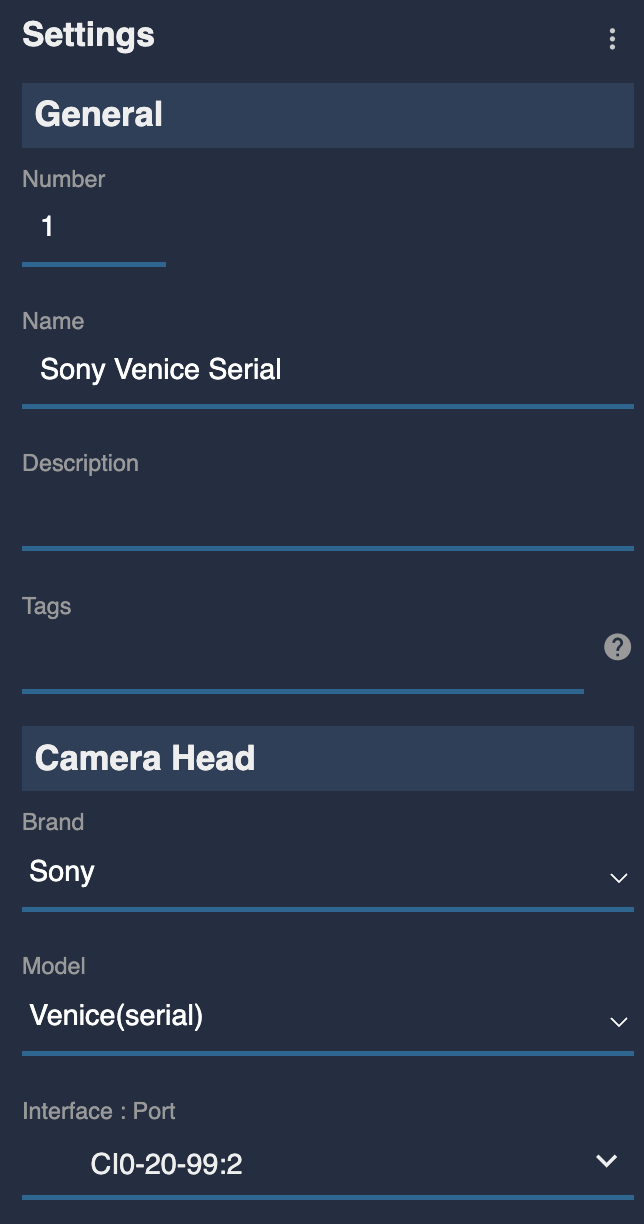
Venice Serial
- Enter a custom number, name, etc.
- Select Sony brand
- Select Sony Venice(Serial) for the protocol
- Select the CI0/RIO port on which your camera is plugged
RCP operation
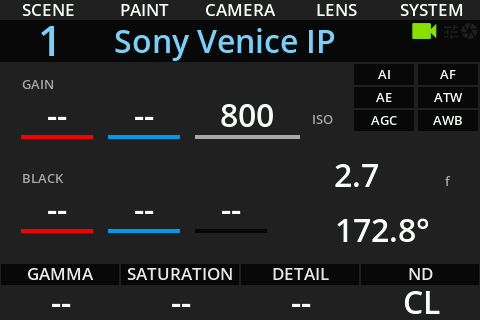
Overview
On the exposure and joystick, you have access to iris, ISO, shutter.
Assignables
Keys
You can customize the 10 buttons on top of the RCP main screen.
This is accessible through : MENU > SYSTEM > ASSIGN. > Set Buttons.
By default, keys 1-5 are not assigned to anything : NA.
You can assign them to something more meaningful like this:
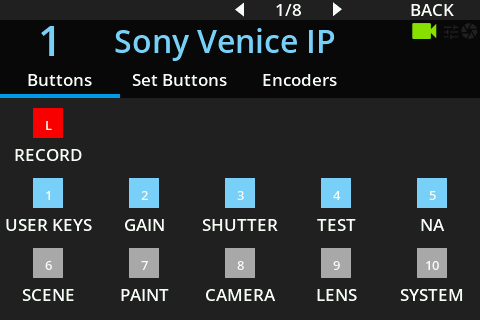
So you have a quick access to:
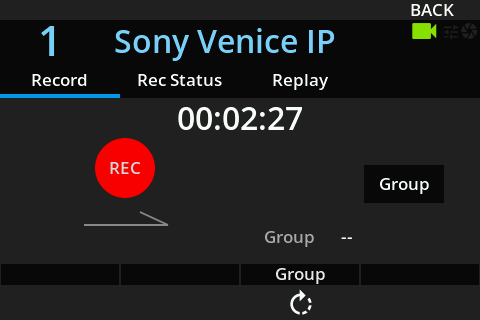
- Lock button is now a shortcut to REC menus (and replay, etc.) and the LED reflects the REC status.
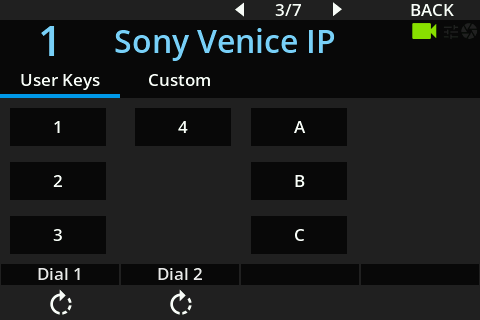
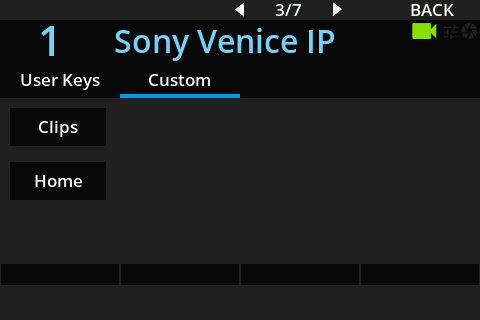
- cam assignables buttons (1-4 and A-C, Home and Clips)
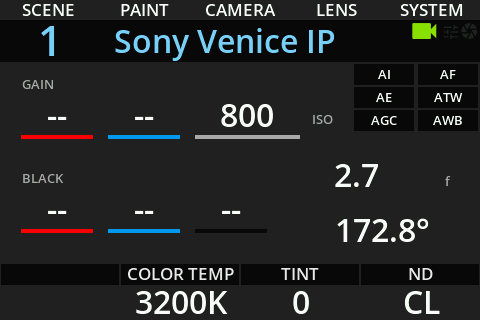
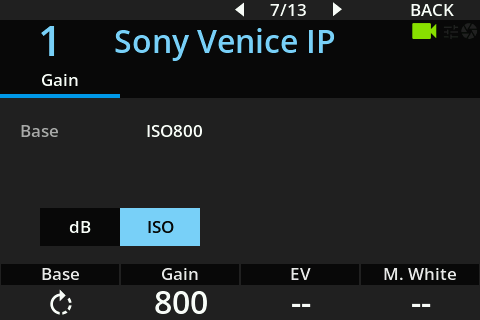
Base ISO from the gain view:
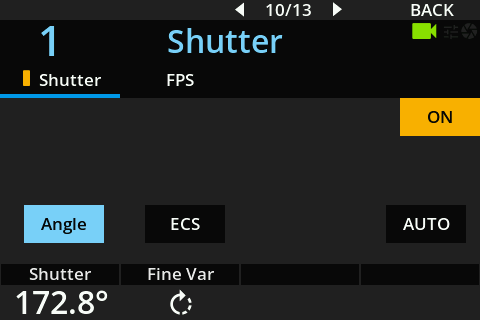
Shutter Angle/speed from the shutter view:
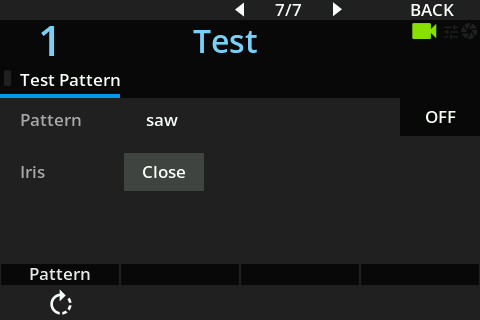
Test patterns from the test view:
Encoders
You can customize the 4 encoders below the RCP main screen.
This is accessible through : MENU > SYSTEM > ASSIGN. > Encoders.
By default, the encoders are assigned to gamma, saturation, detail, ND.
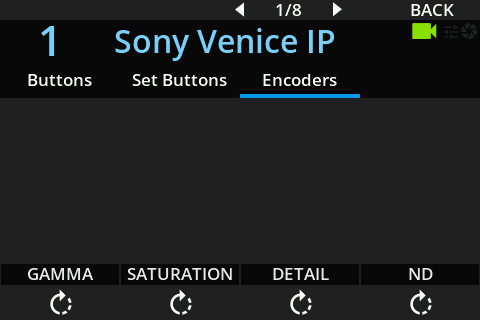
So it looks like this on the main screen:
For cine-style cams like Venice, it's better to assign them to color temp, tint, ND.
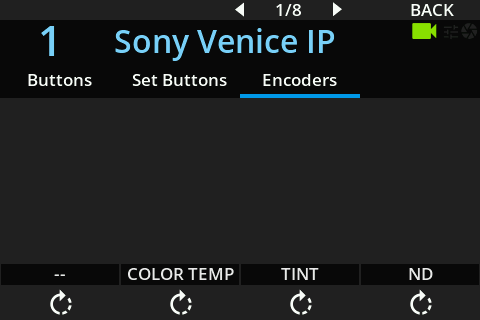
So it looks like this on the main screen: