IP Configuration
Cyanview devices communication relies on IP Network.
Find device's IP
There are several ways to find your device's Network IP.
- Deduce IP from the device Serial Number
The default IP and Subnet Mask of the Cyanview devices has the following pattern: IP= 10.192.x.y and Subnet Mask= 255.255.0.0 (or /16) where x, y are the two last numbers of the serial number.
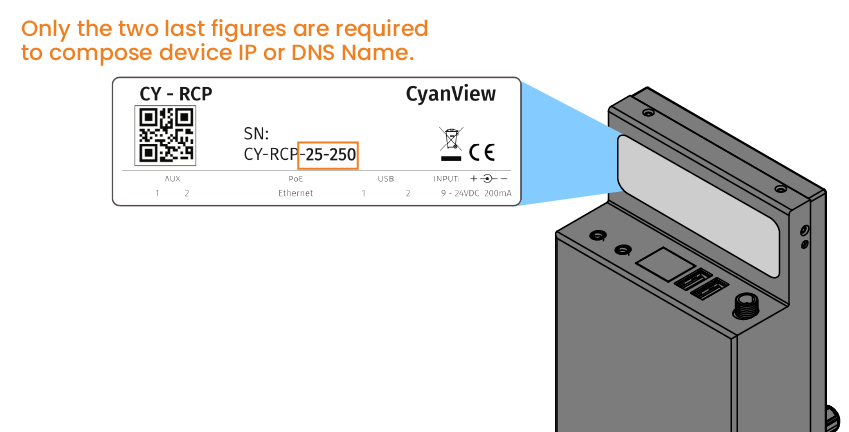
- SN: CY-RCP-25-250
- IP: 10.192.25.250
- Subnet Mask: 255.255.0.0
- mDNS : http://cy-rcp-25-250.local1
- requires a DHCP supporting mDNS (multicast DNS). If
Bonjouris working, mDNS is working.
LAN configuration
Use case:
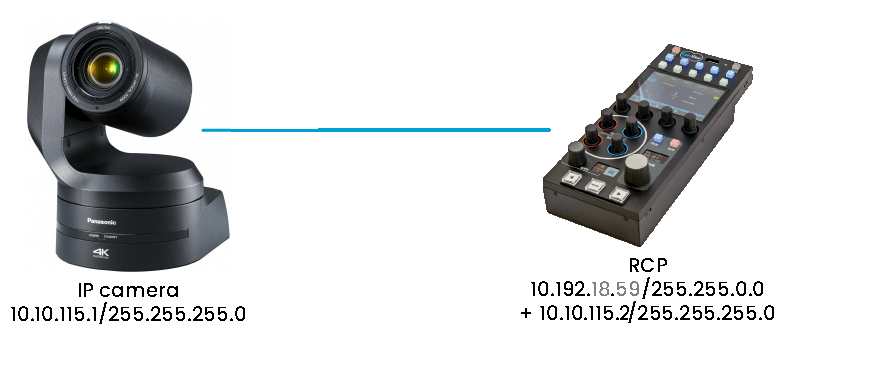
- You have a RCP and an IP camera or an IP router
- They need to communicate with each other
- You don't want to change your camera/router IP
In the Configuration tab, click on IP Connections:
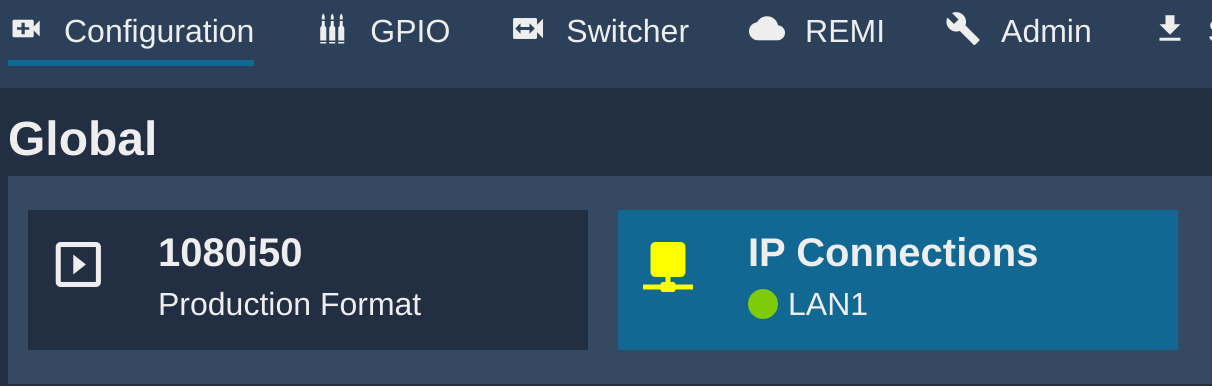
On the right panel:
- Click on
+of theLAN connectionsblock - Select
LAN1 - Enter a new IP and mask for your RCP
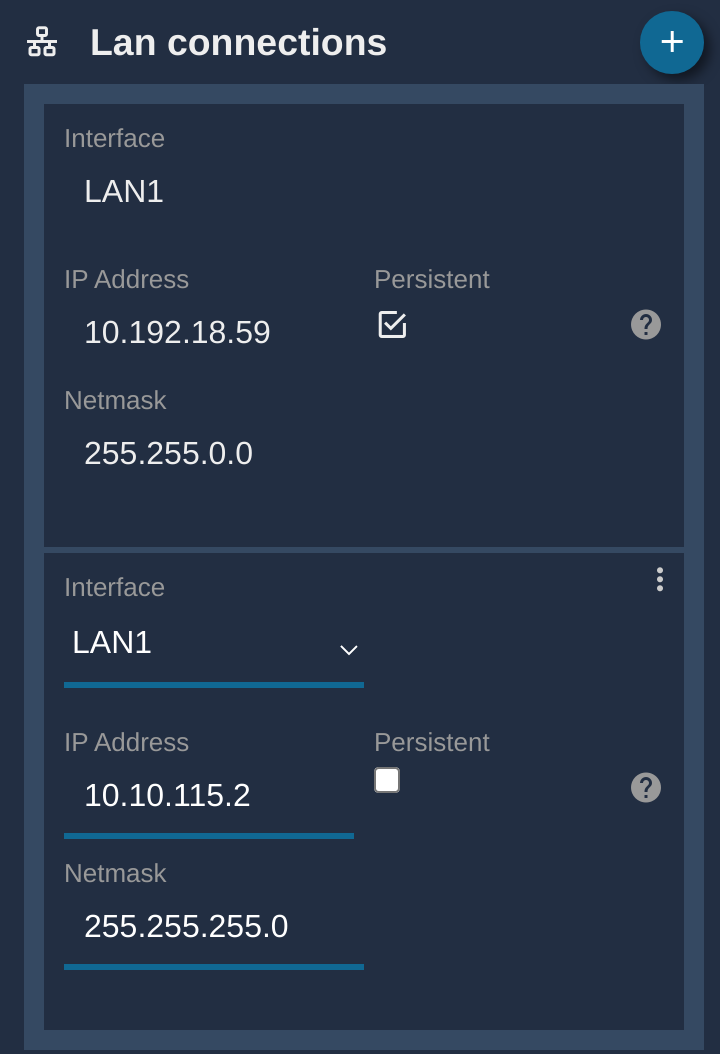
Now, your RCP:
- is reachable on
10.10.115.2 - can reach all devices on the network
10.10.115.0/24(from10.10.115.1to10.10.115.254) - in particular the PTZ at
10.10.115.1
LAN web UI access
Use case:
- You have a RCP
- You have a computer
- You need to access the RCP web UI from the corporate network (not the factory IP of the RCP)
In the Configuration tab, click on IP Connections:
On the right panel:
- Click on
+of theLAN connectionsblock - Select
LAN1 - Enter a new IP and mask for your RCP
- Click on
persist
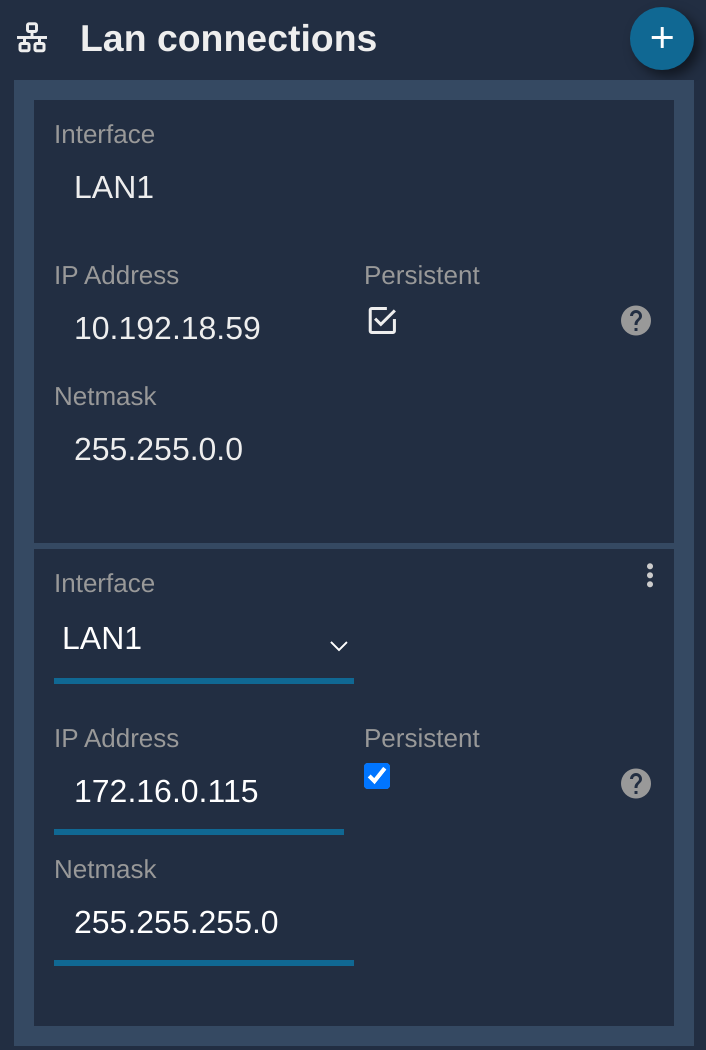
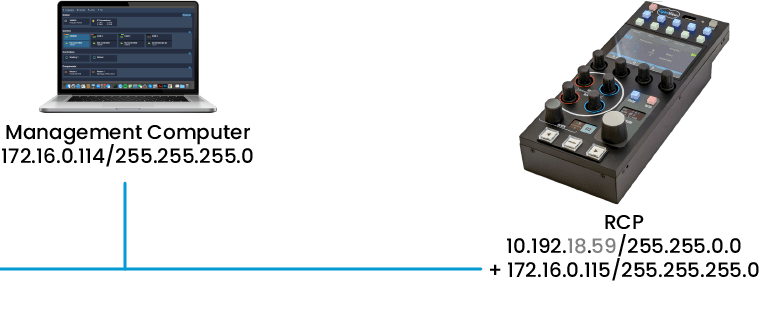
Now, your RCP:
- is reachable on
172.16.0.115 - can reach all devices on the network
172.16.0.0/24(from172.16.0.1to172.16.0.254) - in particular from your computer (which has the IP
172.16.0.114) - this IP is marked as
persist, this will stay even if you reset your config or upgrade the OS with a SWU
It is interesting to setup a static IP on your RCP and computer. This way your computer can easily access your RCP web UI. To setup a static IP on your computer (Windows and Mac OSX), you can follow this guide
WAN setup
By default, all our devices will connect to internet using DHCP.
You can change that if your network setup needs a static setup (IP, mask and gateway).
In the Configuration tab, click on IP Connections:
On the right panel:
- Click on
+of theWAN connectionsblock - Select
LAN1 - Enter a new IP and mask for your RCP
- Enter the gateway of your router
- Enter a valid DNS server/relay (you can use google ones :
8.8.8.8) - Click on
persist
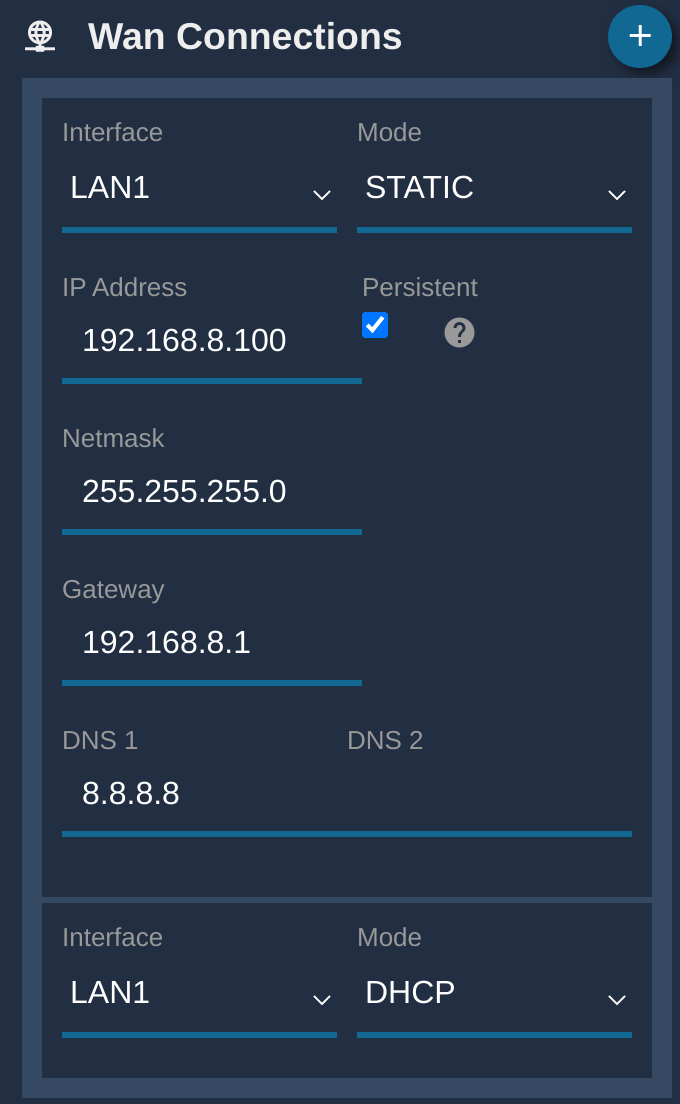
Now, your RCP:
- is reachable on
192.168.8.100 - can reach all devices on the network
192.168.8.0/24(from192.168.8.1to192.168.8.254) - can connect to internet using the router located at
192.168.8.1 - using DNS server
8.8.8.8 - this IP is marked as
persist, this will stay even if you reset your config or upgrade the OS with a SWU
Route setup
Use case, you need to access a specific network through a specific router.
In the Configuration tab, click on IP Connections:
On the right panel:
- Click on
+of theRoutesblock - Select
LAN1 - Enter the gateway (this gateway should be reachable by the RCP)
- Enter the network destination
- Enter the network mask
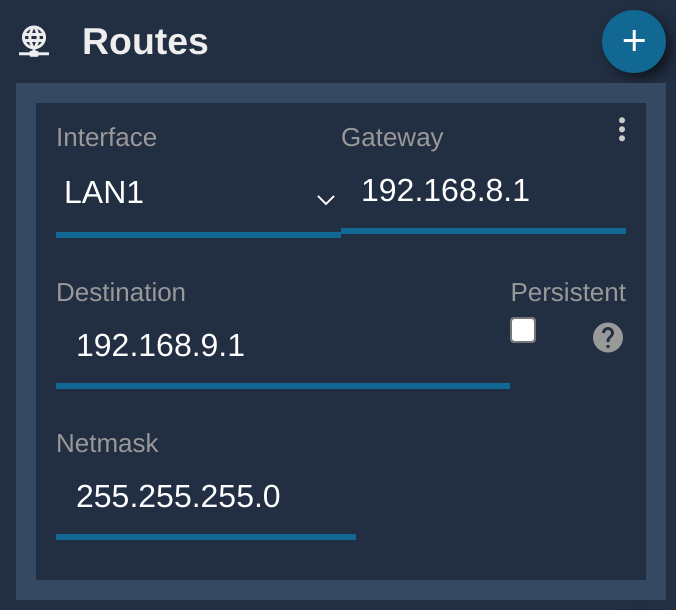
Now, your RCP
- can reach the network
192.168.9.1/24 - the trafic for this network is routed to
192.168.8.1
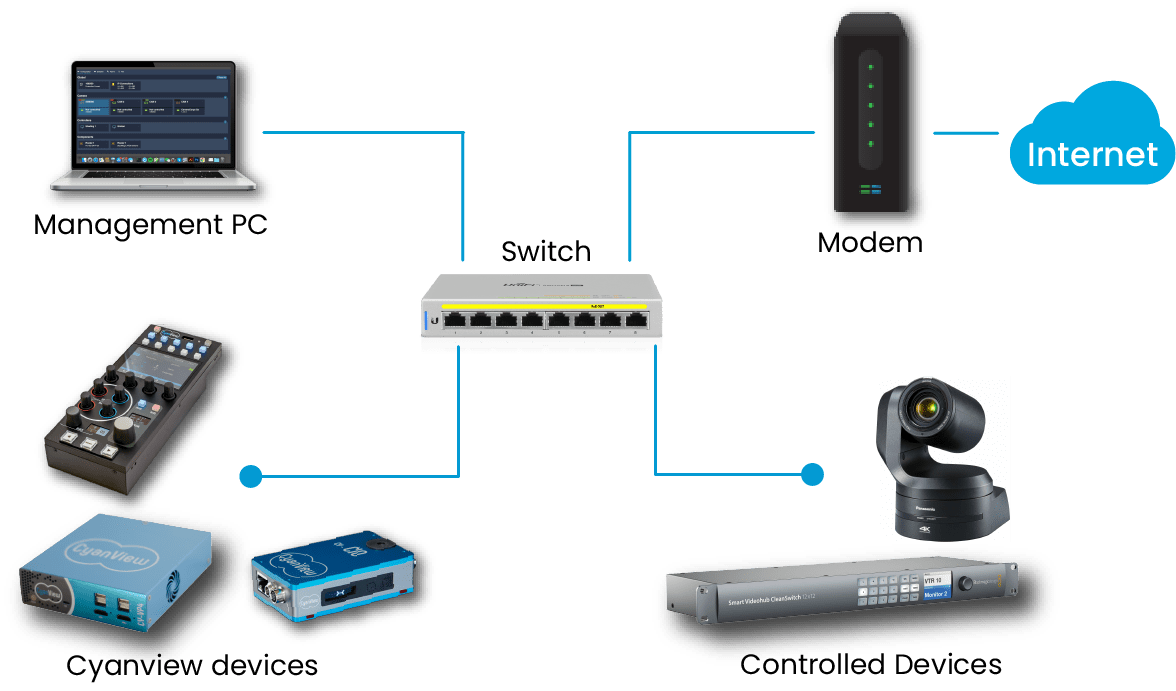
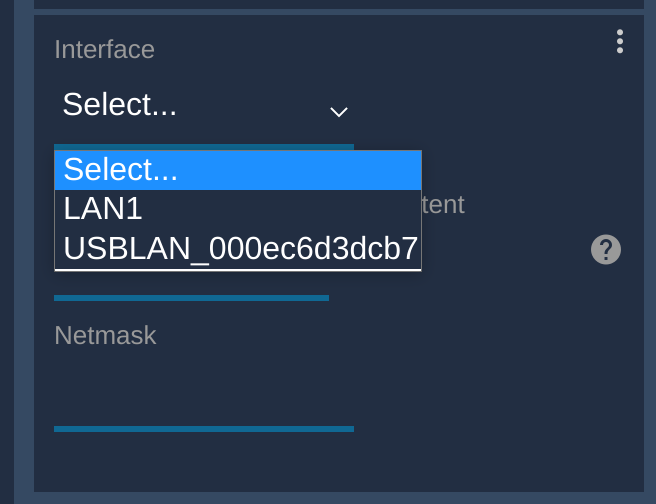
USB dongles
We support a wide range of USB ethernet dongles. This allows you to have physically separated networks.
In the web UI, they will appear allongside LAN1 in the dropdown list.
Network overview
You can navigate to the Diagnotics tab.

And here, you have an overview of all your IP's for all the interfaces (including DHCP addresses, etc.).

Here in my example, my RCP has:
- a factory IP :
10.192.18.4(based on serial numbercy-rcp-18-4) - a DHCP address :
192.168.88.30
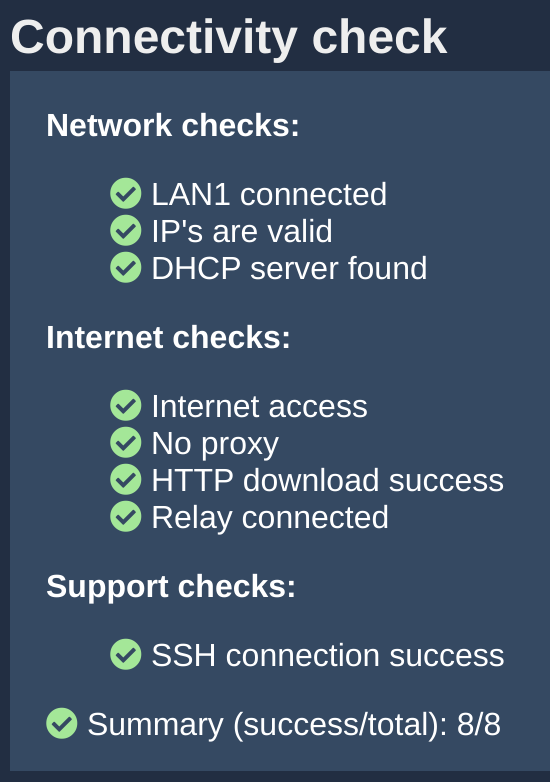
Internet check
You can navigate to the Admin tab.

Wait some time (usually a couple of seconds if everything is OK, up to a minute if you have network issues).
And in the Connectivity check block, if everything is green, you're connected to internet.