My First Cyanview
This guide is for when you are first unboxing Cyanview equipment. This page will guide you through how to find a Cyanview device's IP address, how to access the Web UI and basic configuration steps.
For more indepth instructions please consult the camera's integration page
How to find the IP Address?
RCP/RCP-J
There are 2 methods to finding a IP address on a RCP/RCP-J
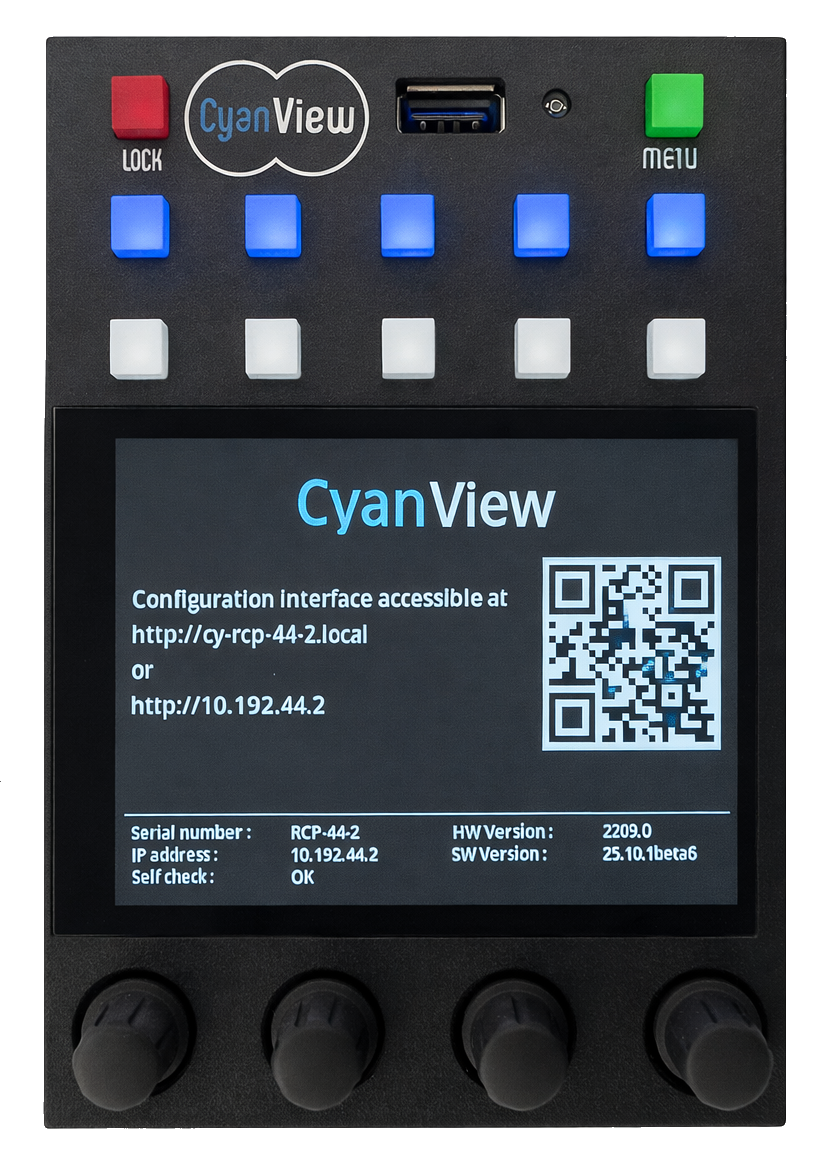
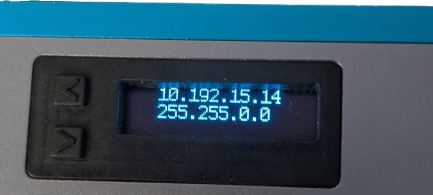
Method 1 - When booting
When the RCP boots, it displays the unit's default IP address.
Method 2 - Use the front screen
Navigate to Menu -> System -> Info
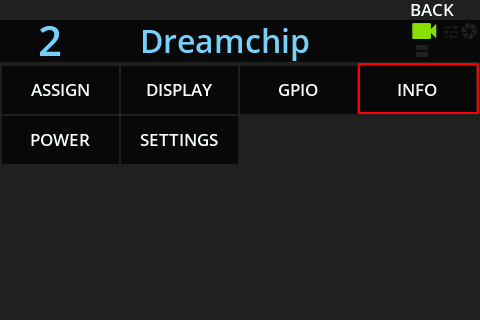
This menu will state the default IP Address and if the RCP has a DHCP address
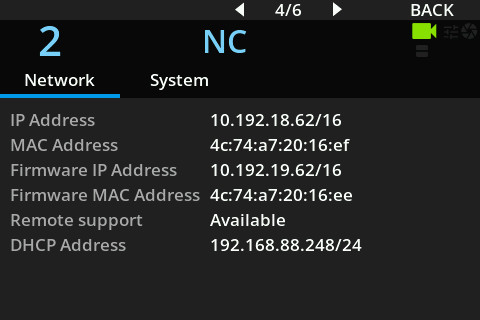
The Firmware IP Address is an internal IP and does not allow access to the configuration web page. Use the IP Address or DHCP Address instead to reach the UI.
RIO
Use the left and right arrows to go through the menus
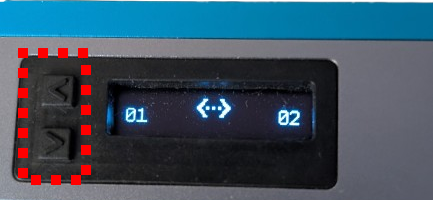
The screen will detail the RIO's IP address
Browse to the RCP or RIO
Now that you have the IP address, you can browse to the RCP or RIO UI.
To access the web interface of your RCP or RIO, your computer must be on the same subnet/IP network as the device. Typically, this means setting your computer to a static IP address within the Cyanview factory range: 10.192.0.0/16.
If you need help setting a static IP address on your computer, refer to IP Primer – How do I change my computer IP address?.
Do you have a CI0? It doesn't have a UI - You configure the CI0 via the RCP See CI0 section below
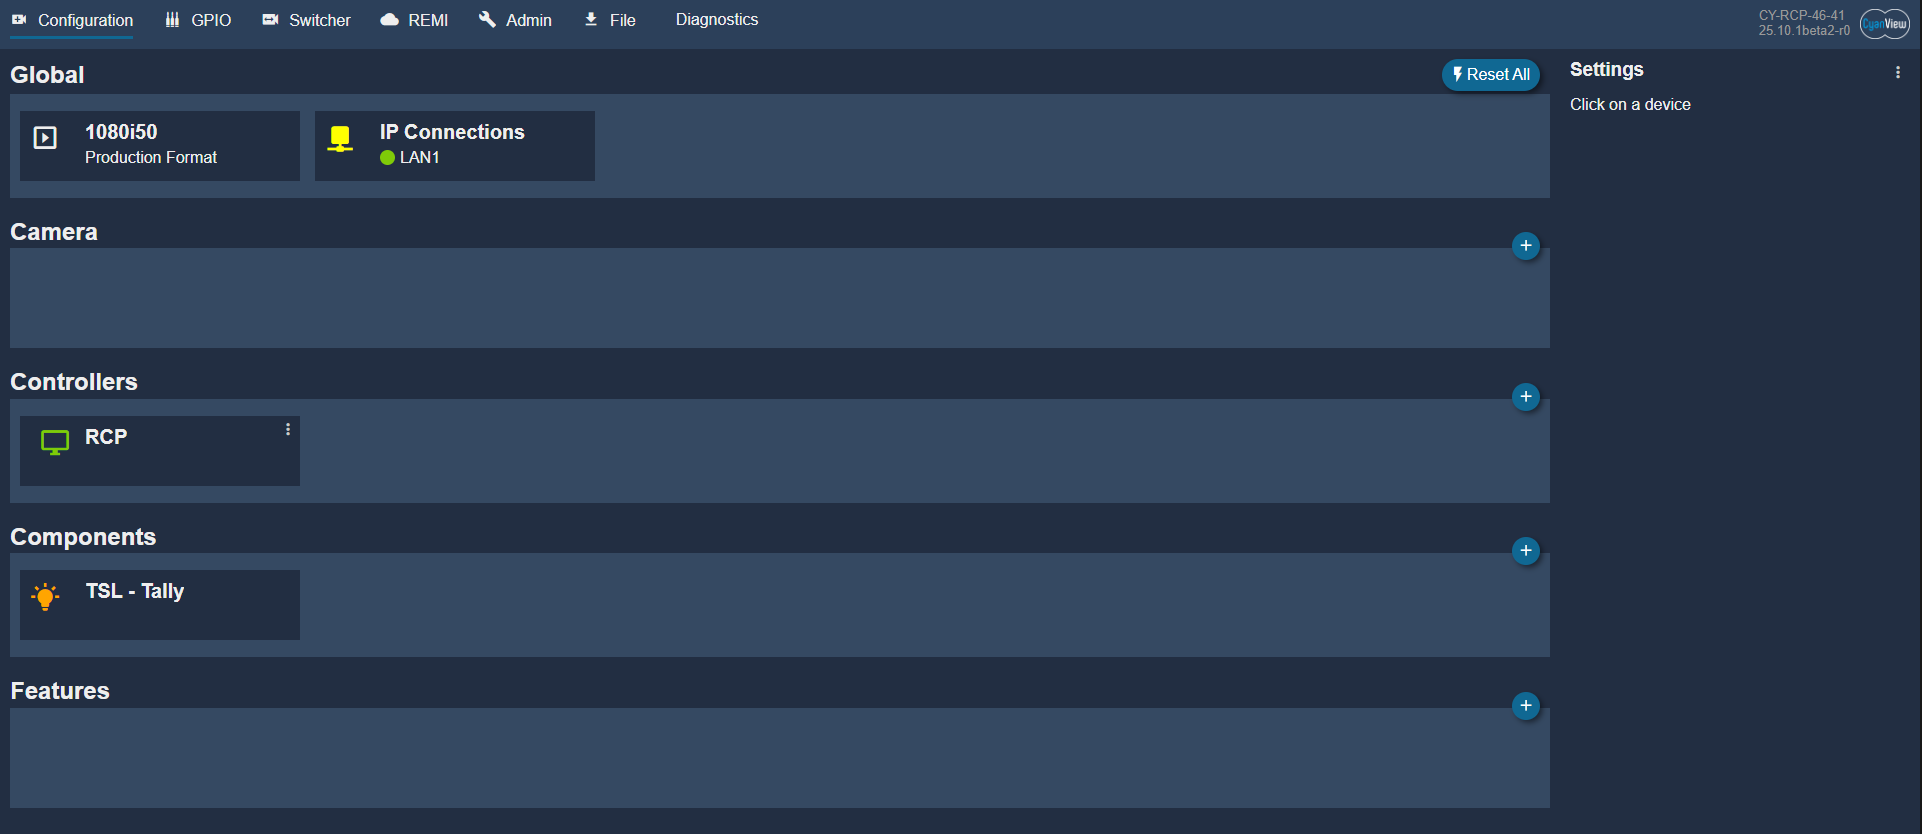
Configure your RCP/RIO IP address
As your network is unlikely to use the 10.192.X.Y range, start by adding an additional IP address on the RCP in your own network (subnet) in the LAN section. This creates a second IP on the RCP: the factory 10.192.X.Y address is always kept and cannot be removed (see IP Primer – Default IP configuration of Cyanview devices for details).
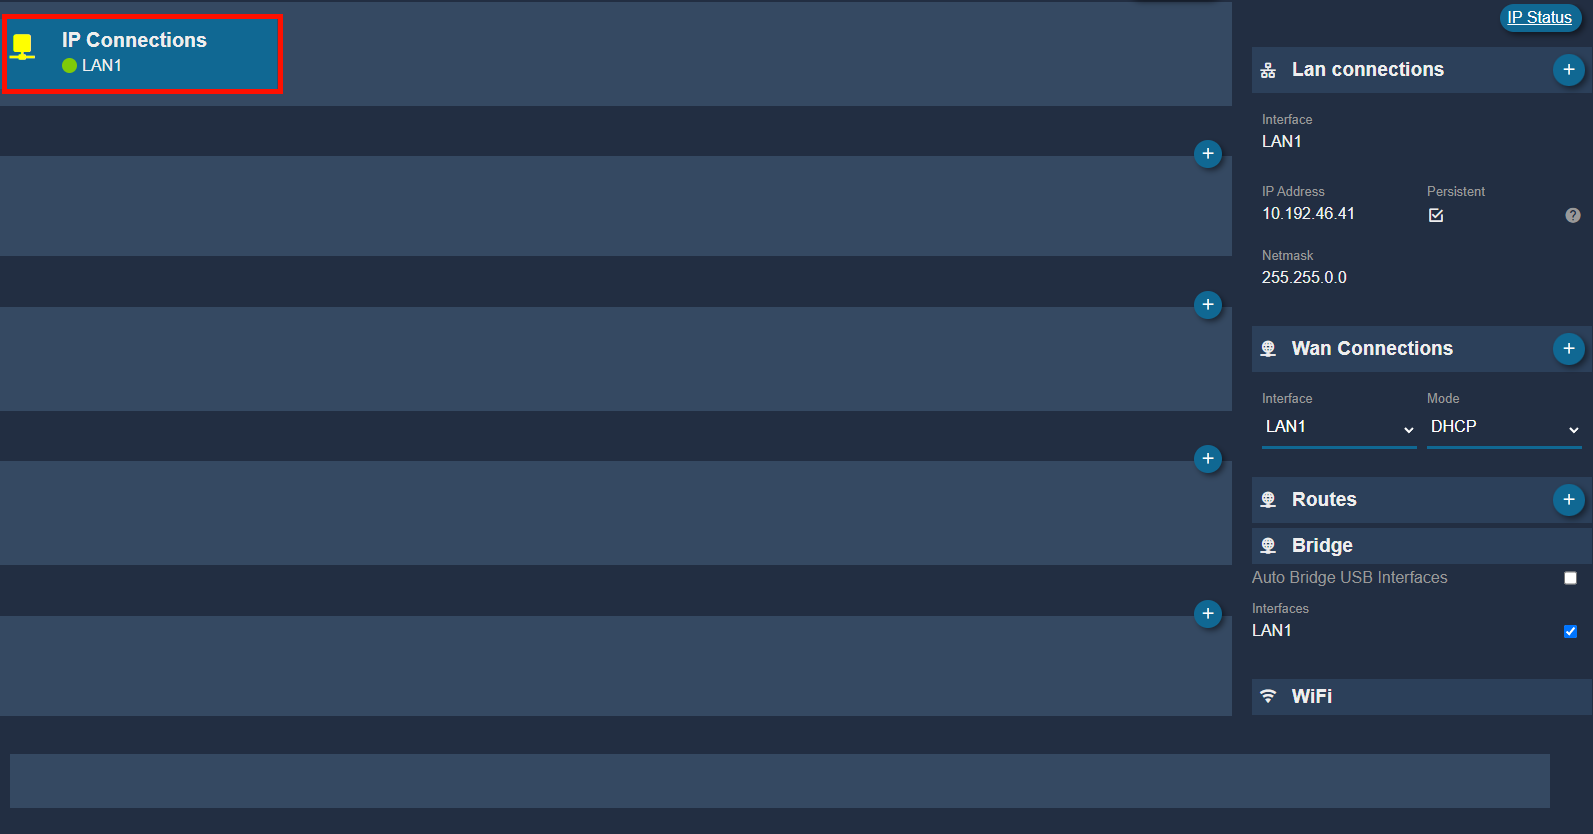
Click the + icon to add a new IP address
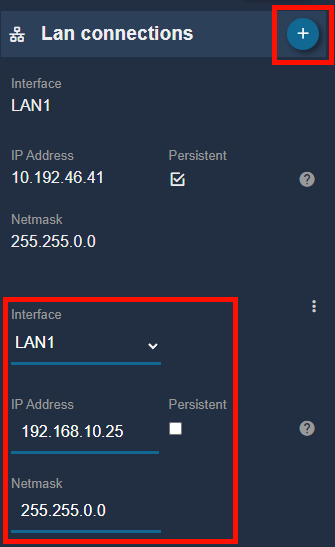
When you tick Persistent, the IP is treated as a technical address and will be kept even if you restore defaults on the panel. Non-persistent IPs are usually temporary addresses you add to reach cameras that are already configured in a different IP range, without changing all camera IPs.
You can add multiple networks on the LAN, meaning several IP addresses on the same port/interface (see IP Primer – Default IP configuration of Cyanview devices if this concept is new to you).
You can now access the configuration GUI using either the default IP address or the newly added IP address, as long as your computer also has an IP address in the same range as the one you use to connect.
Where do I configure the camera?
The first question - How are you connecting to your camera?
- Is it over IP? -> You will connect to the RCP
- Is it using serial? -> You will connect to the RIO or CI0
- Are you wireless? -> Depending on your camera model, you You might connect direct IP or with the RIO via IP or serial
Configuring on the RCP and RIO
When configuring on the RCP, you will likely be dealing with IP addresses but if you are configuring on the RIO you will likely be configuring the ports
The process is the same
For specific camera setups - Look at the integration section
- Click the
+icon
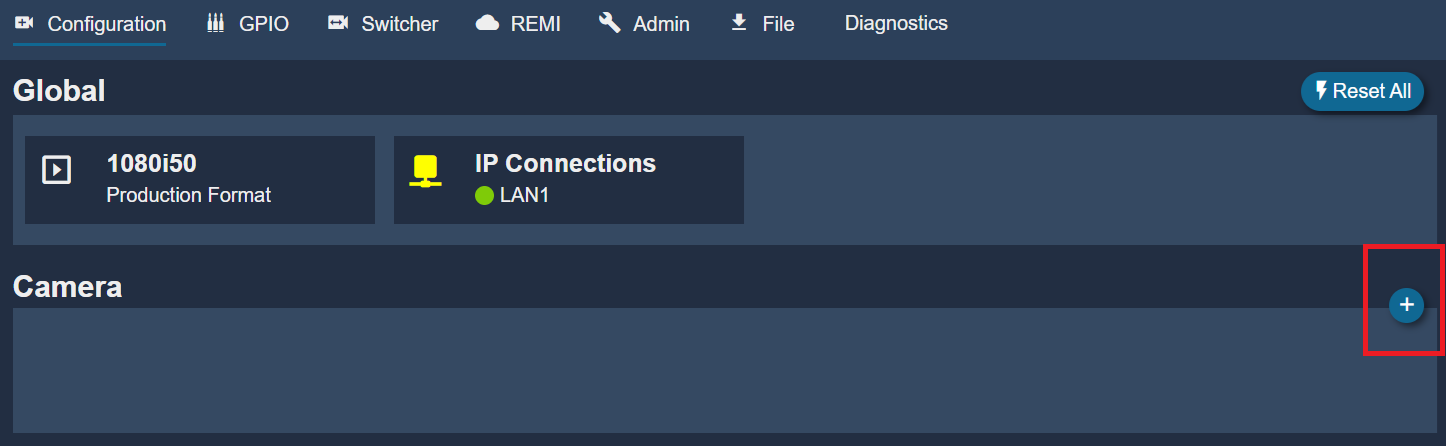
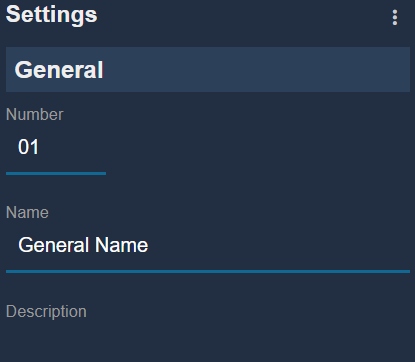
- In
Generaladd a cameranumberandname. This is anything related to your workflow.
- The rest of the setup can be found in the relevant integration section
Configuring with a CI0
The CI0 provides the same serial ports as the RIO, but is a simpler device dedicated solely to serial communication.
The CI0 acts as a bridge, converting Ethernet data from the RCP into serial data for connected cameras.
CI0 Vs RIO - The RIO has additional features and a user interface, the CI0 is dedicated solely to serial communication. The RIO can be thought of as running similar software to the RCP, but with a built-in CI0 for serial connectivity.
The CI0 being a simpler device, it doesn't have a UI, so you configure the CI0 connection on the RCP.
Repeat the previous sections steps to add a camera. However, when the camera is selected, select the Port on the CI0.
How do I connect a RIO to a RCP?
If you are using a RIO and have created the camera, then it is time for you to connect the RIO to the RCP
- On the RIO UI, go to the
REMImenu

- On the right hand side add a
Tag

This is case sensitive. Treat the REMI tag like a password: anyone who knows the tag can access and control the configuration. Avoid simple or common tags.
-
Go to the RCP UI - Repeat the REMI tag steps
-
Once added, you will see the RIO in the menu
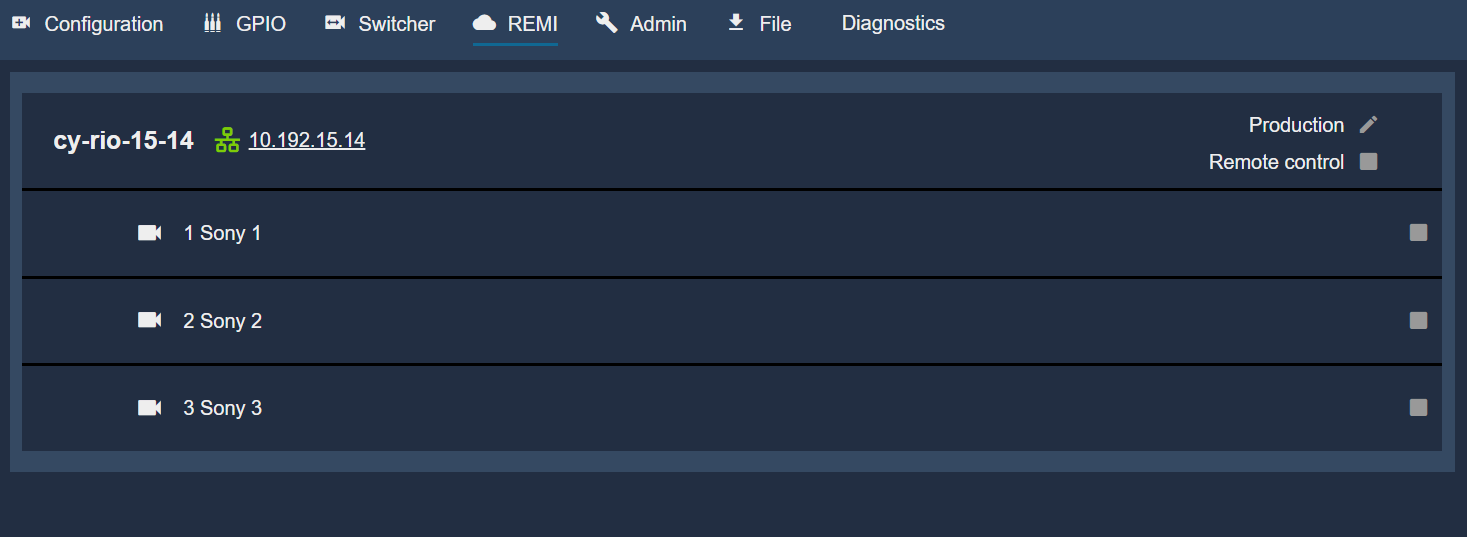
- To import the camera which is connected to the RIO, click the 'Remote Control' tickbox. Either select each camera or select 'Remote Control' for all cameras

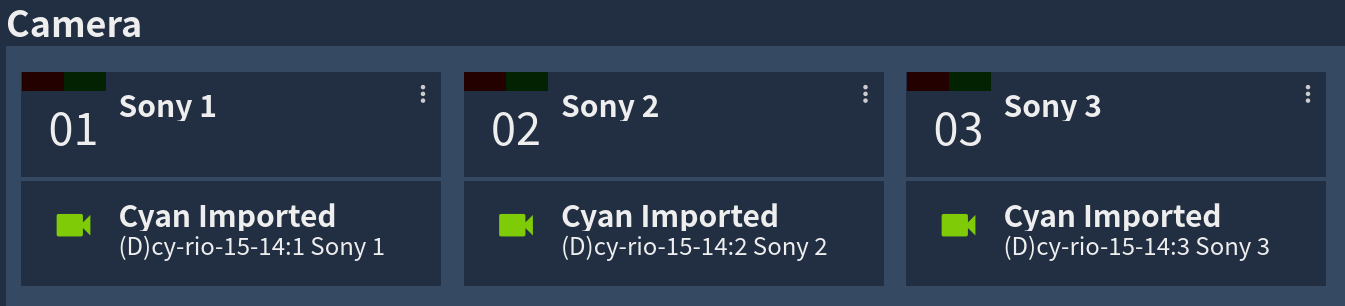
- Go to the configuration menu on the RCP and the camera should be there as 'Imported'
Configuring a serial camera
This example uses a CI0 - Reference the RIO section if using that product
- Access the RCP UI, See previous sections
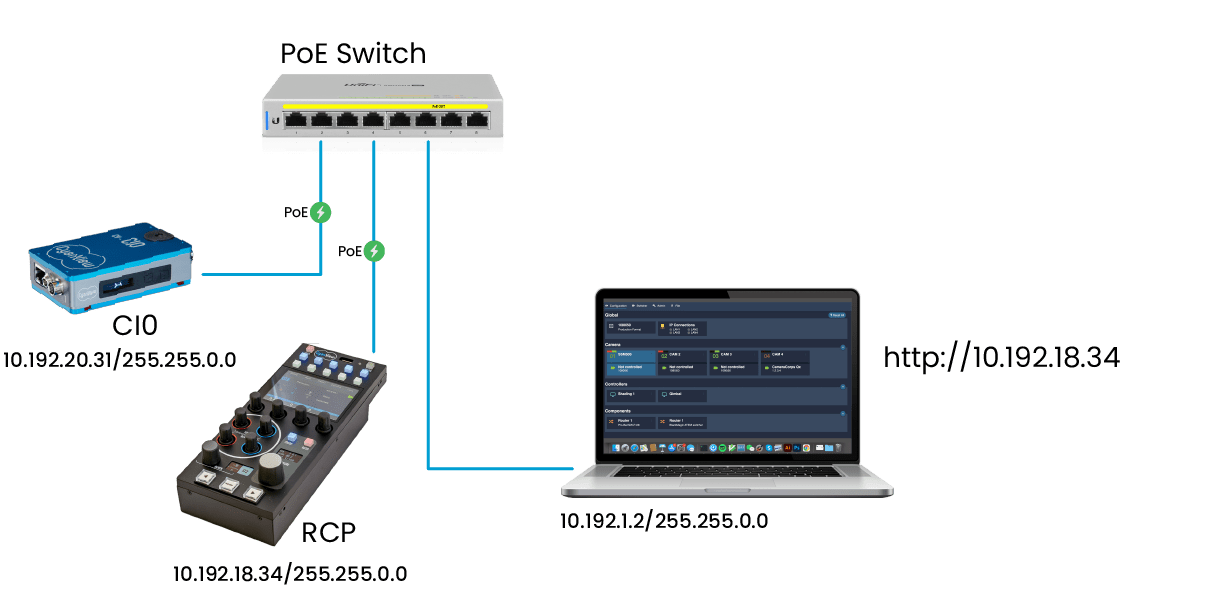
The following diagram shows a static configuration for an RCP with serial CY-RCP-18-34.
- Click the
+icon
- In
Generaladd a cameranumberandname. This is anything related to your workflow.
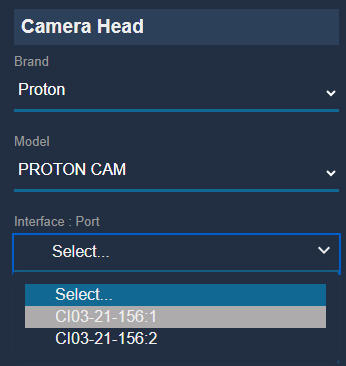
- Add the Camera's Manufacturer and Model.

- Select the relevant CI0 Interface Port
Checking if the camera is properly connected.
-
The camera icon in the web interface will turn green when the camera has been detected and configured.
-
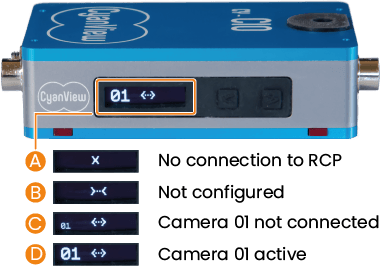
The CI0 will also display the camera number in bold [D], which indicates that the camera is communicating. If the number is small [C], the CI0 has been configured by the RCP but no communication can be established with the camera. Check the cable, connection and the troubleshooting section of your camera in the Integrations section.
- The camera icon on the RCP turns green, indicating that the camera is properly controlled. The icon stays red if communication with the camera can't be established.
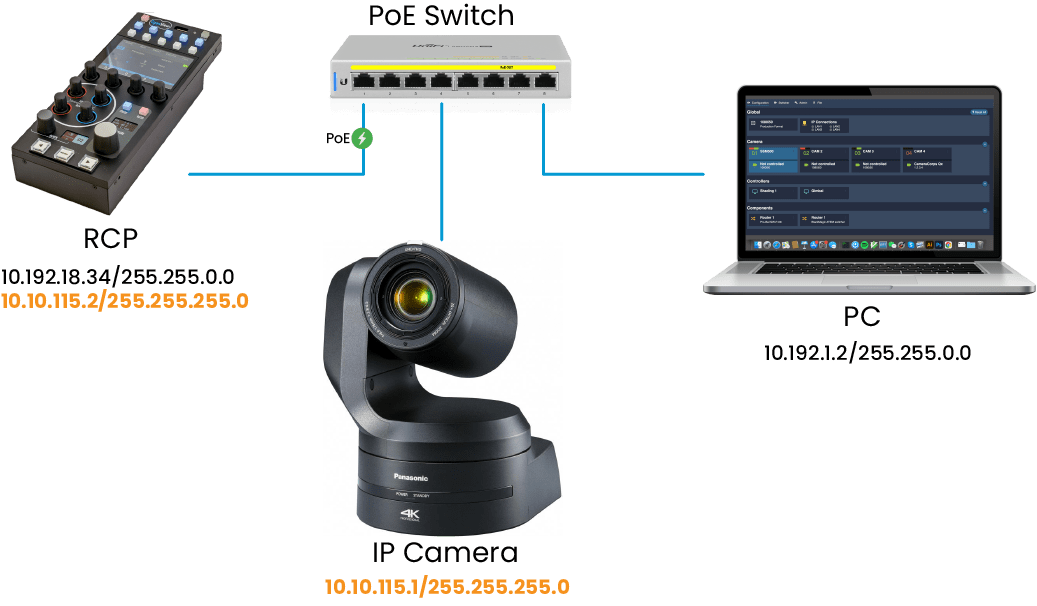
Configuring an IP Camera
In this example, we use the following IP addresses:
- Camera IP 10.10.115.1 mask 255.255.255.0
- RCP IP 10.10.115.2 mask 255.255.255.0
-
Access the RCP UI, see previous sections
-
Click the
+icon
- In
Generaladd a cameranumberandname. This is anything related to your workflow.
- Add the Camera's Manufacturer and Model. As it is an IP camera, the IP address will appear. Put the IP address of the camera into that menu. In this example it is 10.10.115.1
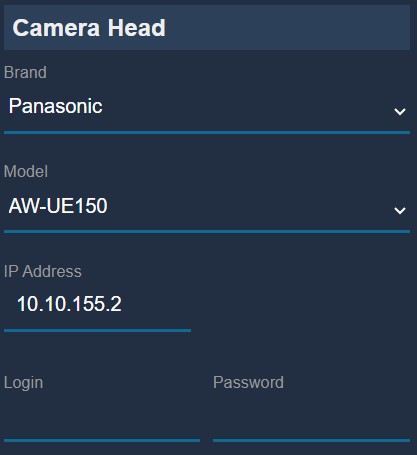
Some IP cameras also need a username and password. So make sure you know what that is!
Checking if the camera is properly connected.
-
The camera icon in the web interface will turn green when the camera has been detected and configured.
-
The camera icon on the RCP turns green, indicating that the camera is properly controlled. The icon stays red if communication with the camera can't be established.
What's next?
- Updating your products: We recommend updating all your Cyanview devices to the latest firmware version.
When updating the software, the configuration is wiped. You can store and reload a config from the admin page. Do this before updating the software to save your configuration
Refer to this guide for instructions on how to update your devices.
- Configuring your cameras: Refer to the Integrations section in the left sidebar for specific camera setups organized by brands and models.
- Tally Configuration: Refer to the Tally Configuration section.
- Controlling Color Correctors: Refer to the Controlling Color Correctors section.
- Integrate with a Switcher or Router: To synchronize the RCP camera selection or touchdown with a router or switcher, refer to the Routers section.