Camera wiring
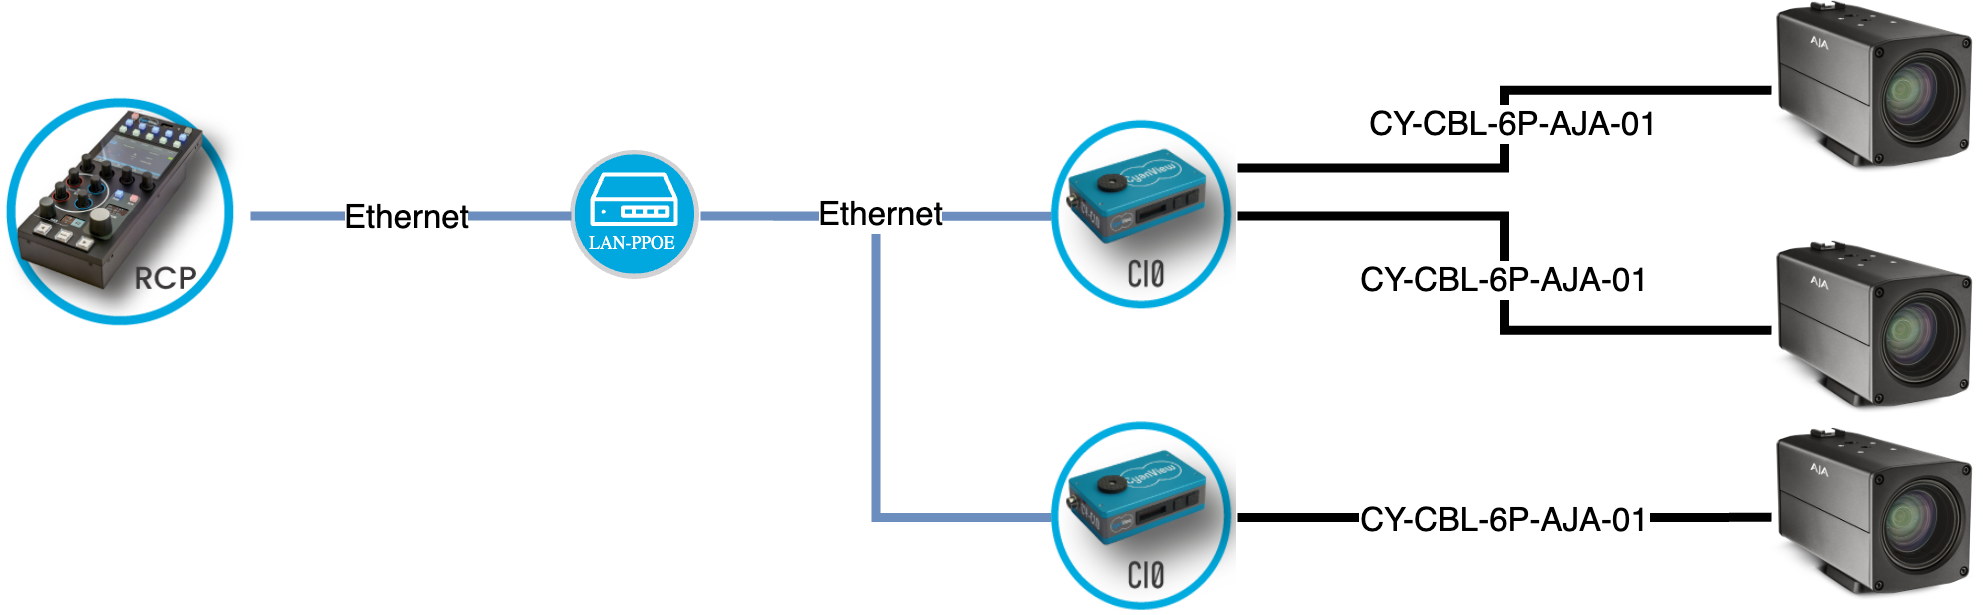
Cable needed: CY-CBL-6P-AJA-01
note
- Compatible with CI0/RIO
- The camera is powered by the CI0/RIO (data + control, single cable)
- If you need to control it wirelessly, you need to use the RIO
- You can plug a camera per CI0/RIO port
- You can chain them on a single CI0/RIO port, on a bus, as every camera has a unique ID
Camera control
| Control | AJA RovoCam |
|---|---|
| White balance (R/B and color temp) | ✔ |
| Black balance (R/B, master pedestal) | ✔ |
| Other control (Master gamma, saturation, detail) | ✔ |
| Exposure (Iris, Gain, Shutter) | ✔ |
| Camera Menu Control | ✔ |
| Lens (zoom, focus) | ✔ |
| Scene file : save/recall | ✔ |
Setup
Before starting, ensure to setup/know your camera ID using the AJA RovoCam app
VISCA BUS
Access the RCP Configuration UI.
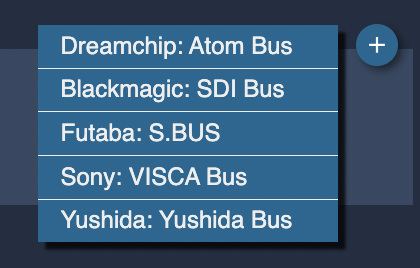
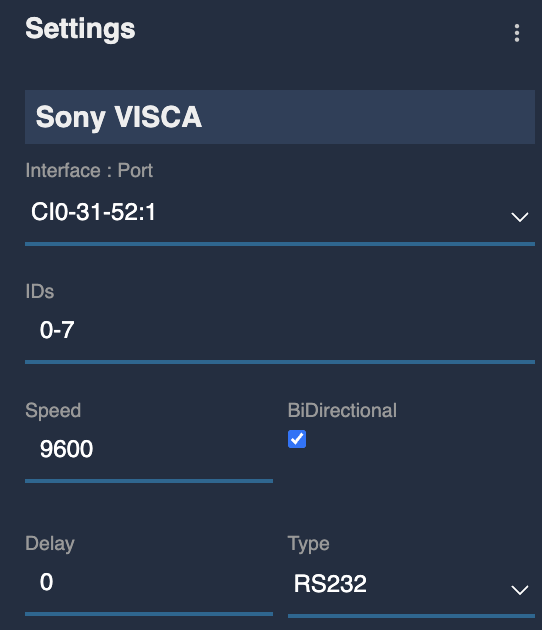
Create a new Sony VISCA BUS:
- In
Featureblock, click on+ - Select
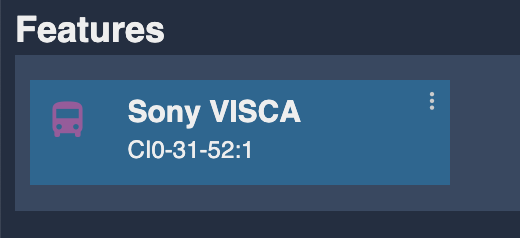
Sony: VISCA Bus - Setup the bus ID range (0-7 by default)
- Setup the bus type
RS232 - Setup the baudrate to
9600 - Setup your serial port (here:
CI0-31-52:1), in my case CI0CI0-31-52on port 1
The Feature + button and list:
The block:
The setup should look like this:
Camera
Access the RCP Configuration UI.
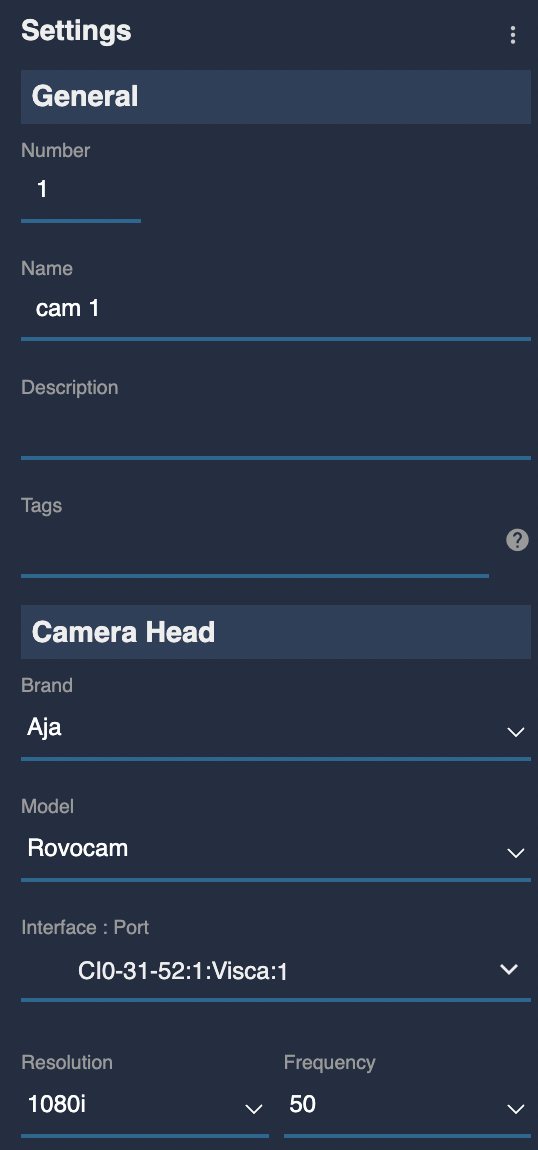
Create a new camera:
- In the Camera sectionlick on
+ - Enter a custom number, name, etc.
- Select AJA brand
- Select Rovocam for the model
- Select the camera bus and ID
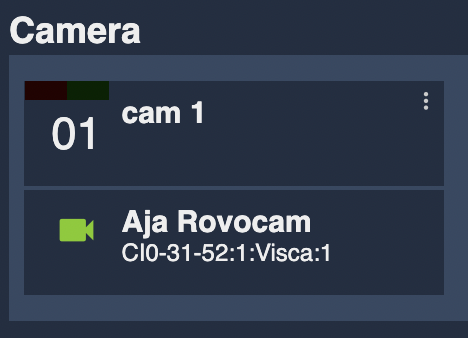
This should look like this:
And once correctly connected, it should be green: