RCP Scene Files
This guide will describe how to use the scene files on the RCP.
On your RCP main view, 2 ways to access the scene files:
- pressing the
SCENEbutton - pressing
MENUbutton, then navigating toSCENE
You have two submenus:
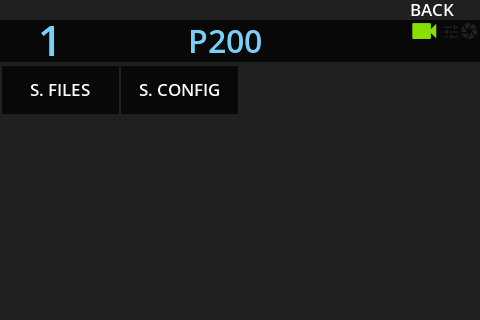
S. FILES: to use the scene files (load, save, etc.)S. CONFIG: to configure the behavior (folders, filters)
Once you're in a submenu (S. FILES or S. CONFIG), you can:
- go back to the previous view by pressing the
BACKbutton - press arrows
<or>to navigate between the submenus pages - press
MENUbutton to go back to the main view
Once you're on a submenu page, pressing MENU will go back to the main view.
Pressing SCENE shortcut will go back to the previous submenu page you selected.
If you were on S. FILES > Files, pressing SCENE will go back to this page.
SCENE last used page is always saved on a "page" level. But MENU position is saved separately. So if you're in S. FILES > Files, you click on MENU, you're back on the main view, if you press MENU again and your last menu navigation was in another section (PAINT for example), it will bring you there. MENU button will bring you back to SCENE only if you navigated there using MENU button. While SCENE shortcut always brings you to your last page in SCENE.
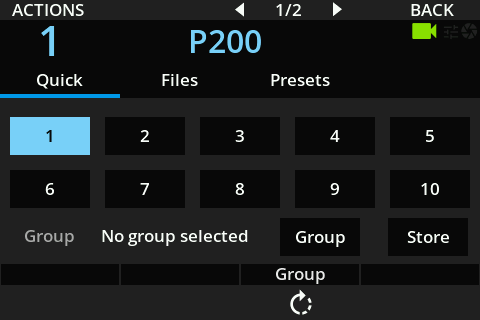
Quick scene files
This page provides a quick way to save/load scene files based on scene slots.
If you have an RCP-J, you have 5 scene file buttons, mapped to loading scene files 1-5.
Pay attention that:
- it only load the scene file slot (quick press)
- no save
- as you can lock your joystick module to a specific camera, the scene load buttons are linked to the same camera. So your quick load on RCP and quick load on joystick, even if working exactly the same way, could load different scene files on different cameras.
Save/Load
This is the main view and allow to quickly:
- load a scene file
- save scene file
- load/save but on a whole camera group
 |  |
To save:
- Click on
Store, it's a modifier button, once engaged, you're saving (not loading) - Select the slot you want to save to
- The last slot used is highlighted
- You can overwrite a slot by clicking on it, even if highlighted
- Once a slot is clicked, the
Storemodifier is disengaged, and you're back in loading mode
To load : simply click on a slot
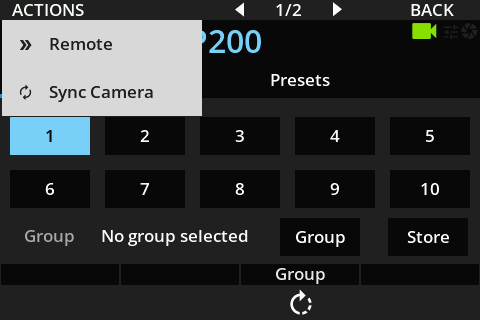
Actions
Remote: this is a modifier, will save/load on the remote device (if you use REMI from RIO, it will save/load on RIO).Sync Camera: force a refresh of the values from the camera, useful for RF/wireless.

Groups
For more information on group setup.
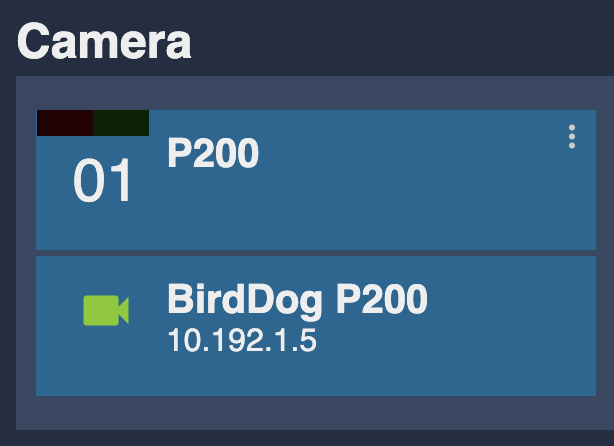
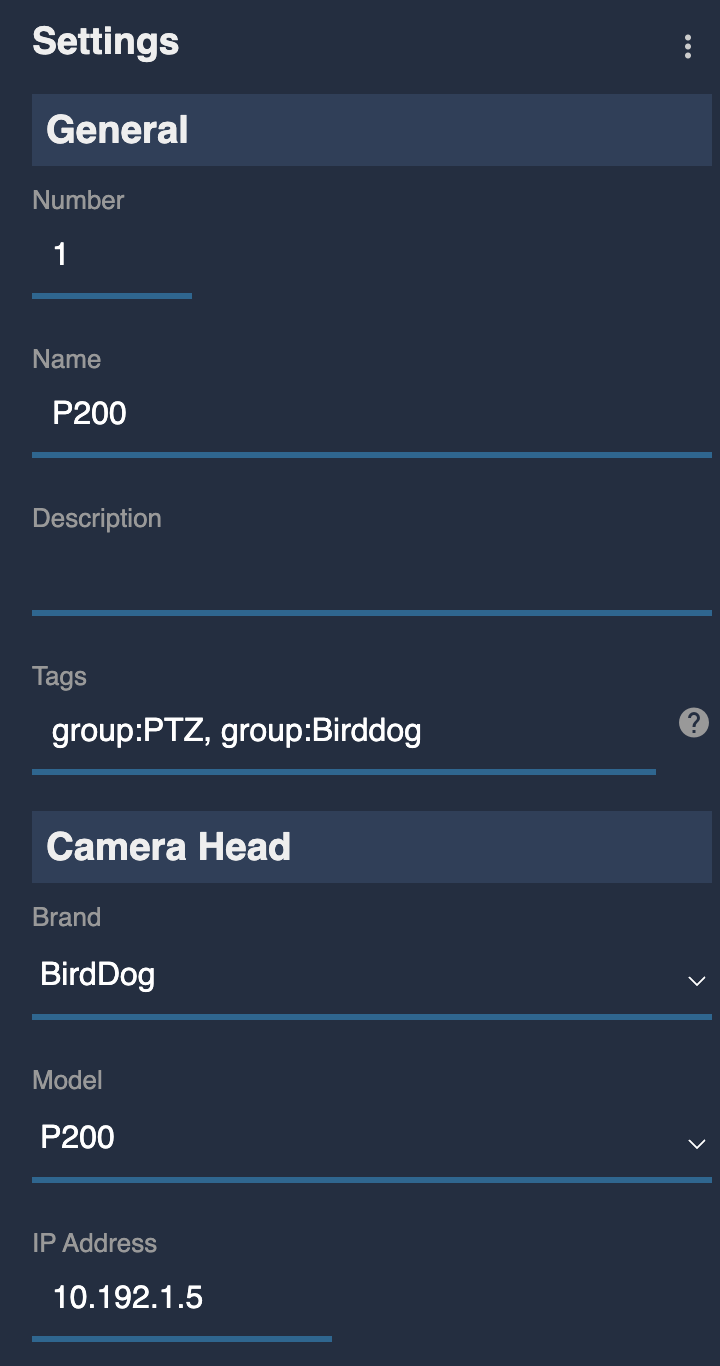
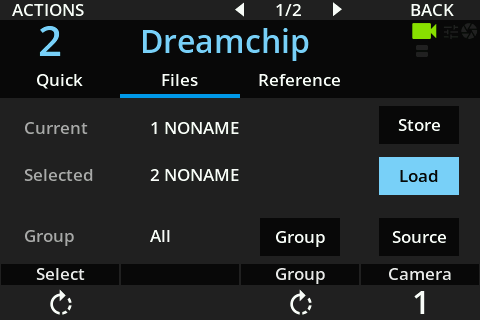
In this setup, I have my BirdDog P200 camera that is in multiple groups: All, PTZ, Birddog.
The group All exists by default, and all cams in the RCP config are in this group.
 |  |
Once the group button is engaged, all actions are performed on the selected group and not on the selected camera.
You see a yellow border on your RCP display to signal you're in group mode.
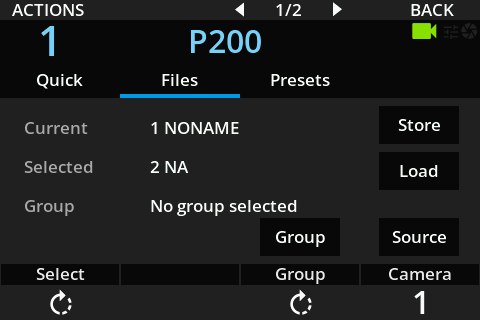
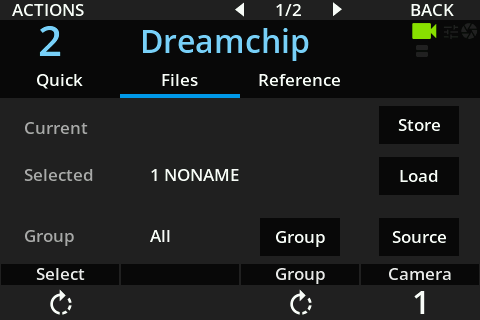
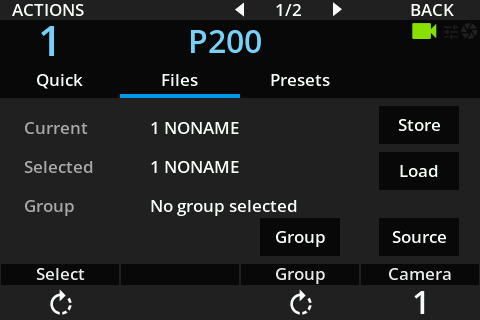
Files
This page allows to Store & Load scene file with more options:
- See scene file names
- Rename scene filenames
- Change source/destination camera
- Go to
Menu->S Files->Files
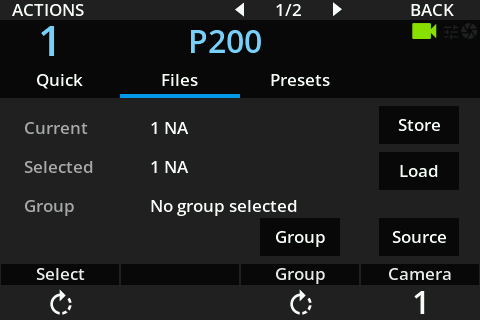
- In this menu, The buttons are:
Current= The scene file which is loaded for this cameraSelected= The scene file slot which you canStoreorLoadfromStore= Save or 'Store' the camera configuration into a scene fileLoad= Load a certain scene file onto cameraSource= This details which camera you want to load from - This is used when transferring a scene file from one camera to another
The labelling format is the Slot number and the description. For example 1 N/A = Slot 1 - No scene file stored
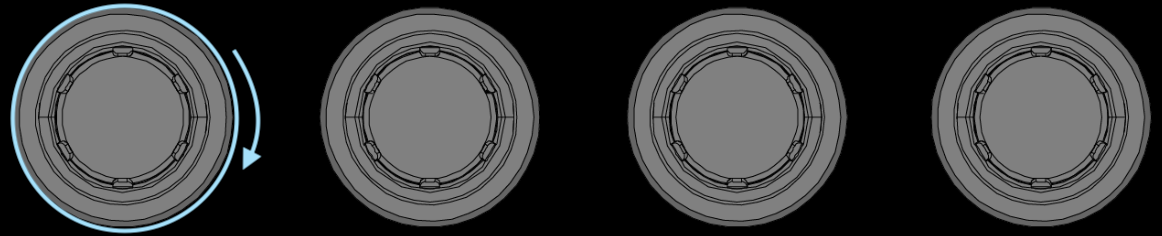
- The encoder's are:
Select- This changes theSelectedscene file (Highlighted inRED)Group- Changes the camera group selected (Highlighted inGreen)Camera- Changes the source camera number (Highlighted inBlue)

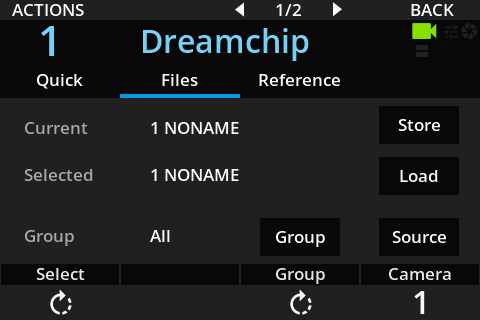
Store/Save
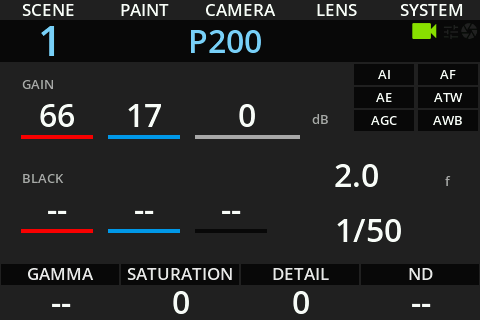
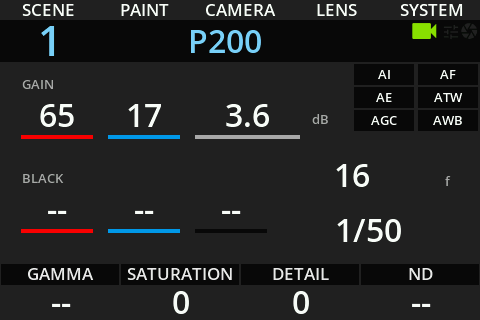
The camera is currently set to:

To store these settings in slot 1:
- Use the first encoder to change
Selectedto 1 - Here it is labelled
NAas there is no scene file saved - Click on
Storeto save/store all painting parameters to the slot 1
You can change another setting and then save it to another slot. Gain changed:
Repeat the store settings to slot 2:
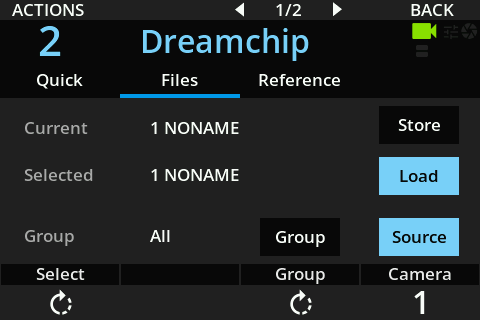
Load scene file
If you have several scene files for a camera, you may need to load between them
- Use the first encoder to change the
Selected- Go to the slot you want to change to. You can seeSelectedis on Slot 2 below - Click
Load
Currentis now on slot 2
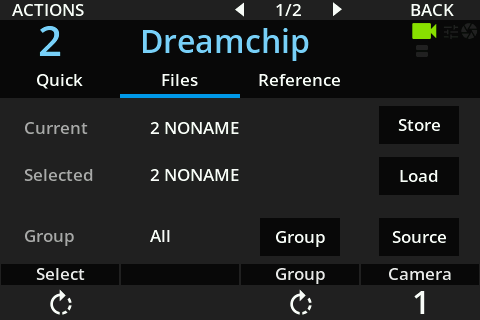
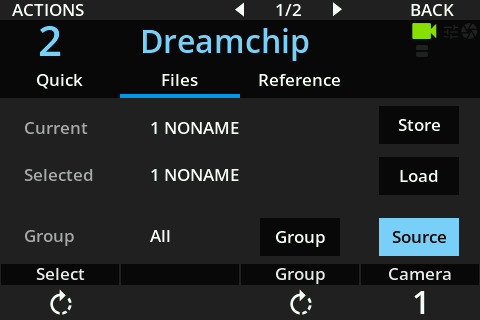
Copying scene files
If you want to 'copy' scene file to another camera, you would use the source button and Camera encoder
- Select which camera has the scene file - In this case it is
Camera 1
There are two camera numbers to note.
- Which camera the RCP is connected to - top left
- The camera which is the scene file
source- Bottom right
- Navigate to the camera using either left and right arrows or switcher you want to 'copy' the scene files to - In this case it is
Camera 2
You can see the camera has moved to Camera 2 but the source camera is still 1
- Click
Source- This should remain highlighted

- Click
load
- You will now have the scene file from
Camera 1Slot 1 onCamera 2Slot 1
Actions
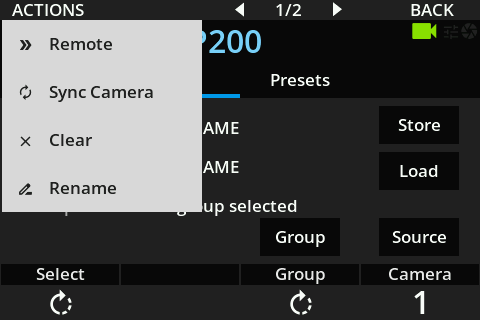
Remote: this is a modifier, will save/load on the remote device (if you use REMI from RIO, it will save/load on RIO).Sync Camera: force a refresh of the values from the camera, useful for RF/wireless.Clear: delete the selected slot fileRename: rename the selected slot file
I can rename my slot 1 as my default scene:
Go back to scene 1 slot:
Click on ACTIONS, then Rename, validate with ✔:
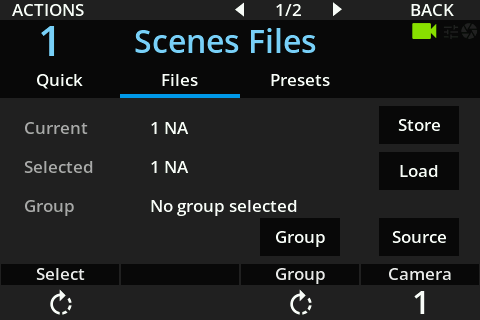
Files
Scene files are saved on RCP. They are actual files you can see using your computer file browser.
On my Mac, I can open Finder, then in Network and see all my Cyanview devices:
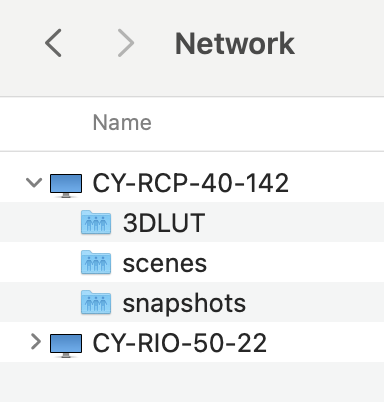
Each device has 3 directories exposed:
3DLUT: to store 3D LUTs (some cameras and LUT boxes)scenes: to store scene filessnapshots: to store the configuration snapshots
Here I clicked on my RCP CY-RCP-40-142 scenes directory:
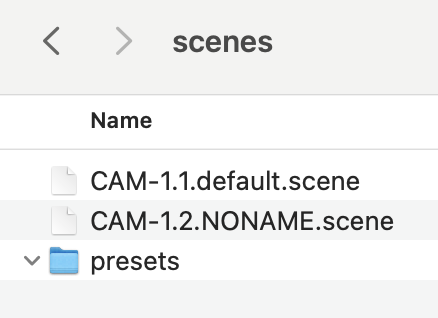
I see my files with this naming: CAM-{CAM_NUMBER}.{SCENE_SLOT}.{SCENE_NAME}.scene
You can open the *.scene files using a text editor and see something like this:
lens/iris=16.0
denoise=0 0.0
multimatrix/3=0.0 1.0
exp=20.0
multimatrix/4=0.0 1.0
lens/focus_speed=0.0
lens/focus=0.1428571428571429
multimatrix/cnt=6
wb_temp_b=5.6e3 5.6e3 0.0
lens/auto_focus=0
model=P200
multimatrix/1=0.0 1.0
multimatrix/0=0.0 1.0
multimatrix/2=0.0 1.0
color_gains=0.6484375 0.171875
multimatrix/5=0.0 1.0
lens/auto_iris=0
scene_filter=1F
auto/white=manual
multimatrix=0
detail=1 0.0
keyboard=menu    ←  ↑  ↓  → back
saturation=1.0
lens/iris_fstop=16
auto/exp/mode=0
wb_temp_a=3.2e3 3.2e3 0.0
master_gain=1 1.0 400.0
gamma=0.45 0.0 0.0
tally/green=0
number=1
You can:
- rename the files by changing
SCENE_NAMEsection in the filename - copy and paste the file and change
SCENE_SLOT - copy and paste the file and change
CAM_NUMBER - edit the text file and enter manually the desired value (like
lens/iris_fstop=4)
Group
It's exactly the same logic as in the quick scene files page. Every action you perform is here performed on the group instead of the camera.
Presets
In the above section:
- I saved a scene file in slot 1
- I renamed it to
default - I saw that I can browse the scene files using my computer
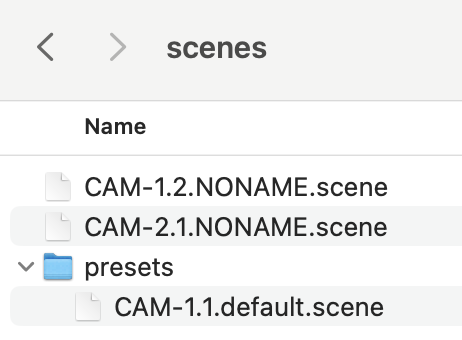
And you can copy/paste or drag'n'drop the default scene file in the directory presets
This allows to transform a scene file in a preset.
A preset is a read-only scene file that can't be deleted or renamed from the RCP (only from the computer).

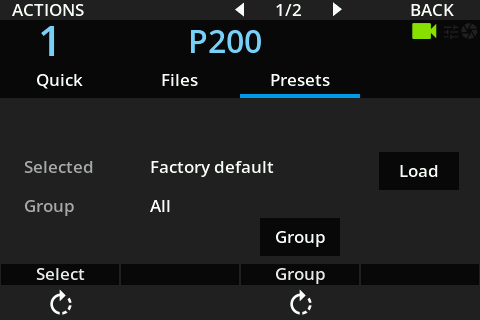
By default, only 1 preset is available: Factory default.
It will reset the camera to the default values (in Cyanview world).
You can add your own presets by copying scene files in this directory:
Here, I take the file CAM-1.1.default.scene

And move it to the presets directory:
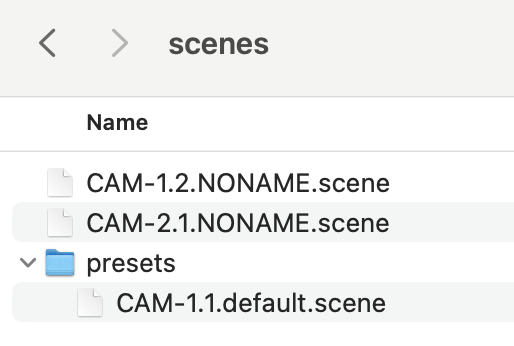
As it is, it's now available as a preset for my camera 1.
You can create presets for various cameras by changing the name: CAM-{CAM_NUMBER}.{SCENE_SLOT}.{SCENE_NAME}.scene
You can:
- rename the files by changing
SCENE_NAMEsection in the filename - copy and paste the file and change
SCENE_SLOT - copy and paste the file and change
CAM_NUMBER - edit the text file and enter manually the desired value (like
lens/iris_fstop=4)
To load a preset, it's exactly like for the scene files.
Here, loading my preset named default
Folders
Create
This allows to organize scene files in subdirectories

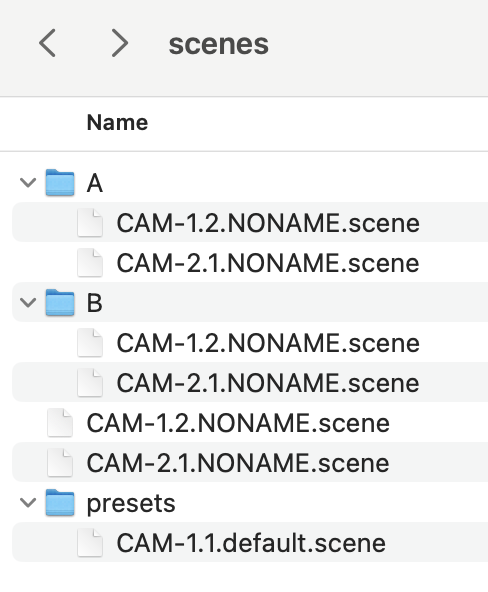
By default, all scene files are stored in the root directory.
I have 2 scene files:
- cam 1, slot 2
- cam 2, slot 1
And 1 preset:
- cam 1 slot 1, named
default
I can create scene files subfolders to organize my scene files for different events.
Here I:
- kept my original scene file (not associated with any event, so in the root directory).
- created a folder named
Awith 2 scene files - created a folder named
Bwith 2 scene files
Load a folder
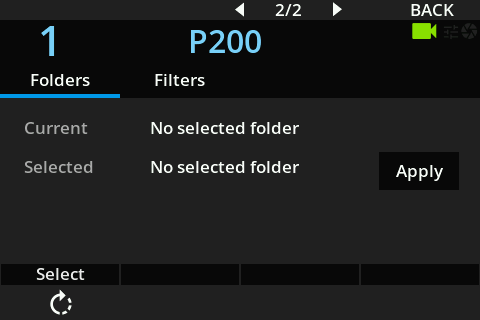
On the RCP, you can now:
- change the base folder using 4th encoder
- select
B - click on
Applyto validate
And if I go in the file browser, I can see:
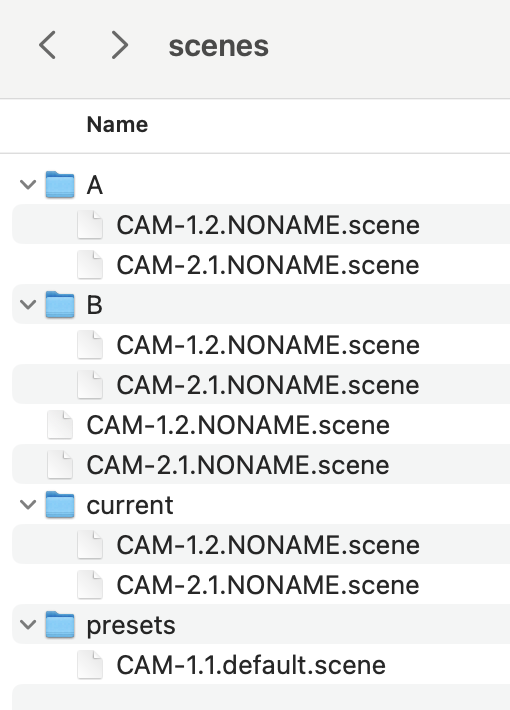
current is a symbolic link to the actual folder selected on RCP (here, B). So changing files in B or in current are changing the same files under the hood.
Now, every load/scene actions will be performed in this subdirectory.
To go back to root folder, select the option No selected folder
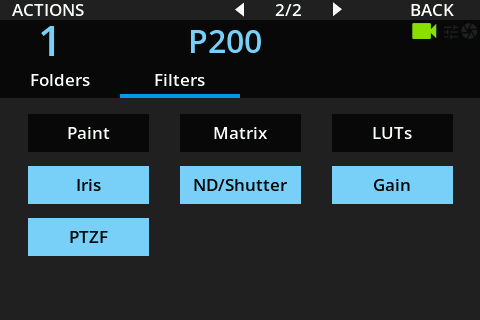
Filters
This allows to filter the loaded parameters in a scene file.
This is the default values:
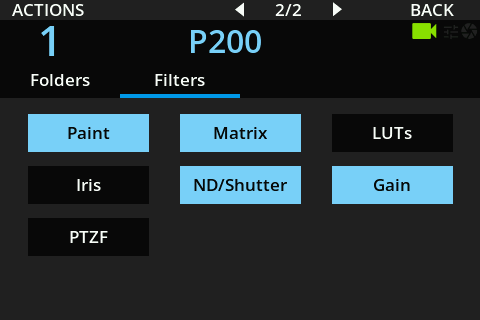
You can select:
- Paint : all paint parameters (white balance, black balance, etc.)
- Matrix : all matrix parameters (matrix, multi matrix, etc.)
- LUTs
- Iris
- ND/Shutter
- Gain
- PTZF : pan, tilt, zoom, focus
When you save, we always save everything. This selection only impacts the load actions.
And you can reset the default selection by clicking on ACTIONS > Reset Selection.
Here I had: Iris, ND/Shutter, Gain, PTZF selected
After the reset, I'm back to default: Paint, Matrix, ND/Shutter, Gain: