Blackmagic Zoom and Focus demand

Control
The goal of this integration is to provide zoom and focus input to your RIO/NIO/RCP.
We also map the buttons to allow you to control the video feedback signal (allows the cameraman to switch on a single monitor between its own camera, live feed, other camera with wide angle, etc.)
It allows you to control any lens that Cyanview is able to control:
- lens driven directly by the camera (through the protocol)
- external lens (B4, PL, etc.)
- motors (tilta, etc.)
And thanks to our IP architecture, the handles can be placed:
- on the camera with a RIO (cameraman, polecam operator, etc.)
- in a remote location with a NIO (cable cam, etc.)
This gives you more flexibility (various lens, even the ones that can't support handles like prime lens or E-mount, various workflow and setup thanks to IP) while keeping the same control that you are used to with typical handles plugged directly on the lens (fujinon/canon handles).
Wiring
Here is an example of a setup with a FX9 and a cine lens that we motorise with tilta motors:
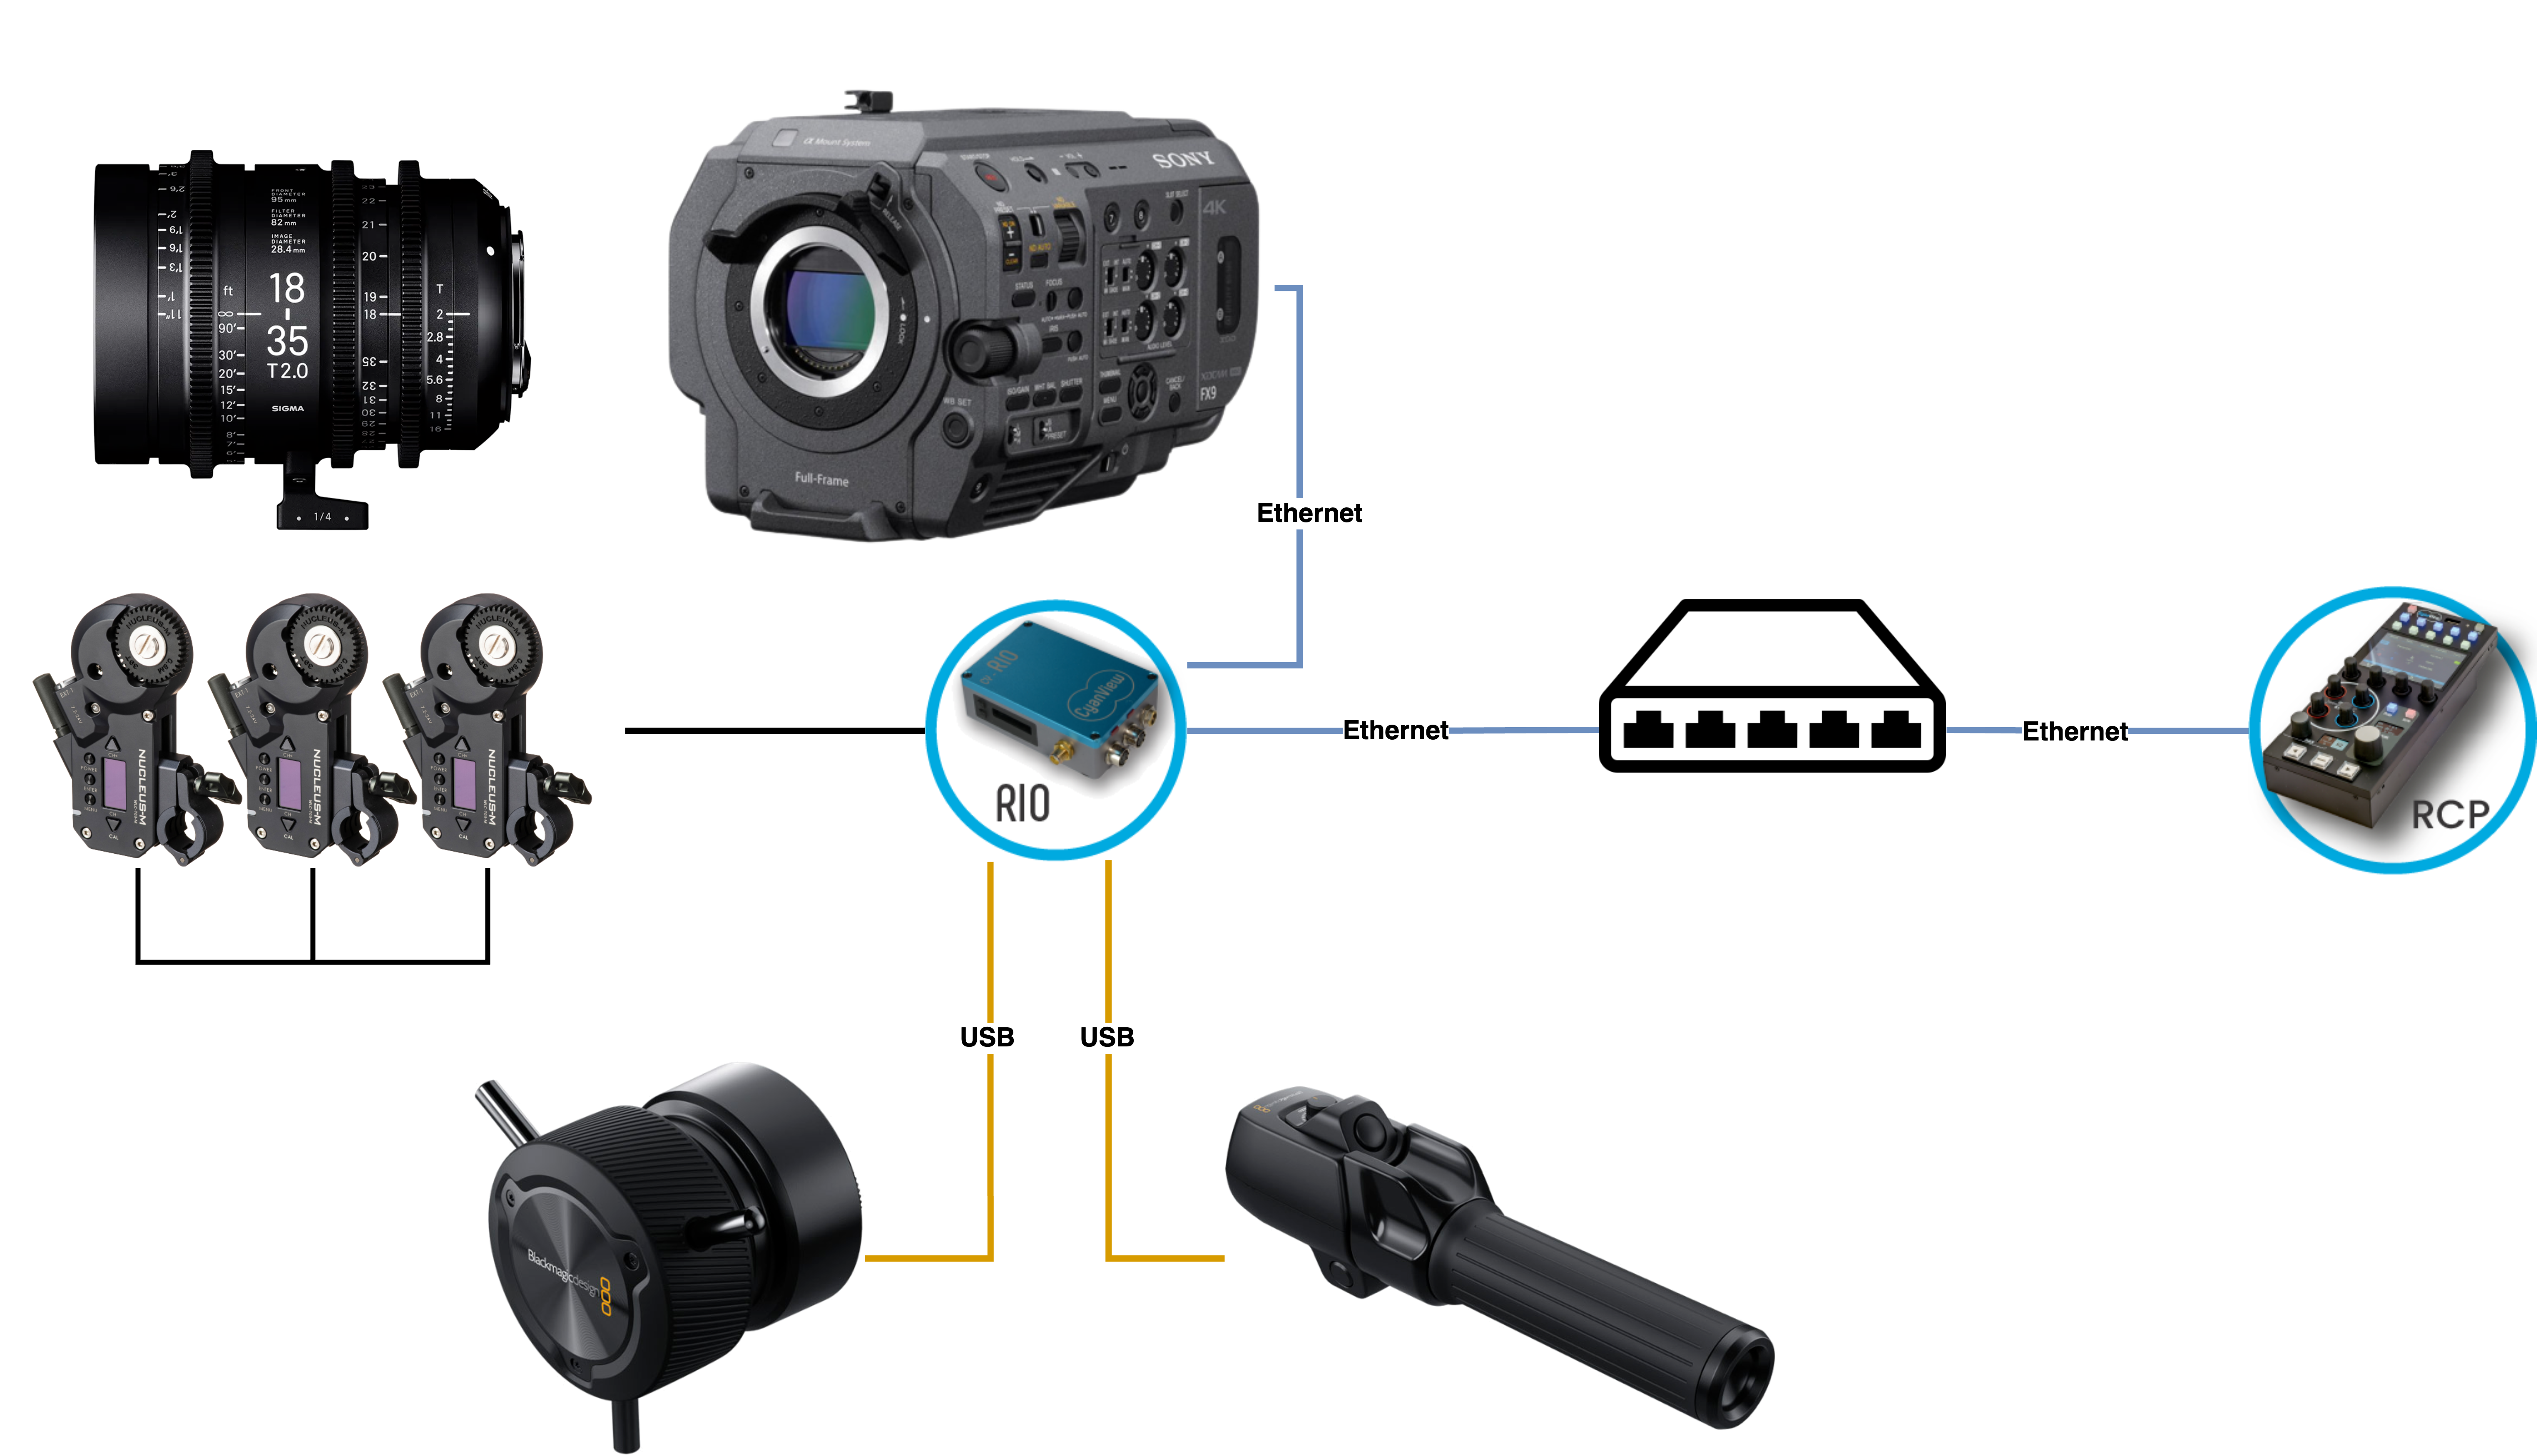
lens: RIO will drive the 3 Tilta motors (zoom, focus, iris) over serial.camera: RIO will drive the FX9 over Ethernet (using a USB dongle bridging both and acting as an ethernet switch)handles: Blackmagic handles are plugged on RIO over USB.
Works also with motorised lens:
- through the camera (E-mount on FX9, B4 on a broadcast camera, etc.)
- through the lens (Canon Cine Servo, Fujinon Cabrio, B4 broadcast, etc.)
Setup
You can wire the zoom and focus together:
- USB-C to USB-C cable from Focus
camport to Zoomloopport - USB-C to USB-A cable from Zoom
camport to RIO/NIO/RCP
Or separately using 2 USB-C to USB-A cables (one for each).
Configure your camera, lens, etc. as usual.
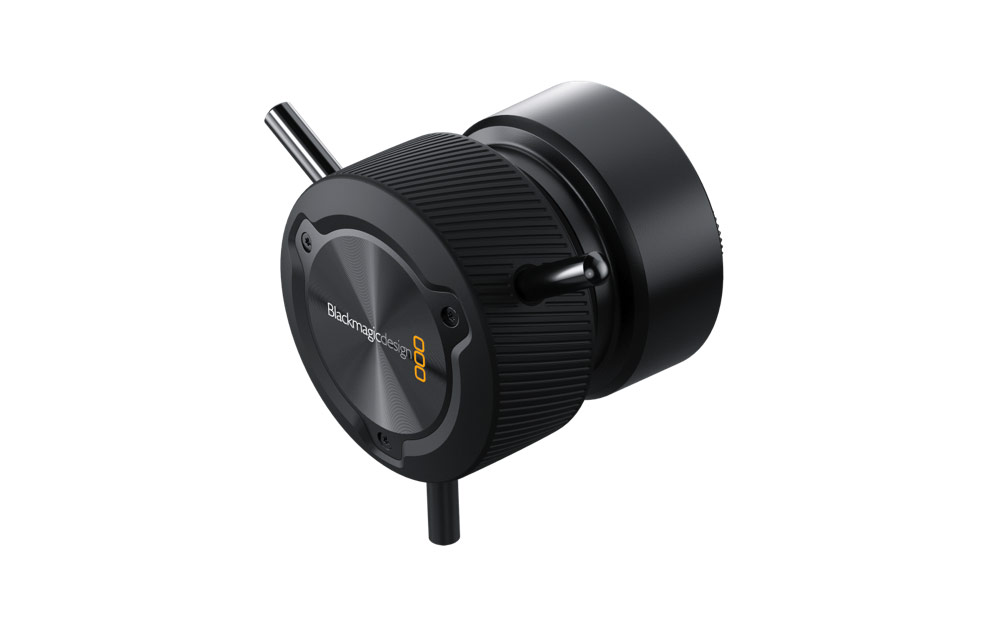
Then in your camera configure (in the right panel), in the User controllers section, you will find the Blackmagic handles controllers (BMFocus and BMZoom):
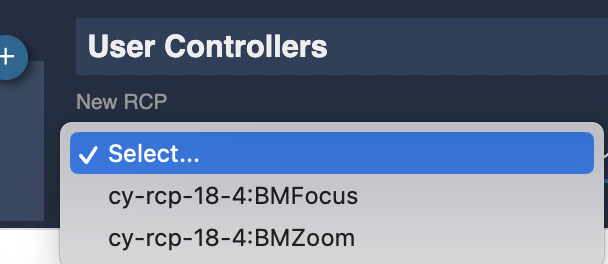
Ensure you selected both (they should be listed in the User controllers section).
If paired properly, the LED of the handles should be steady white.
Video return configuration
You first need to setup your:
- handles
- switcher/router
Then you can follow this guide to link the handles buttons to the switcher/router desired inputs/output.
Buttons mapping
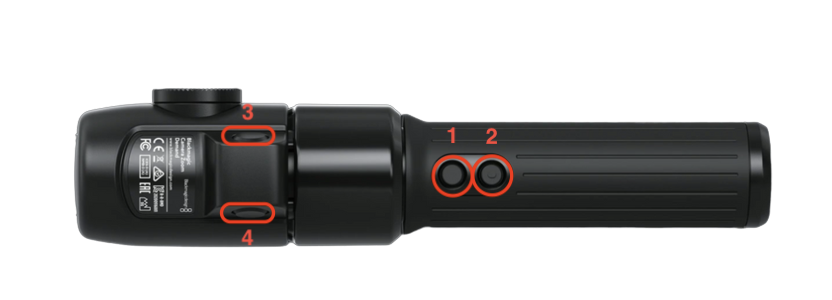
- VTR
- RET1
-
- Long press : Switch zoom speed encoder to iris control
- 3 x short press : Switch zoom rocker to focus speed
-
- Long press : Switch zoom speed encoder to focus control
- 3 x short press : Switch zoom rocker to iris
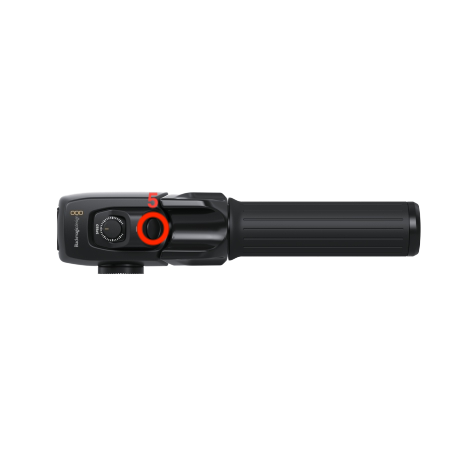
- Long press : calibrate zoom rocker (zero position)
To ensure that the long-press action has been validated, keep the button pressed for at least 5 seconds.
If the Zoom is drifting, the calibration must be done by long-pressing the button number 5.
From the field
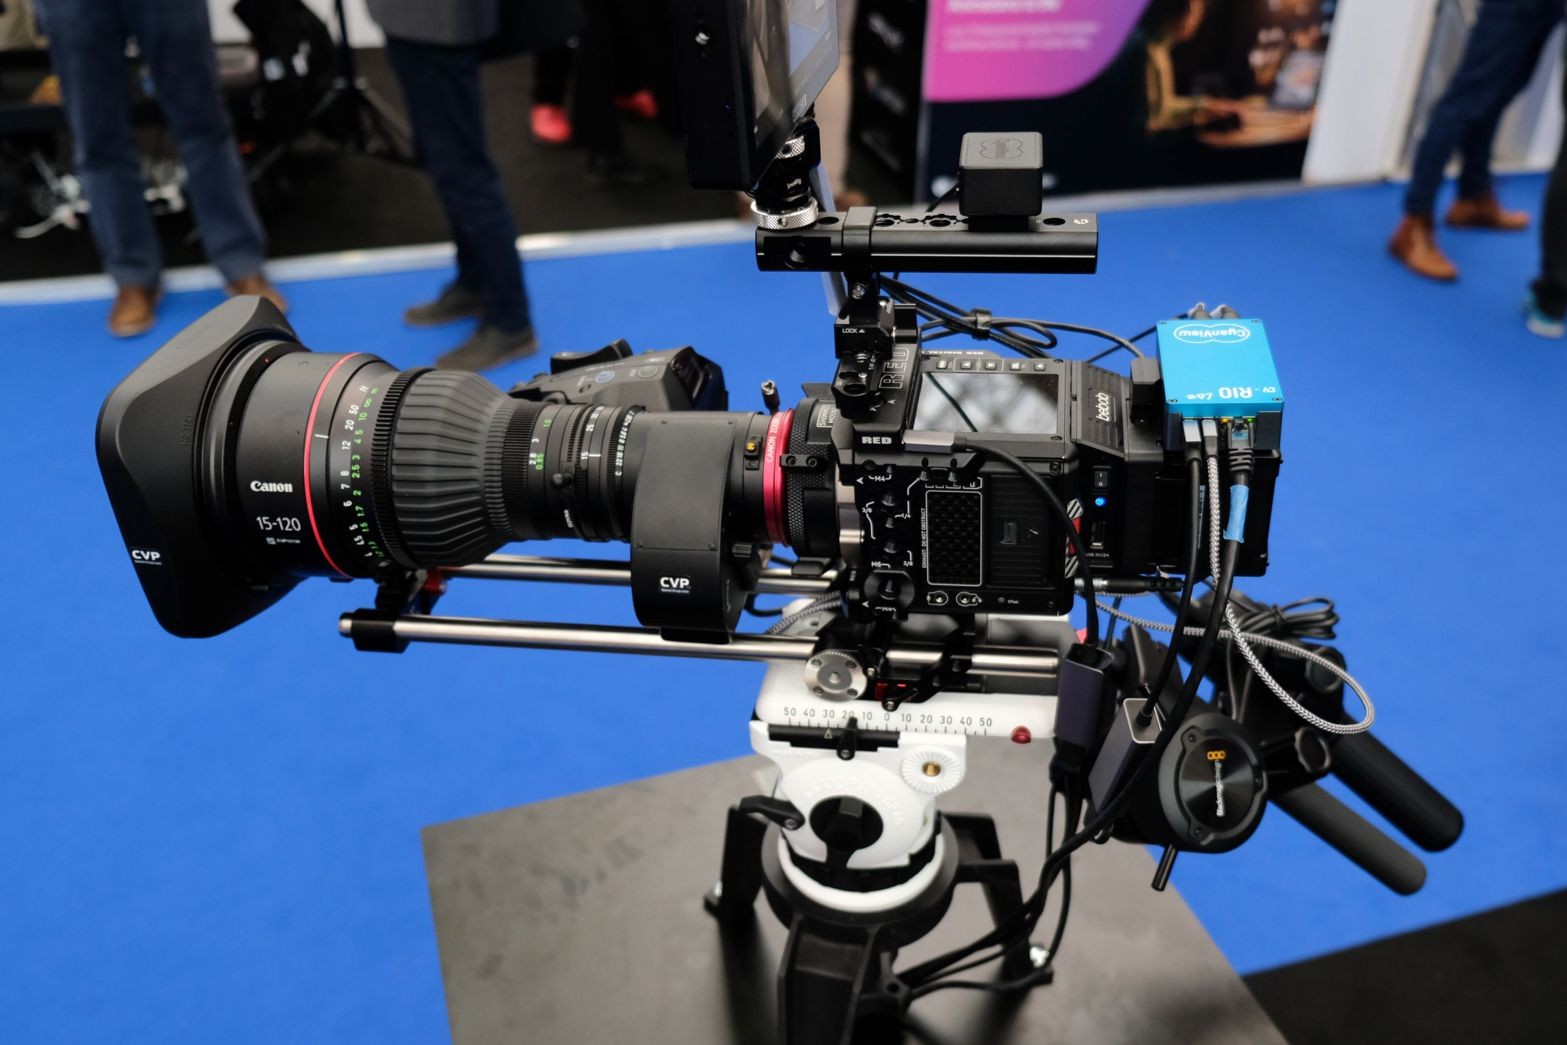
BM handles on a Canon Cine Servo and RED Komodo
- RCP
- RIO1
- 1 x CY-CBL-6P-B4-012
- BM zoom and focus handles