Quick Start Guide
Wiring
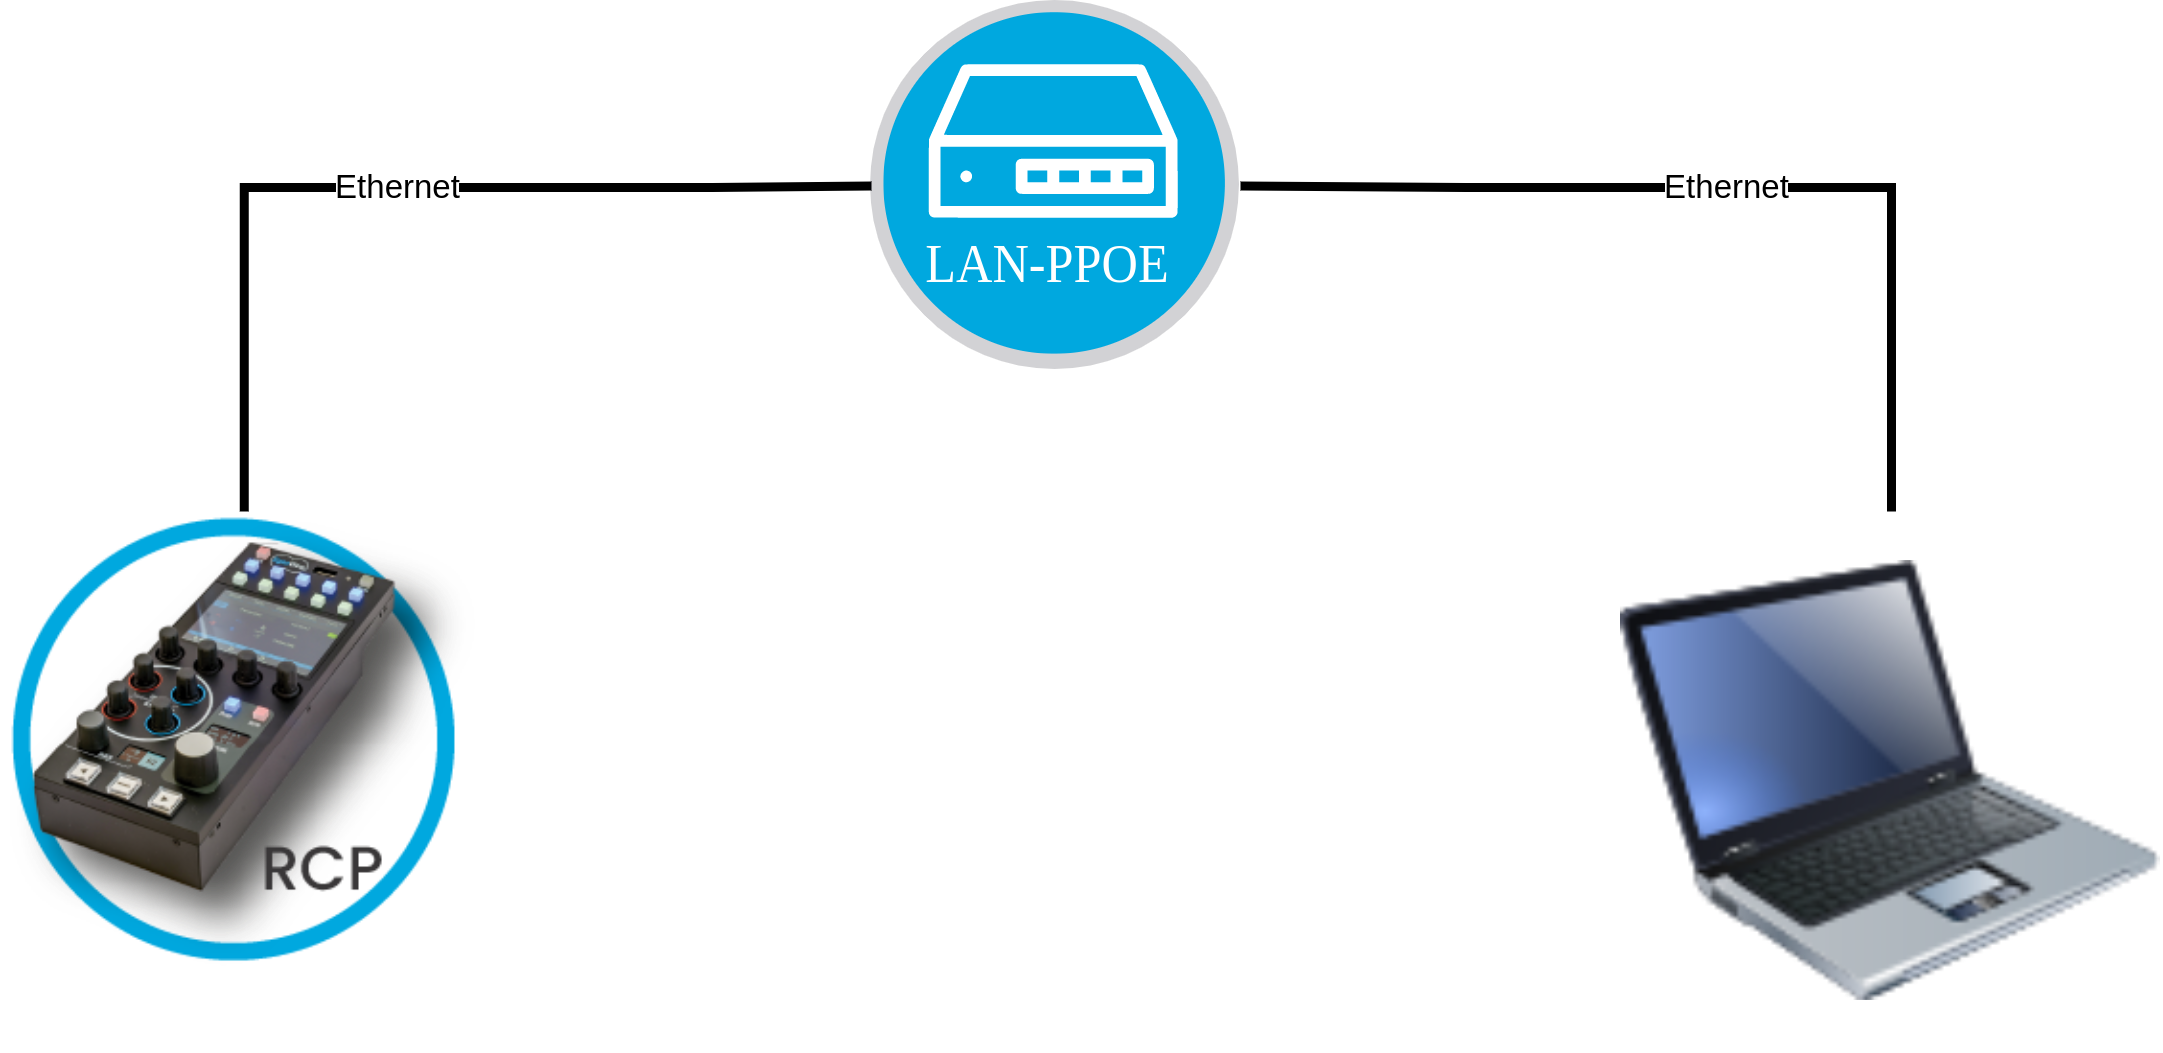
Reach the Device
Each device has a serial number, for example:
cy-vp4-14-35cy-rcp-18-4cy-rio-15-151cy-nio-22-63
Let’s take cy-rcp-18-4 as an example. The format means:
cy-rcp: Device type (here, an RCP)18: Batch ID (production batch)4: Unique device number in the batch
You need the full serial (e.g. cy-rcp-18-4) to uniquely identify a device.
Once you have that, you can reach the device by following this guide.
All configuration is done through a web UI — no software installation is required.
Configuration
Once your network is configured and you can access the device's web interface, you can follow this guide to set up your cameras and accessories.
This guide applies to:
- All versions of RCP
- All versions of RIO
- All versions of NIO
To connect a RIO or NIO to an RCP, you must use REMI.
It is not possible to add a camera connected to a RIO directly into the RCP without using REMI.
You can follow this guide to configure REMI properly.
Update Your Kit
It’s not mandatory, but it’s a good idea to update all your devices to the latest version.
Follow this guide to get started.
Setup IP
Each device comes with a factory IP (10.192.X.Y/16).
You can add your own IP addresses to:
- Match your company LAN
- Match your gear network (cameras, switchers, etc.)
The default factory IP is always active and cannot be changed.
You can add as many additional IPs as you want.
If you need extra physical ports, you can use USB-to-Ethernet adapters (for NDI, Dante, etc.).
Control Your Camera
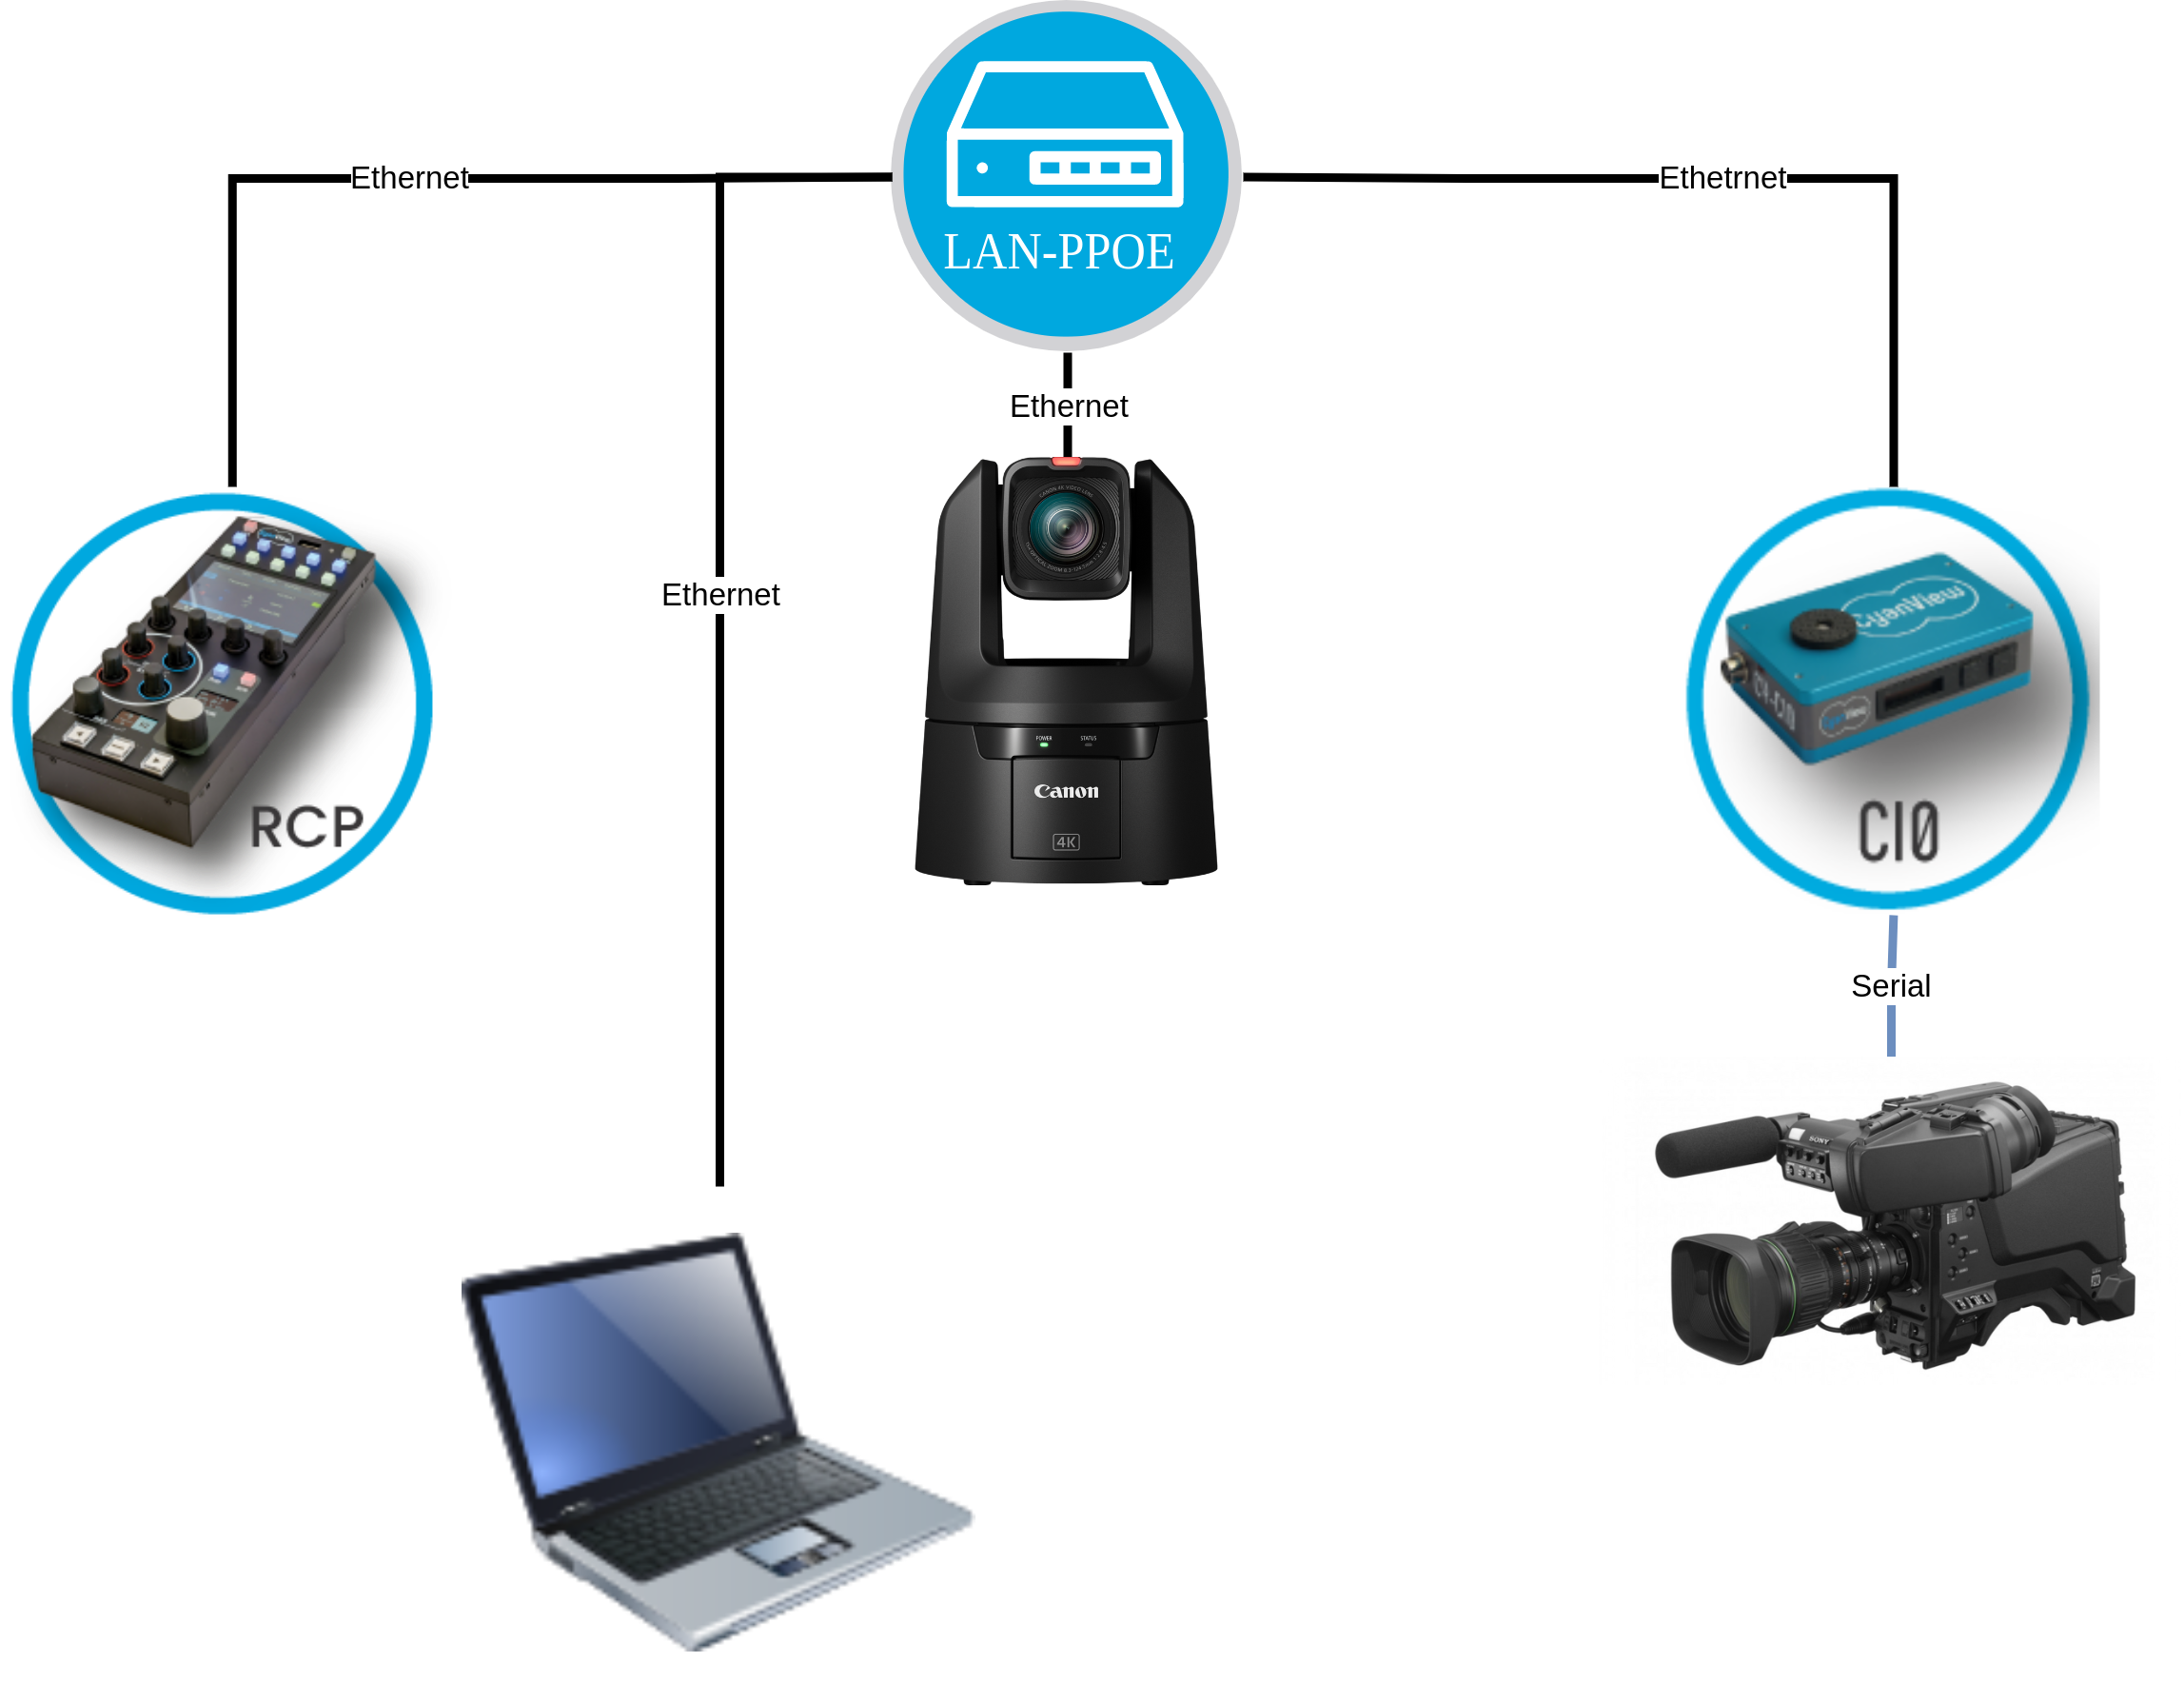
Serial Camera
For Sony 8-pin, LANC, or similar mini cameras:
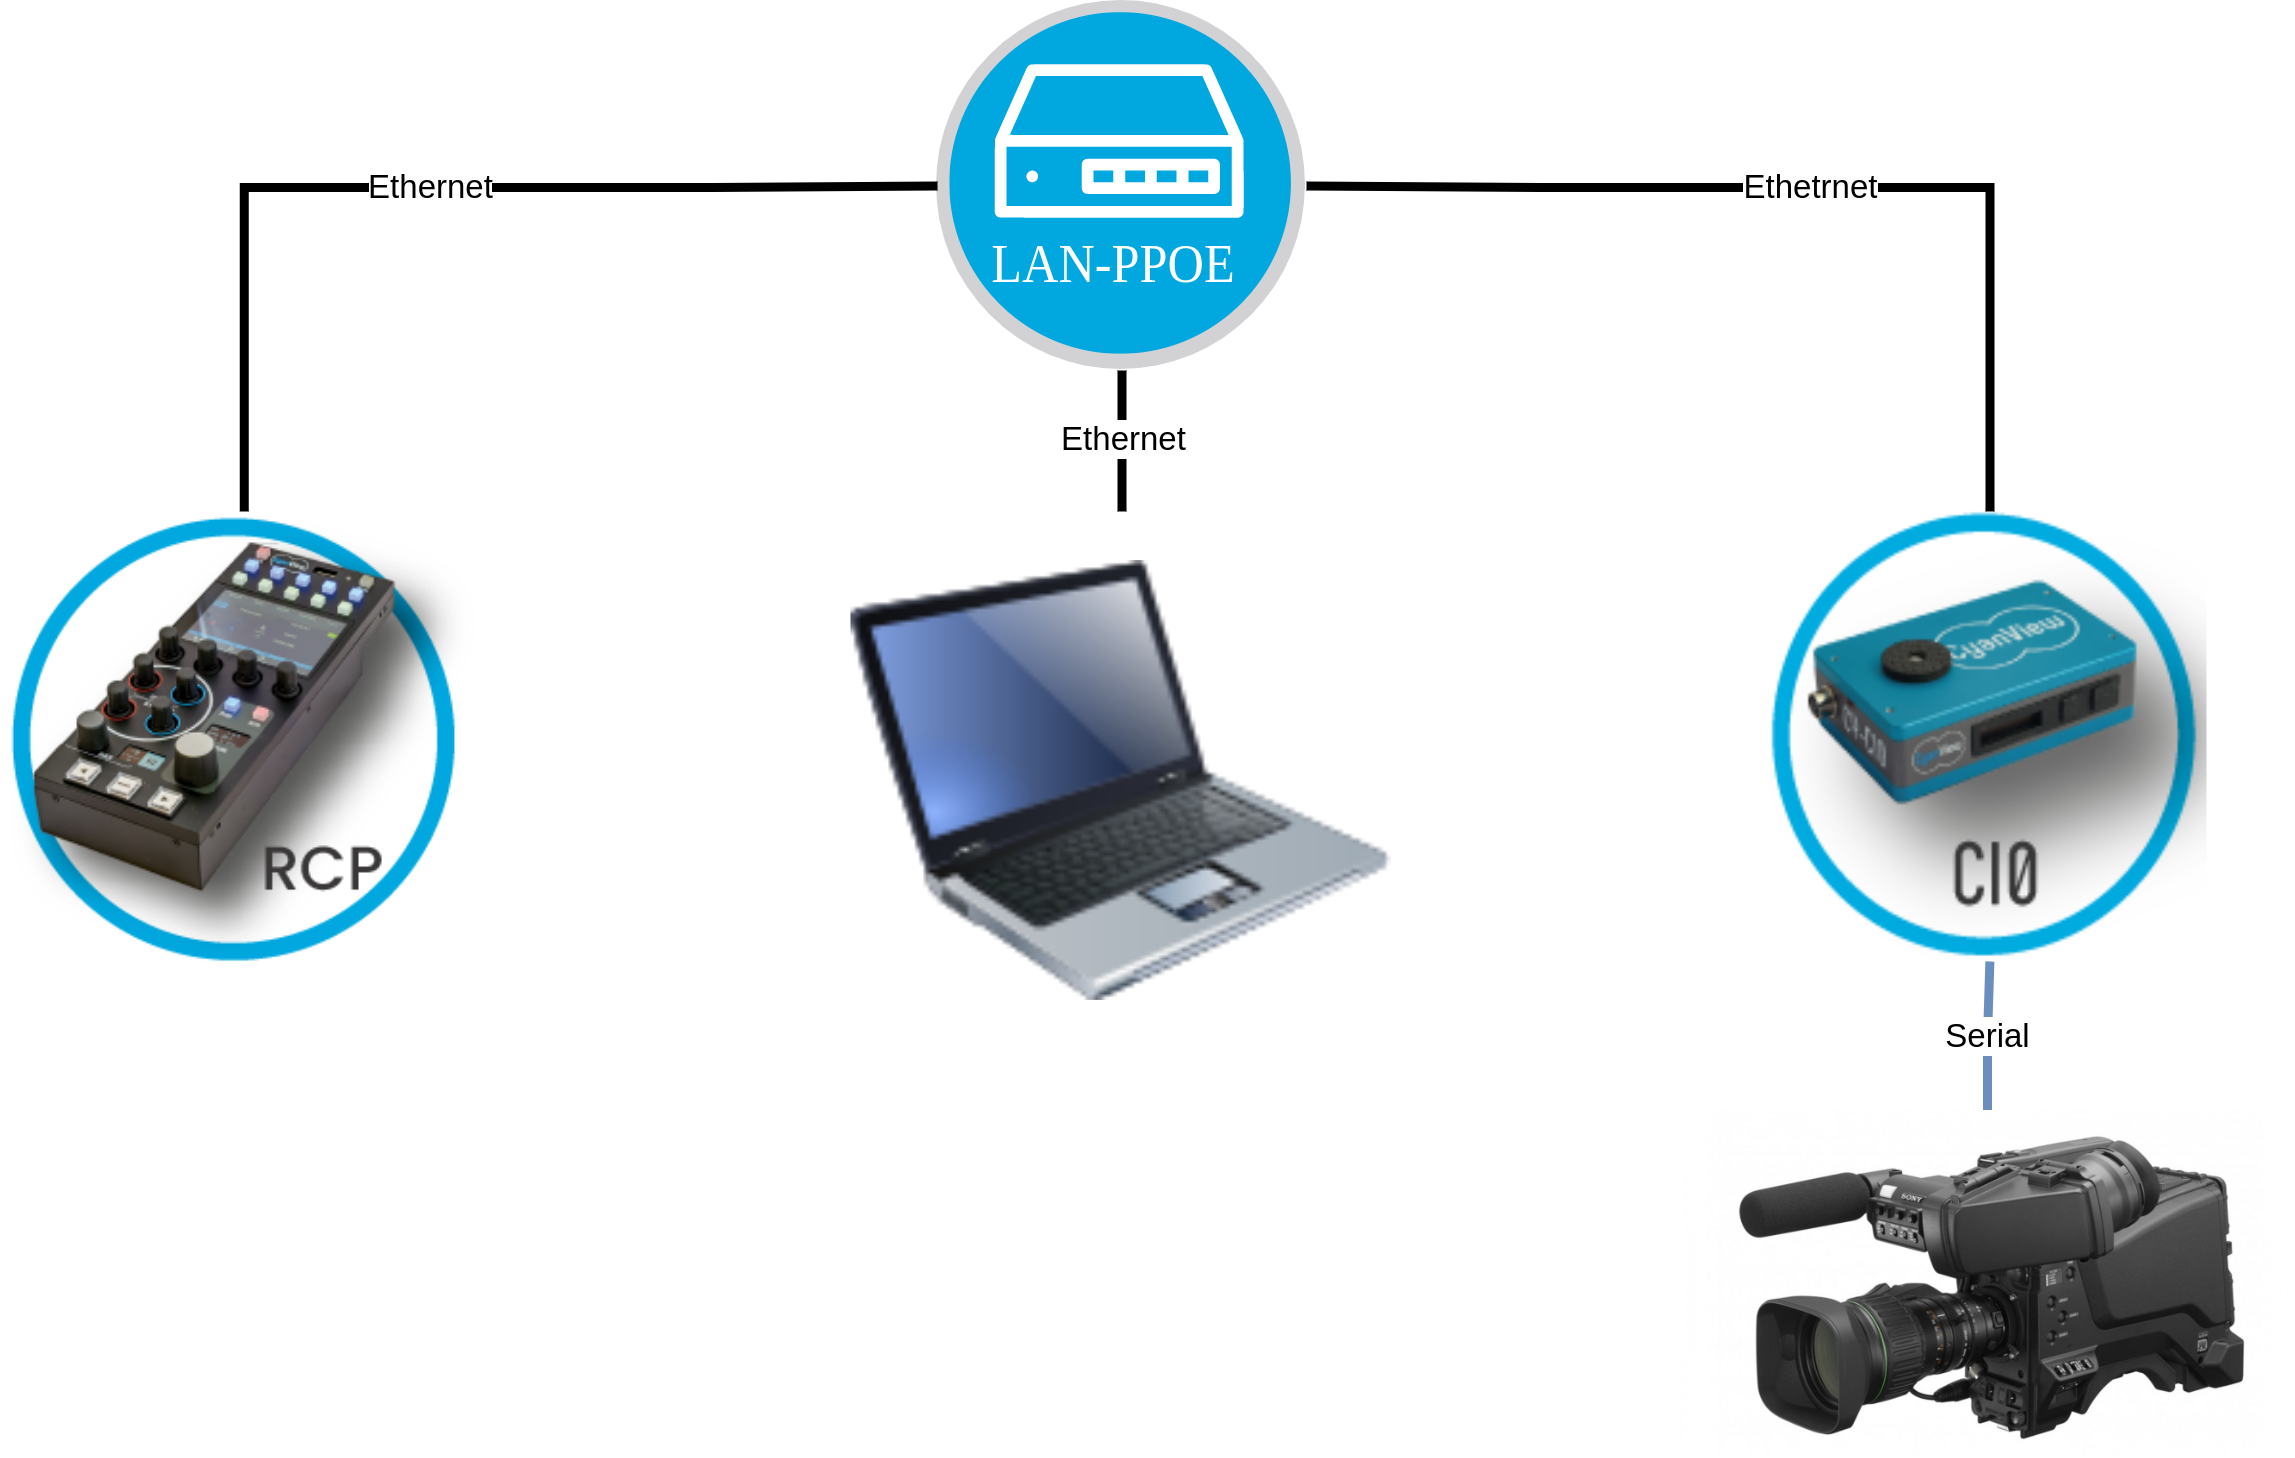
You’ll need:
- Your camera
- A CI0
- Cable to connect your camera to the CI0
- An RCP
Follow this guide to get started.
IP Camera
For Panasonic PTZ, Sony FX9, Canon C300mkIII, or similar:
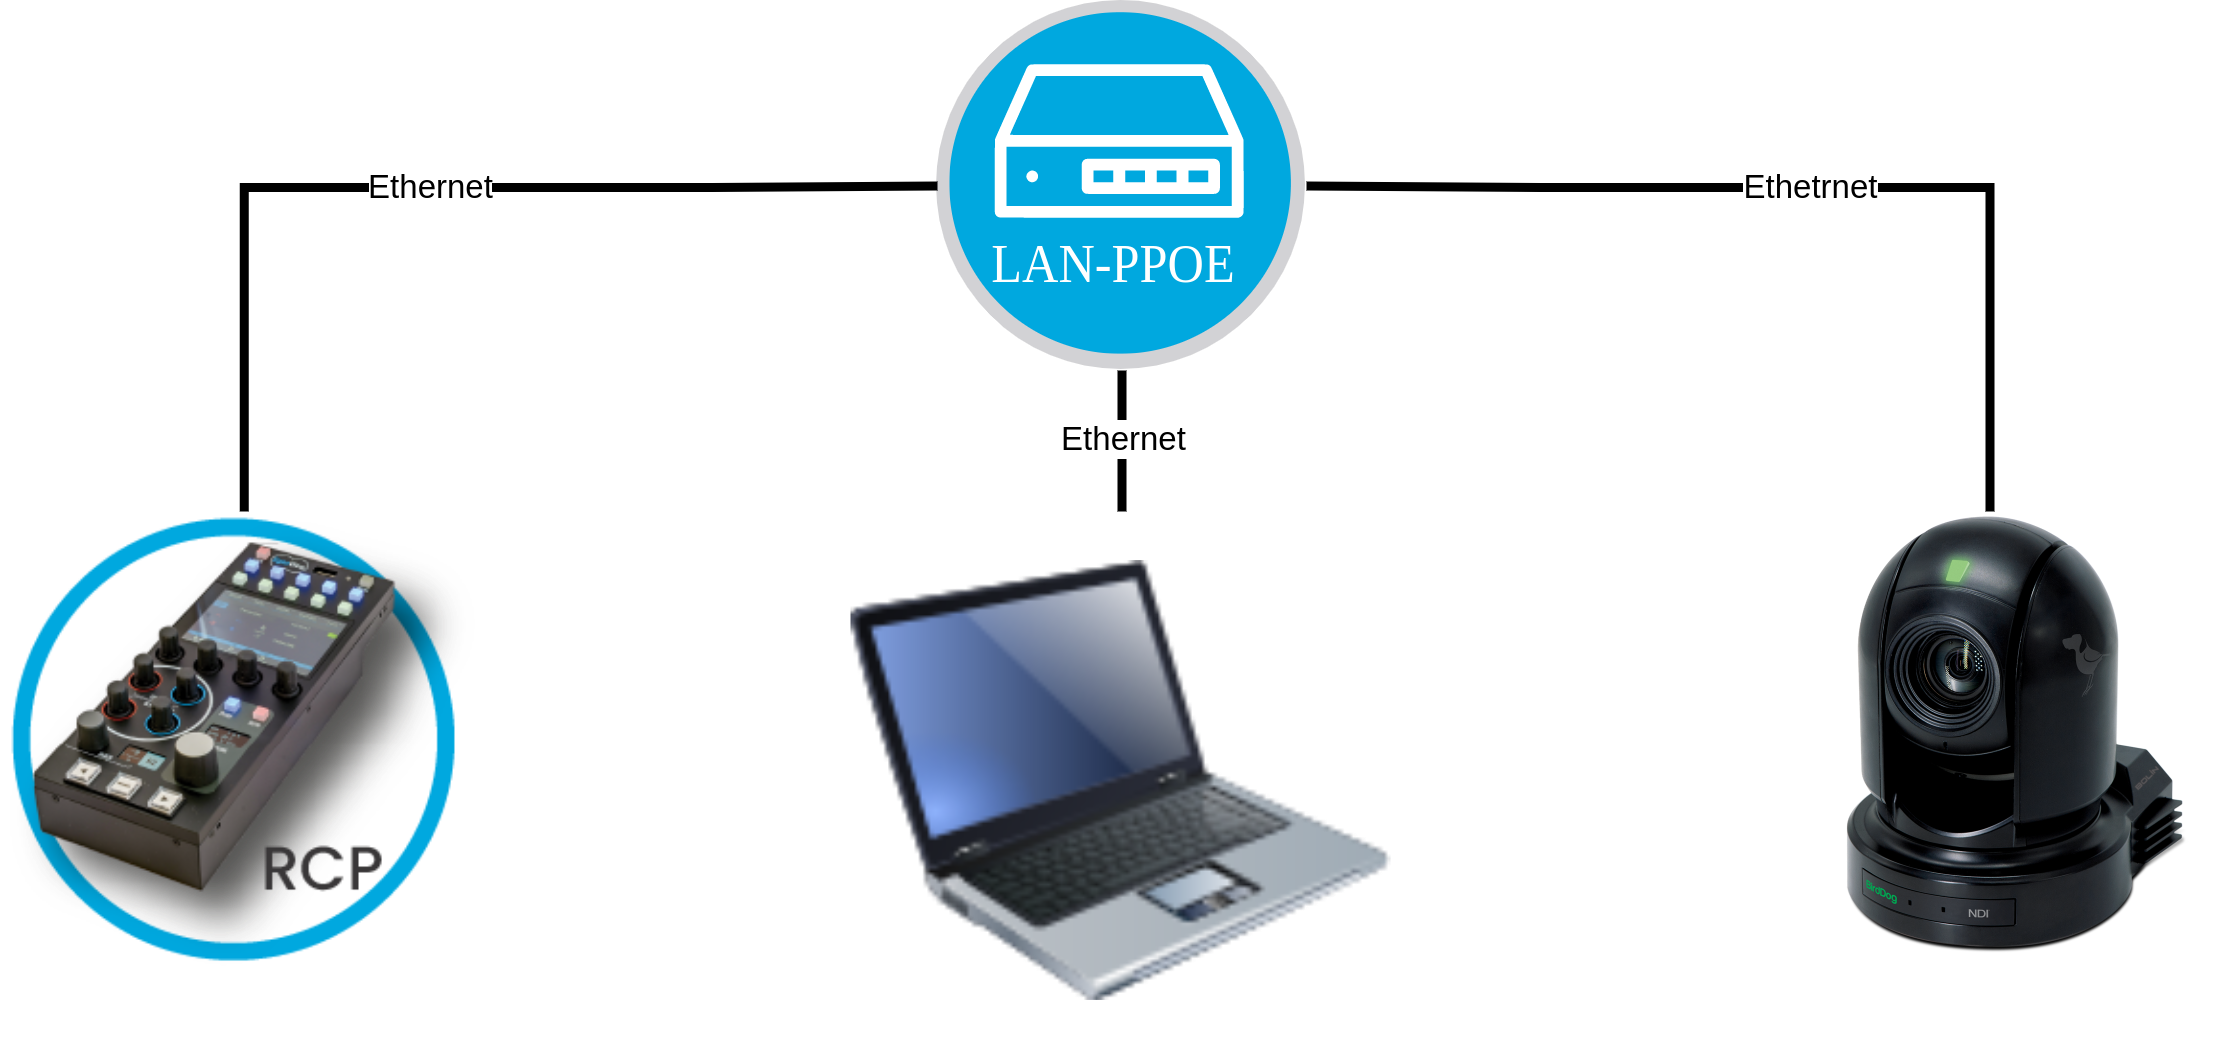
You’ll need:
- Your camera
- An RCP
Follow this guide to connect over Ethernet.
RIO-live Camera
For lens control (or serial cameras):
You’ll need:
- Your camera
- A RIO-live
- Cable to connect your lens
- A WiFi dongle if your camera only has WiFi (e.g. FX9 without XDCA)
- An RCP
Steps:
- Configure the RIO / RIO-live
- Configure the camera
- Configure the lens
- Finally,
importthe camera into your RCP.
Integrate with a Switcher or Router
Goals:
- Sync the RCP with an auxiliary output
- Get Tally input
Follow this guide for setup.
Integrate with a Color Corrector
Goals:
- Control a color corrector (standalone)
- Control a camera head and color corrector together
See this guide for setup instructions.
Tally
For a full overview of available tally input/output options, refer to this guide.
We also provide tally lights to add tally functionality to cameras that don’t support it natively (e.g. Sony FX3).
Further Reading
You can find more in-depth integration guides and advanced tips throughout the documentation.
Browse Docs & Manuals > Integrations, organized by brand.
If you have questions, feel free to email us at support@cyanview.com.
You can also check the available cables in the Cable Catalog.
A full-featured case study is available on our blog.