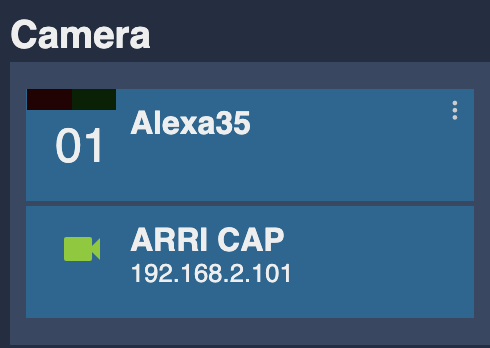
ARRI CAP
Compatible models
- ARRI Alexa mini
- ARRI Alexa mini LF
- ARRI Alexa 35
For Amira and SSCP, check our ARRI SSCP guide.
Controls
| Control | ARRI CAP |
|---|---|
| Exposure (Iris, ISO, Shutter and ND filter) | ✔ |
| White balance (R/B and Color temp) | ✔ |
| Black balance (R/B) | ✔ |
| REC (start/stop and status) | ✔ |
| Other (Multi matrix, Black Gamma, Knee, Test/Bars) | ✔ |
| Scene file : save/recall | ✔ |
Wiring
The camera is controlled over IP:

Setup
Camera setup
You need to:
- Setup a static IP on the camera
- Activate and configure CAP control
- Ensure to have an unlocked look to paint it
Camera IP
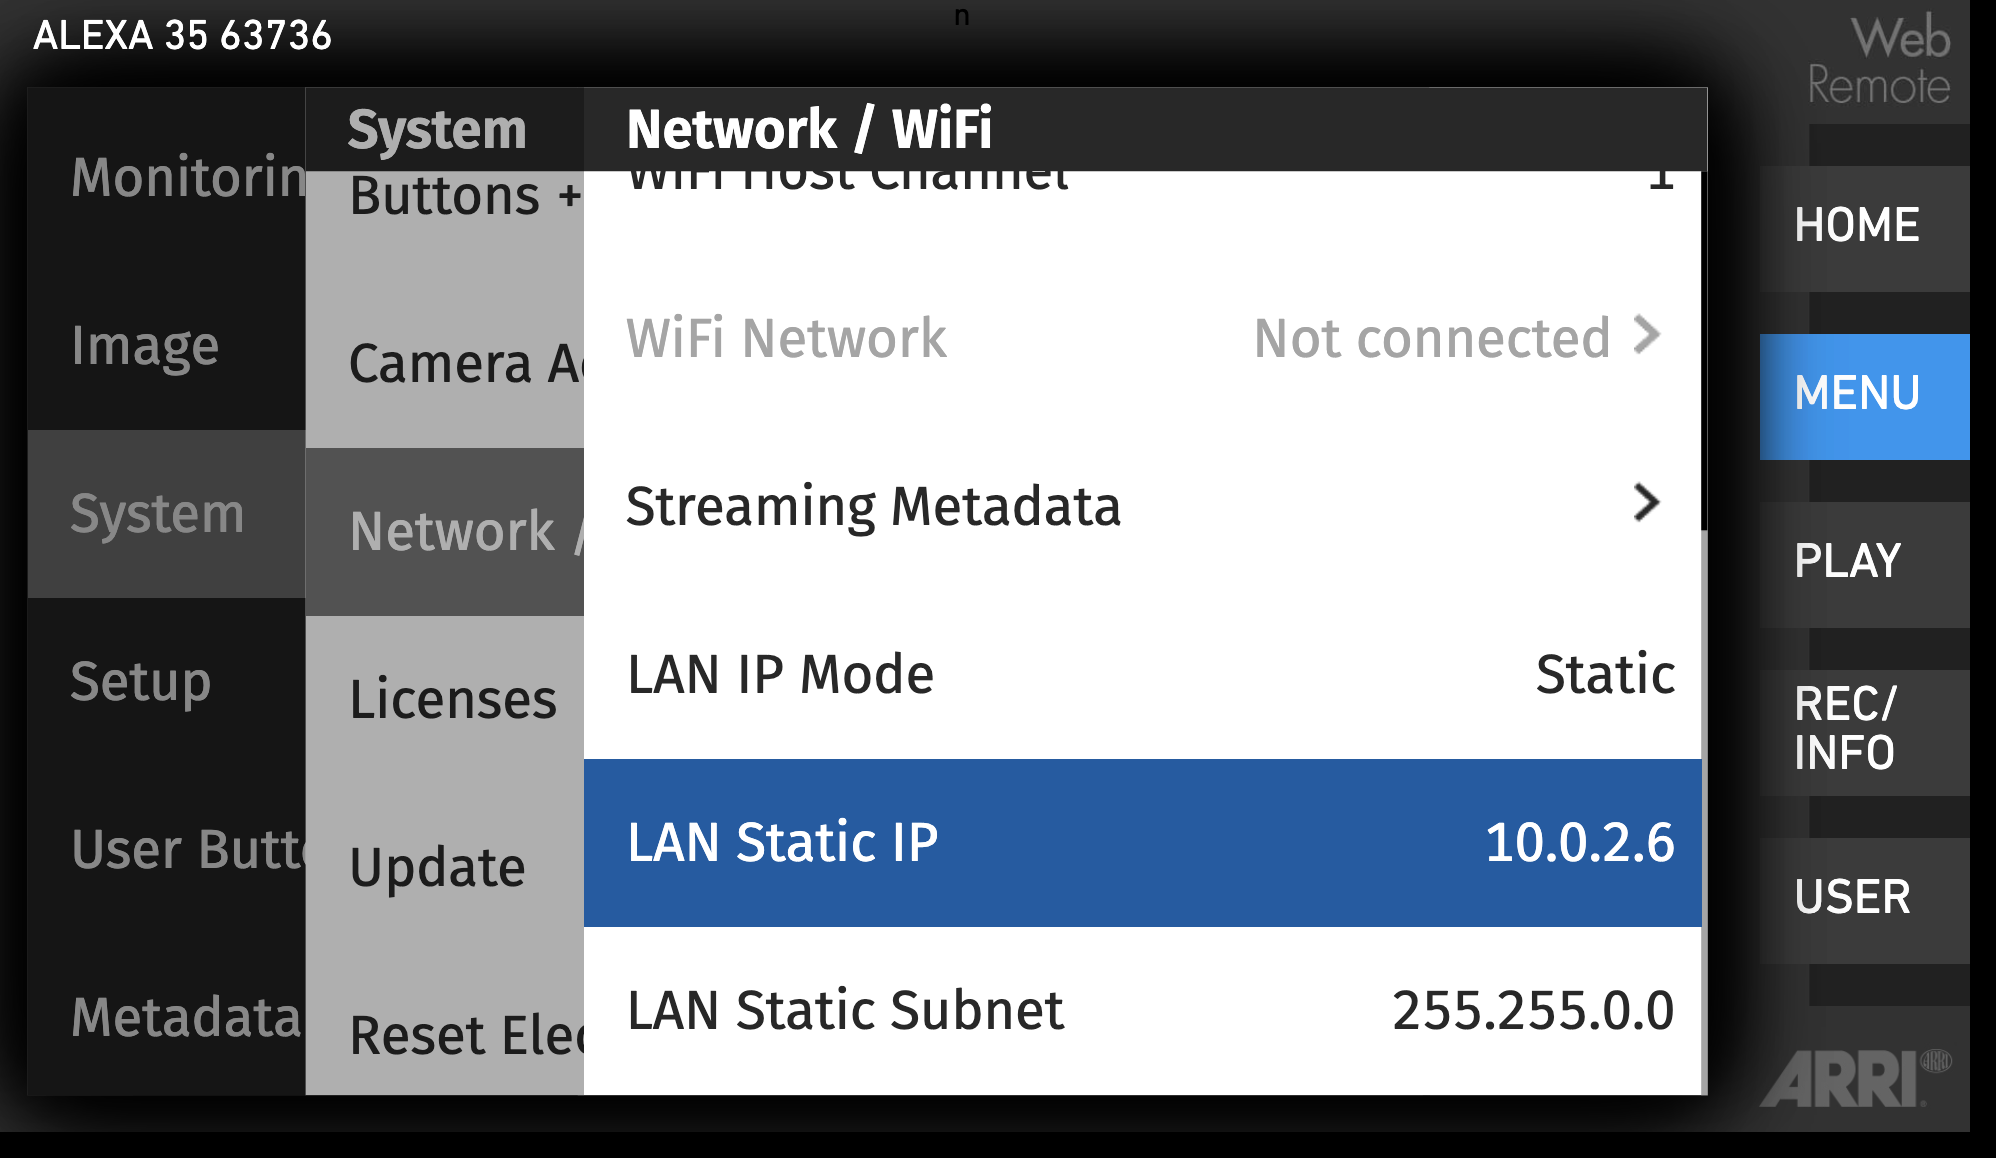
In System > Network/WiFi, setup:
- LAN IP mode to
static - LAN static IP to desired cam IP (here
10.0.2.6) - LAN static subnet to desired cam subnet (here
255.255.0.0)
If the RCP doesn't have an IP address in the same range as the camera IP, you should add one in the LAN section by following this guide.
In this setup, my camera IP is 10.0.2.6/16 and my RCP IP is 10.0.3.10/16
CAP control
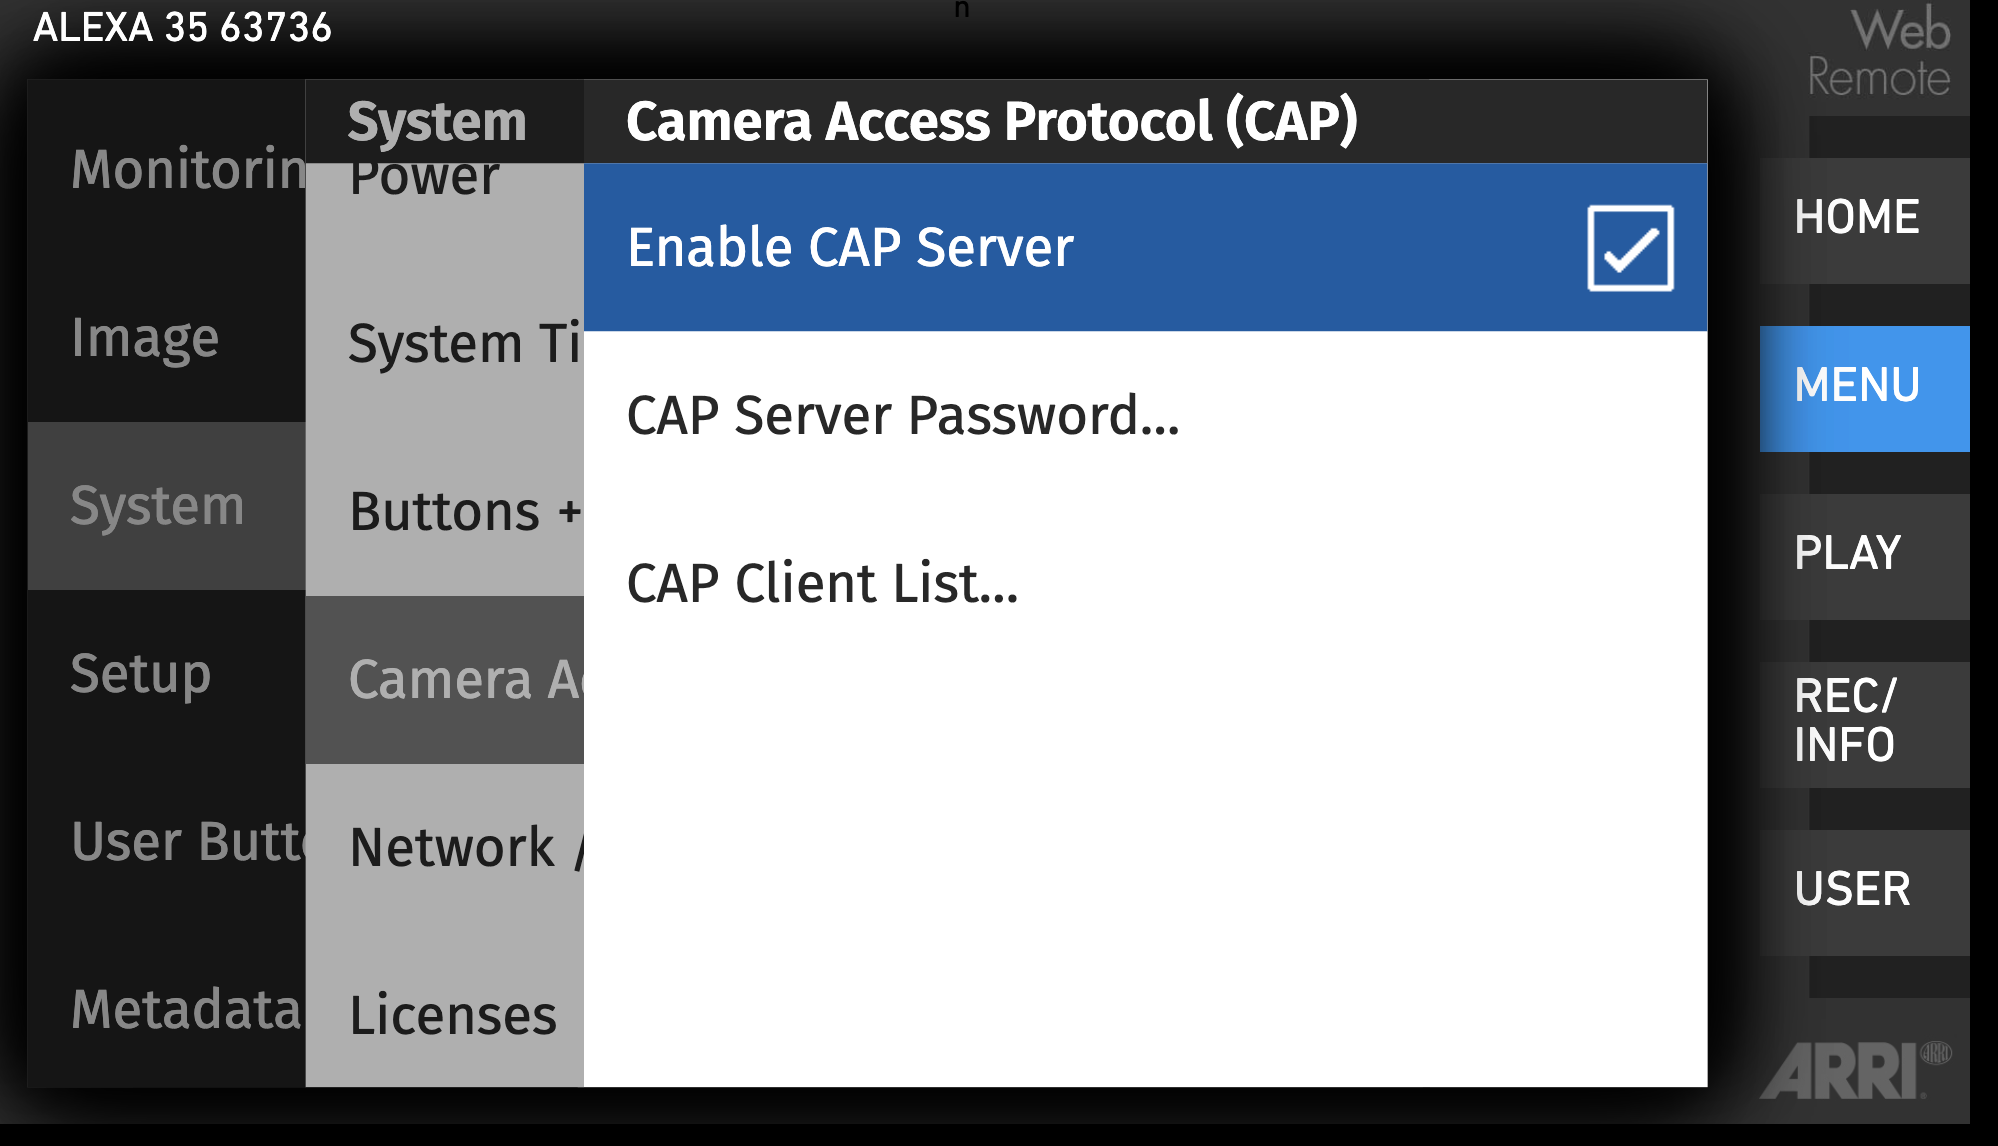
In System > Camera Access Protocol (CAP):
- Ensure
Enable CAP Serveris checked - Ensure
CAP Server Passwordis set toarri
Look unlocking
- Navigate on the camera menu
Image > Look > Look - Take the desired look and duplicate it
- Ensure to select it after that
This step is not mandatory:
- you can keep a locked look, with limited control:
- only: exposure (iris, ISO, shutter, ND filter) and WB (color temp and tint)
- no paint (R/B gains, blacks, etc.)
- you already have your own look that is already unlocked, then keep it
RCP configuration
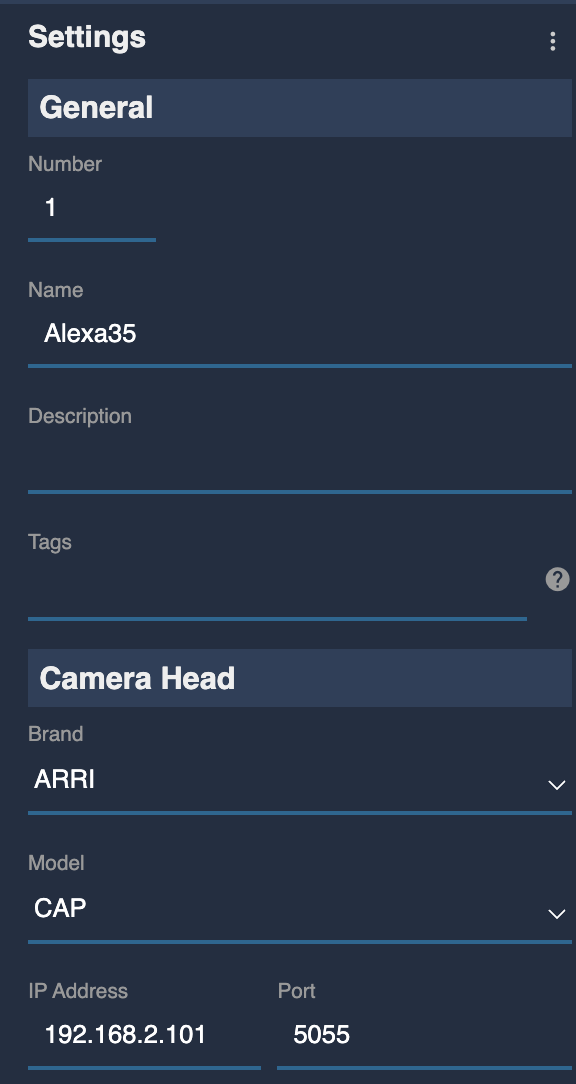
- Click on the
+in the camera block, a new panel will appear on the right - In
GeneralConfigure a Number and a Name - Select
ARRIfor the brand andCAPas the model - Enter the
IPof your camera
If everything is properly configured, it should go green:
Going further
External Lens Control (RIO)
But you can control the iris with the Lens block:
- You have a Fuji or Canon motorised lens, follow this guide
- You have a non motorised lens, you can integrate tilta motors
More shading control
CAP protocol is limited to the controls listed above. If you need more control you, you can combine it with a LUT processor. Check our VP4 manual for more information.
Troubleshooting
- Ensure to update your camera and your RCP/RIO.
- Ensure your RCP/RIO are in similar versions
Iris not controllable or value not matching (LBUS)
Your setup looks like this:
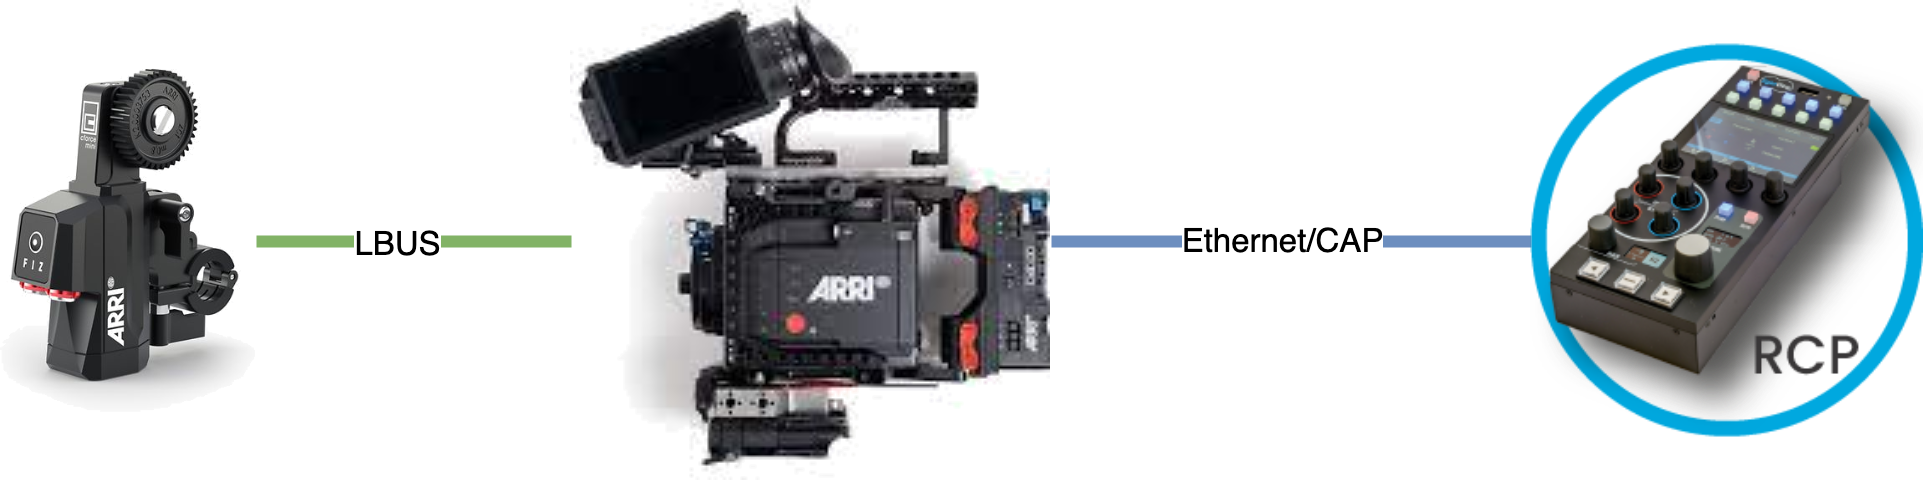
Ensure that the WCU is not taking priority to iris, if not sure, split the bus in two: iris for camera and focus/zoom for WCU.
Follow these steps (order matters):
- Power on your camera
- Plug the L-Bus motor
- Load the lens table (you can do that using a WCU or camera SD card)
- Calibrate the motor
- Now plug Ethernet in the camera
- Configure the ARRI/CAP camera on your RCP
At this step, the motor should blink red/green, like it's not connected. Move the iris knob on your RCP so the camera takes control of your motor.
Camera is RED
- check your camera IP
- check your RCP IP
- Ensure the CAP is active and password is
arri - Ensure the RCP can access the camera (try to ping RCP and camera from a laptop in the same range)
Camera control is limited to exposure (no paint)
If you can control:
- iris
- iso
- shutter
- ND
- color temp
- tint
But not the whites/blacks, etc.
Your look is probably locked.
Ensure to unlock it by following this procedure.