3D LUT Processor
Overview
The RCP can control a 3D LUT processor and integrate with Davinci Resolve, Premiere, etc.
It means you can:
- Get some rushes from the cameras
- Grade in Resolve
- Export the LUT to the RCP
- Shade in live from the RCP, combining camera + LUT
- Export the LUT from the RCP to resolve at the end of the show
Supported devices
- Cyanview VP4
- Flanders BoxIO
- AJA ColorBox
- Blackmagic Terranex Mini
Wiring
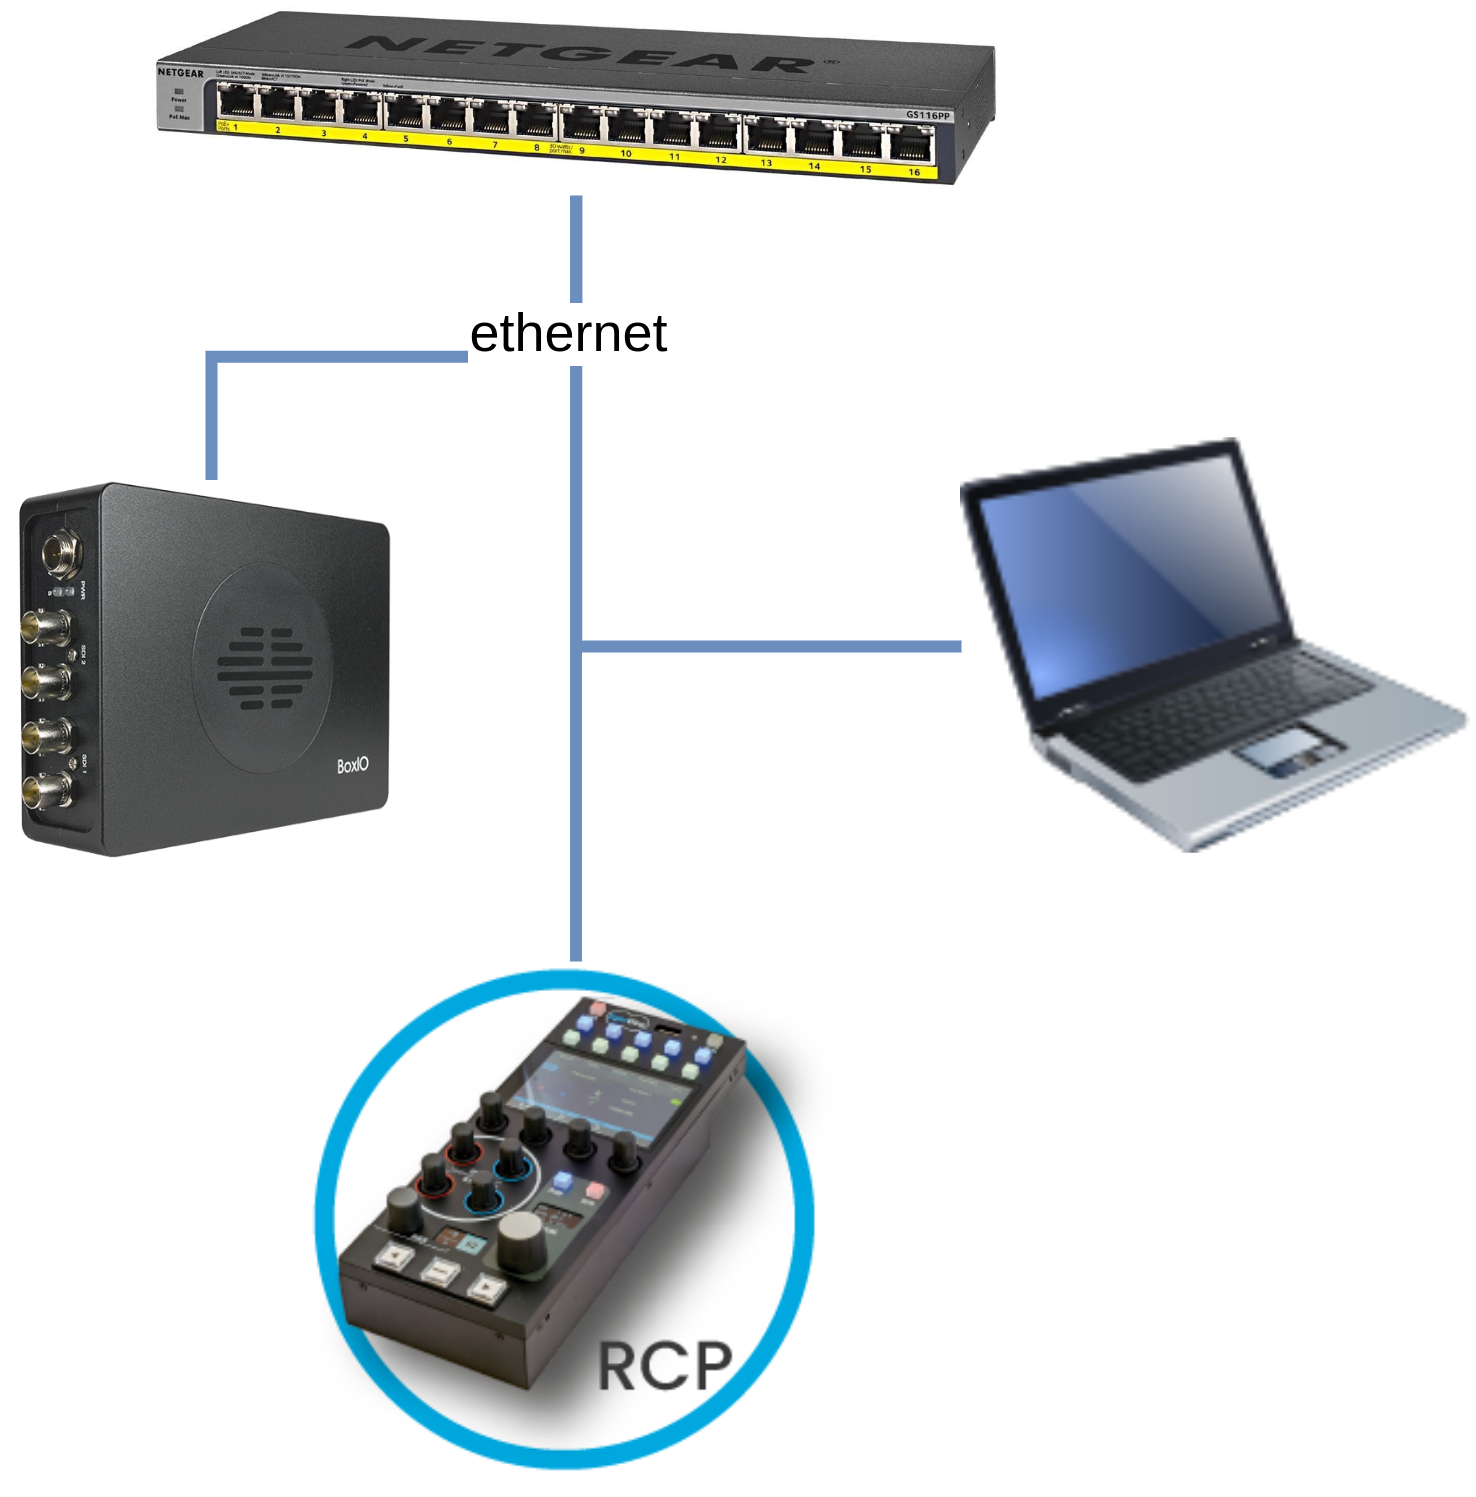
The laptop is optional and only requires for:
- setup
- import/export of the LUT
Setup
The setup is similar to any Color Corrector integration.
Navigate to your RCP Configuration UI.
In the Configuration tab, in the Components section, click on +.
Select Video Processor.
In the list, select your color corrector and fill in the name and IP address:
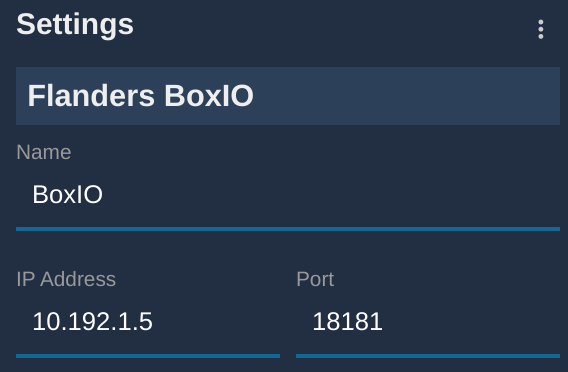
- [step 1] chose a name for your color corrector (optional)
- [step 2] enter the IP of your device
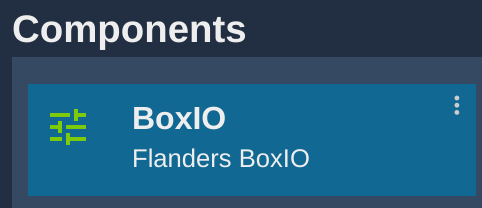
If everything goes well, your block should turn green:
In the VP4 case, it is autodetected and nothing to do
You can now create a camera and in the Video Processor section, select the CC you just created.
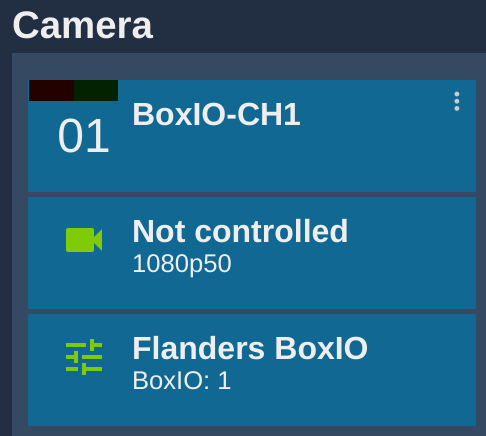
Here the cam is Not controlled, it means I just control the CC.
We could combine camera control (a FX9, etc.) with my BoxIO control.
Usage
For RCP operation of CC and combined cam+CC, you can refer to this generic guide.
I'll show here the integration with Davinci Resolve, but the workflow is similar with any grading software.
3D LUT import/export in RCP
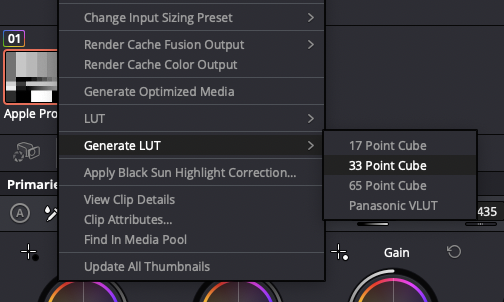
In your grading/editing software, export the LUT (format: 33 Point Cube):
This guide focus on mac os, but the workflow is similar on windows:
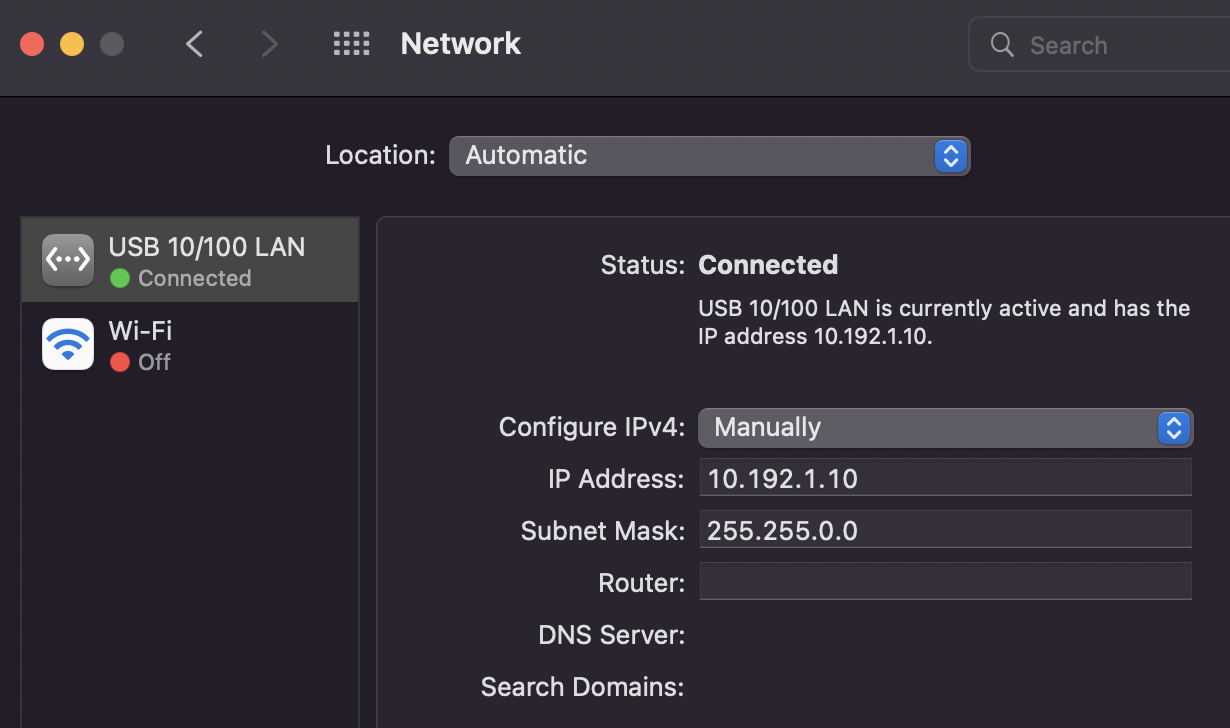
- ensure your PC has a compatible IP (you should be able to browse the RCP web UI)
- open file explorer in
This PC - right click,
Add a network location - network address:
\\<IP of your RCP>\3DLUT(pay attention to the backslash), example:\\10.192.18.4\3DLUT
Ensure your computer is wired and can reach your RCP:
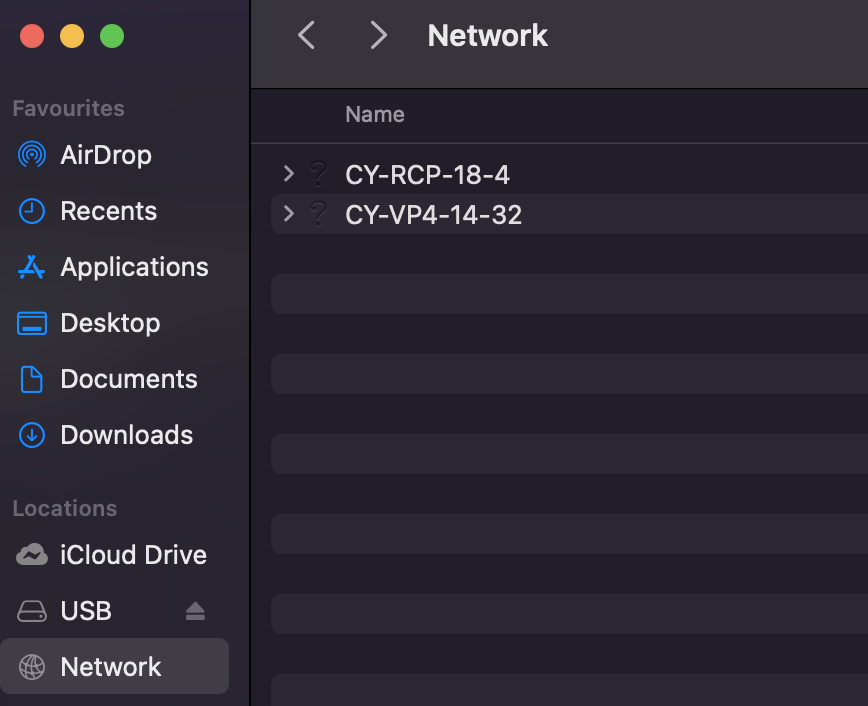
Open your file explorer, and in Network, the Cyanview devices should appear with their serial number:
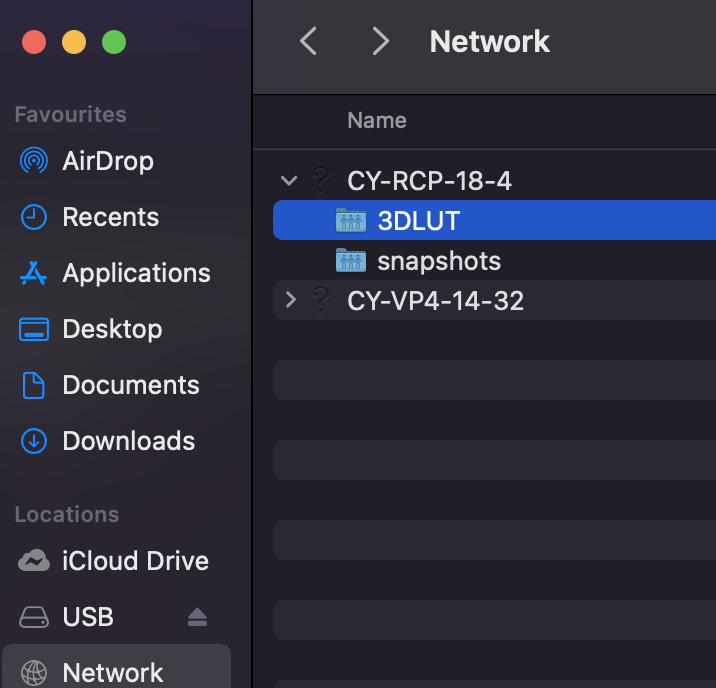
Click on the RCP, then double-click on 3DLUT to mount this network directory locally on your computer:
You should see this:
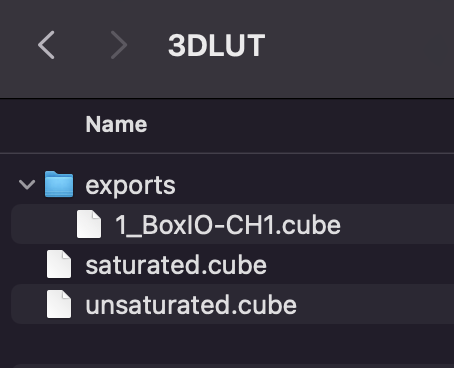
The directory exports will contain exported LUT from the RCP.
Copy and paste the exported LUT from your computer to this directory (3DLUT root directory):
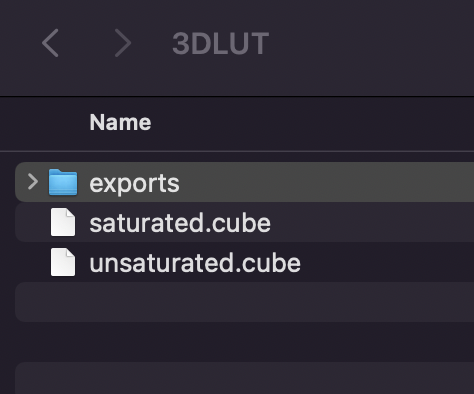
Here for example, I have 2 dummy LUT:
- unsaturated
- saturated
LUT names can contain -, _ or ..
Should end with .cube.
Are case-sensitive : saturated.cube is different from SATURATED.cube
No space allowed in name : LUT Blackmagic_1.3007_12311817_C012.cube is not allowed.
RCP operation
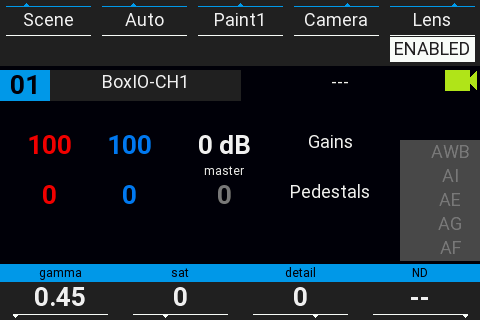
In this case, the basic screen displayed on RCP looks like this:
Navigate to Paint 1 > Color
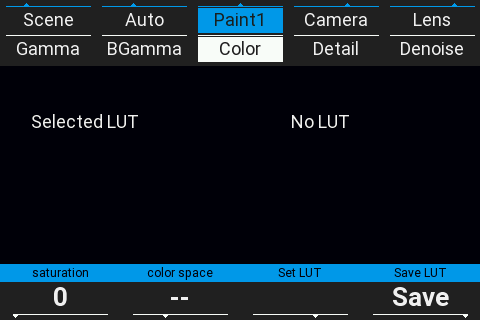
By turning the 3rd encoder below the screen, I can see the LUT I exported from my computer.
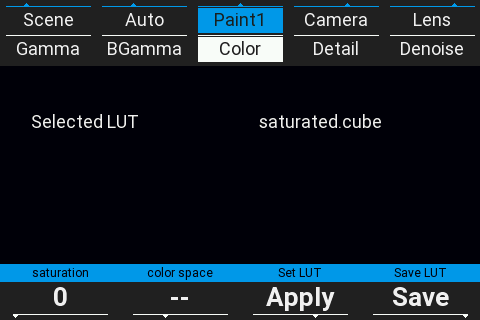
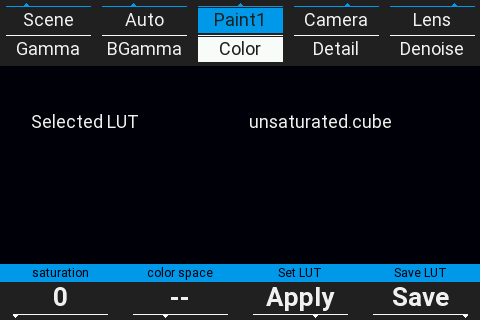
Once you're on the desired LUT, click on the 3rd encoder (Set LUT > Apply).
This will load this LUT on the BoxIO channel 1 (based on my RCP configuration).
Once loaded, Apply will not be displayed anymore:
Here, I loaded my LUT unsaturated.cube.
Now, when I shade using my RCP, the RCP recalculate the LUT based on this one.
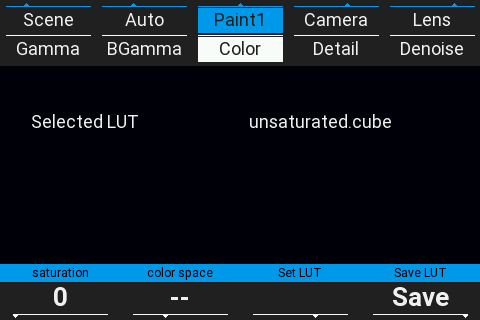
At the end of the show, I can then click on the 4th encoder (Save LUT > Save).
And my live LUT (base LUT + live shading) will be exported in the exports directory:
The name is: X_Y.cube with:
X: my camera numberY: my camera name
So in this case, in exports, I have a file: 1_BoxIO-CH1.cube that I can import back to resolve through the network.
Downloads
You can download the following dummy 3D LUT (generated from Davinci Resolve):