ARRI SSCP
Compatible model: ARRI Amira
Setup
Camera IP
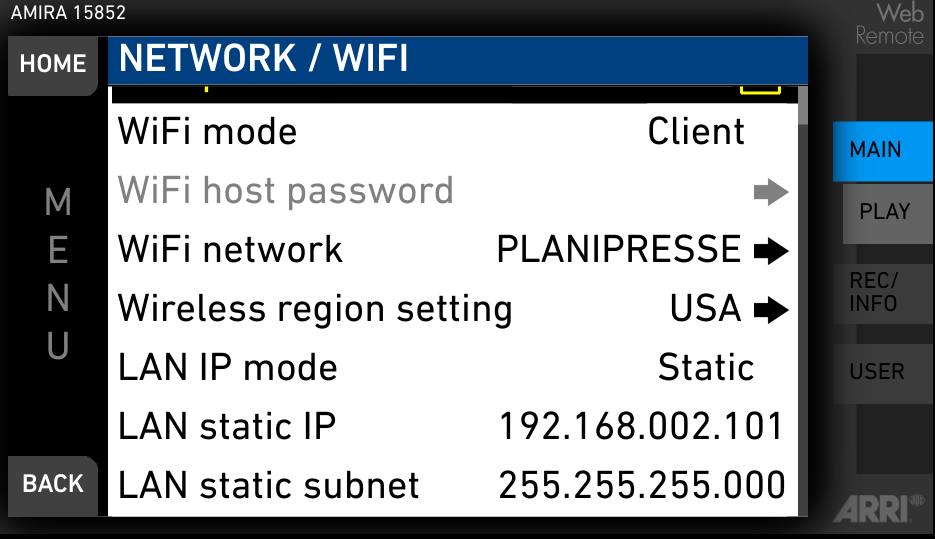
Setup:
- LAN IP mode to
static - LAN static IP to desired cam IP (here
192.168.2.101) - LAN static subnet to desired cam subnet (here
255.255.255.0)
If the RCP doesn't have an IP address in the same range as the camera IP, you should add one in the LAN section by following this guide.
In this setup, my camera IP is 192.168.2.101/24 and my RCP IP is 192.168.2.10/24
Activate SSCP
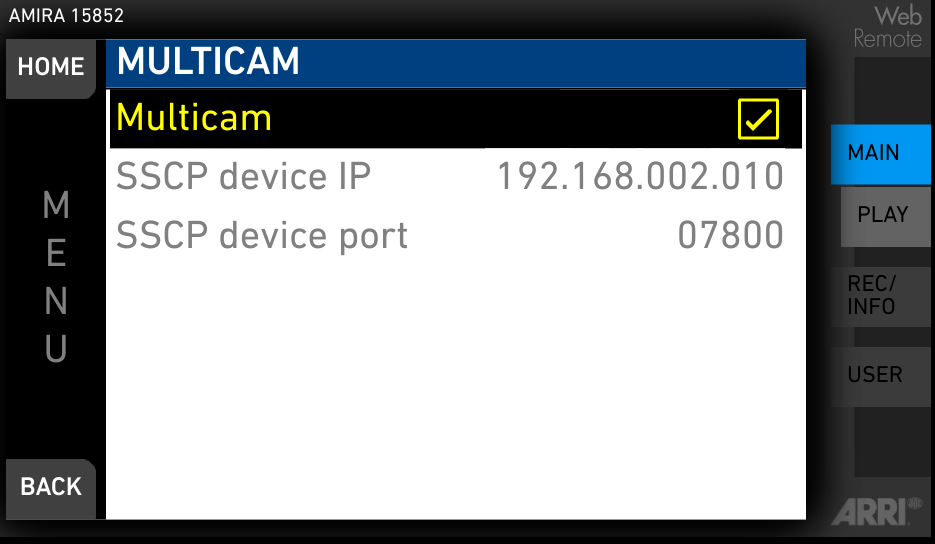
Setup:
- SSCP device IP to the RCP IP (here
192.168.2.10) - SSCP device port to desired port (here
7800) - Multicam checked (to activate the previous parameters)
With ARRI Amira, this is the camera that connects to the RCP.
If you want ton control multiple camera from a single RCP, ensure they all have different ports and adapt the configuration in your RCP to distinguish them properly.
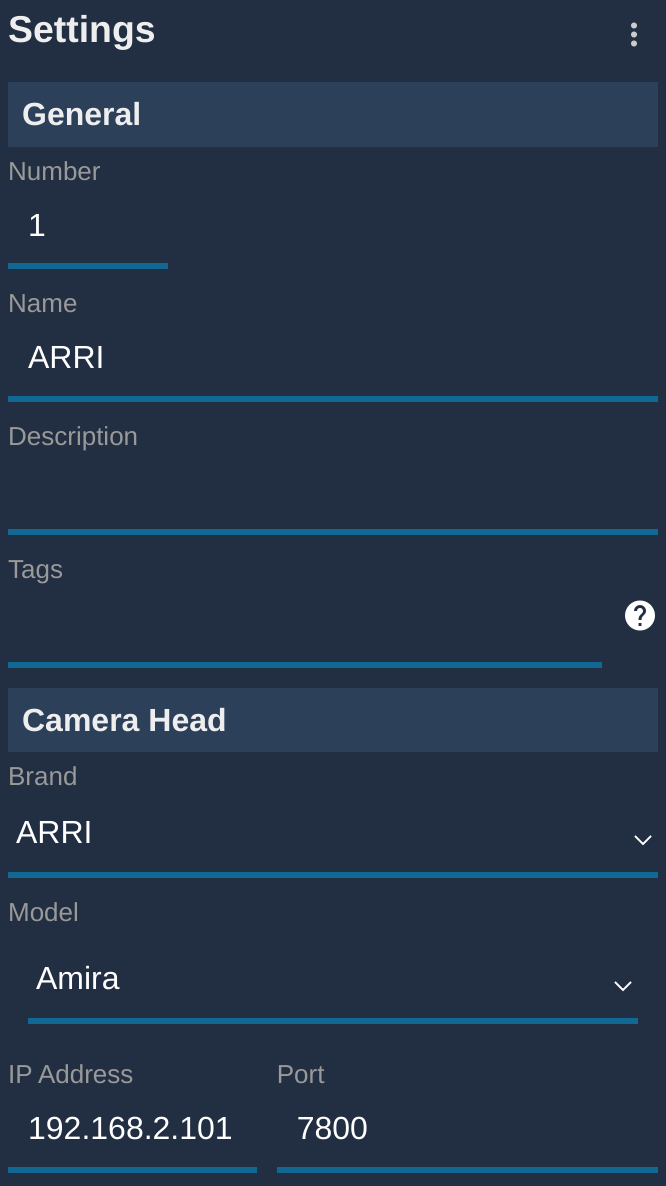
RCP configuration
- Click on the
+in the camera block, a new panel will appear on the right - In
GeneralConfigure a Number and a Name - Select
ARRIfor the brand andAmiraas the model - Enter the
IPof your camera (optional as the camera connects to the RCP, source IP is not checked) - Enter the
portconfigured in your camera (mandatory)
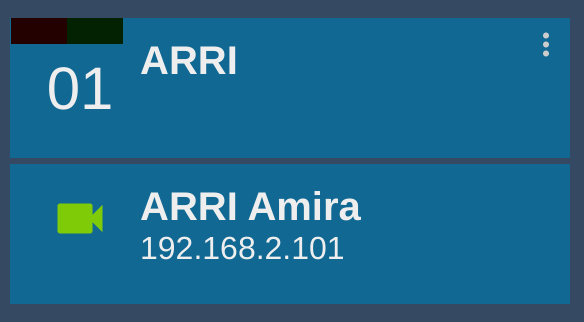
If everything went as expected, it should go green:
Activate shadding
By default the shading, even if active is not display (neither on viewfinder or SDI outputs), you need to activate it.
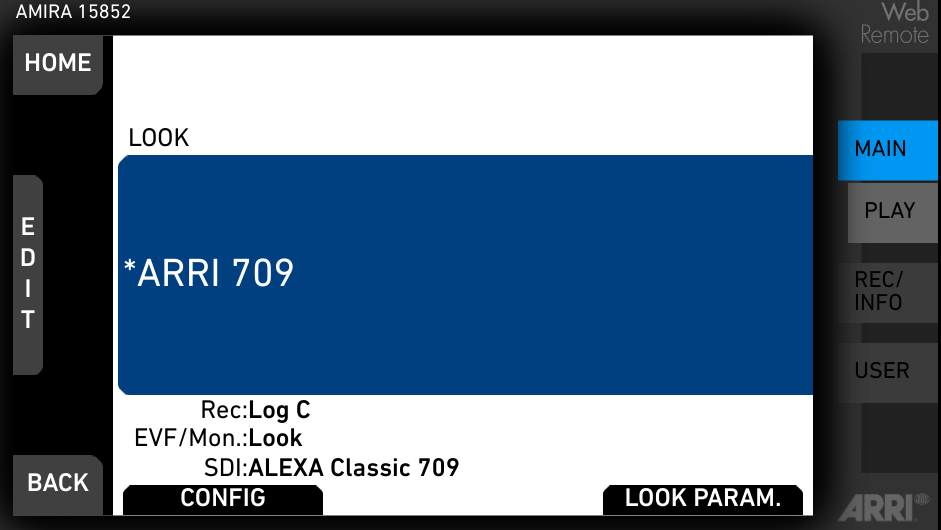
In the HOME menu, click on LOOK:
Click on LOOK PARAM:
Click on DUPLICATE:

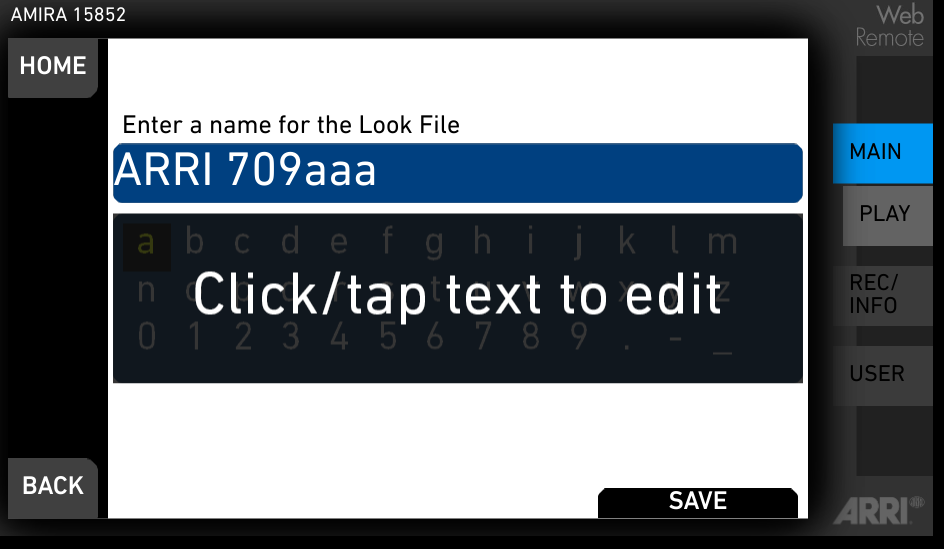
Enter a look name, here for example: ARRI 709aaa and then click on SAVE:
Then in LOOK menu, click on LOOK CONFIG:
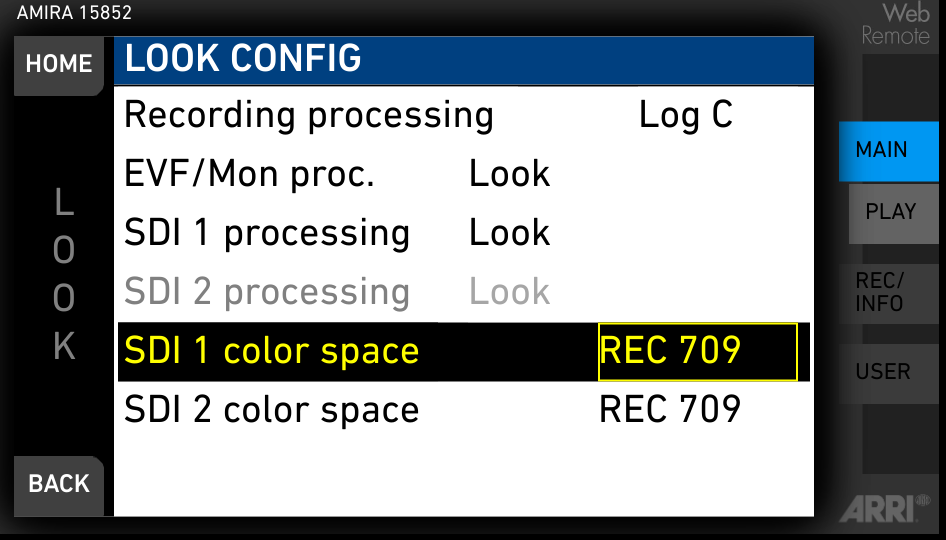
Ensure:
EVF/Mon procis setup to theLOOKcreated above (ARRI 709aaain our case)SDI 1 processingis setup to theLOOKcreated above (ARRI 709aaain our case)