RIO
Introduction
Pronounce [rɪəʊ].
The RIO is a standalone camera control device. It combines:
- A CI0: serial ports, display and buttons
- A RCP: camera protocols and configuration web UI
It is designed for:
- Lens control
- USB cameras, such as mirrorless cameras
- Wi-Fi LAN control
- Polecam, gimbal and remote camera workflows
The RIO can run the camera configuration by itself. If the link to the RCP is unplugged or unstable, the camera and lens remain controlled by the RIO.
Licenses
The hardware is the same for RIO LAN and RIO WAN. The license defines the available REMI features.
- RIO WAN: unlimited number of cameras, REMI access through the cloud.
- RIO LAN (formerly RIO Live): limited to two cameras, REMI access only on the local network.
Power supply
The RIO is not PoE. It can be powered using 12V DC from:
- D-Tap, from a camera or battery
- PSU
DC IN voltage is between 10V and 24V.
The input voltage will be directly applied to the camera, so if you power from batteries, make sure the camera supports the higher battery voltage as well. For thermal reasons, camera consumption should not exceed 12W by port.
Wiring

The RIO and RCP communicate together over IP.
Setup
The RIO camera configuration is exactly the same as RCP.
You can access your RIO configuration page following this guide.
Once there, the setup is similar to the RCP web UI.
You can follow any integration guide from this website, it applies to RCP as well as RIO.
RCP link
To setup RIO with a RCP:
- Setup the camera on your RIO web UI
- Setup a tag/group in your RIO
- Setup the same tag/group in your RCP
- Import the camera from your RIO in your RCP
From there, you will have control of the camera from your RCP.
You can find more information about this pairing on this page.
The REMI is the way RCP and RIO are paired and work together.
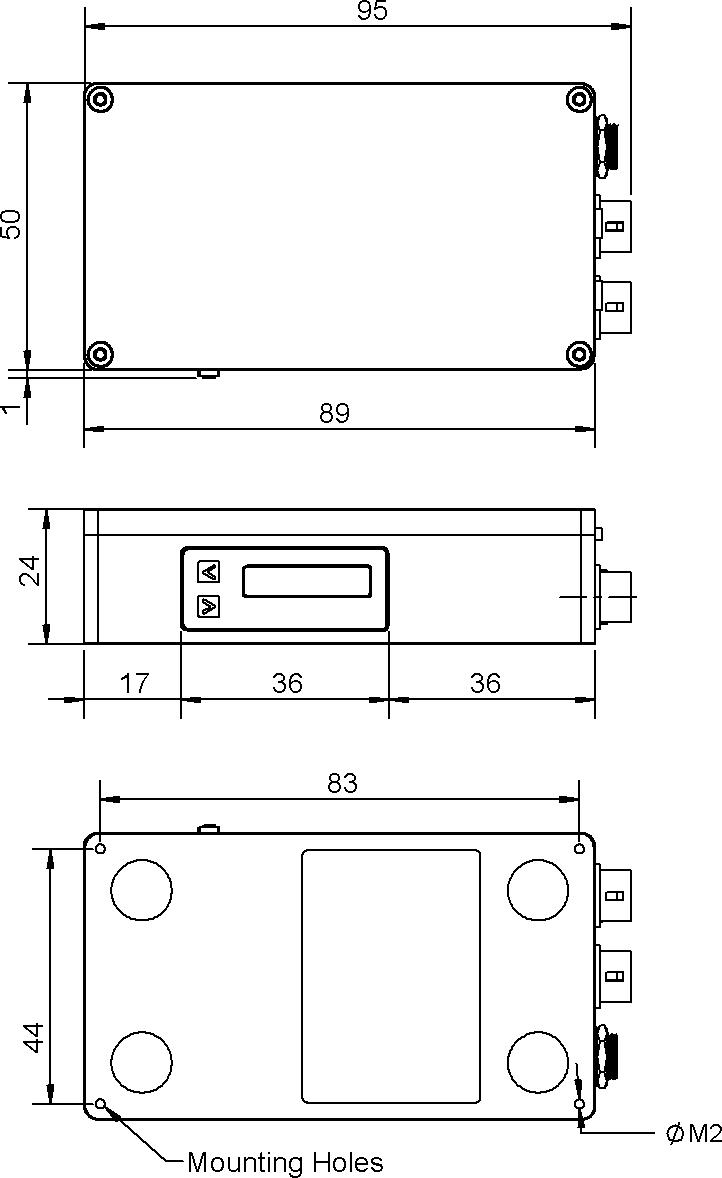
Dimensions