RCP UI - Assignables
Overview
The RCP has 10 + 1 assignable buttons and 4 assignable encoders.
You can customize:
- the LOCK/PWR button
- the 10 buttons on top of the RCP main screen
- the 4 encoders below the RCP main screen
Path : MENU > SYSTEM > ASSIGN.
The first tab (Buttons gives you an overview of the current buttons assignments)
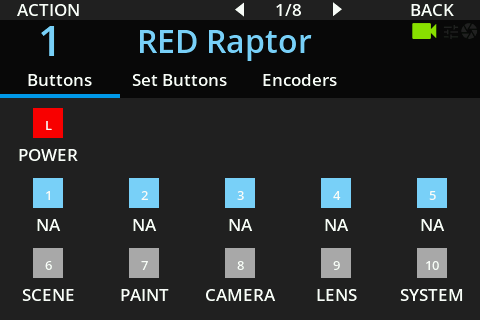
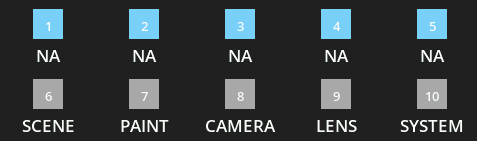
You can see here that:
- the LOCK button is assigned to
POWER - the first line is assigned to anything (
NA) - the second line is assigned to SCENE, PAINT, CAMERA, LENS, SYSTEM
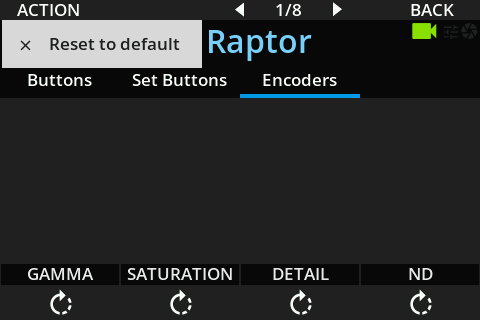
If you changed it and wants to get back to the default, you can click on ACTION (button on the top left of the screen):
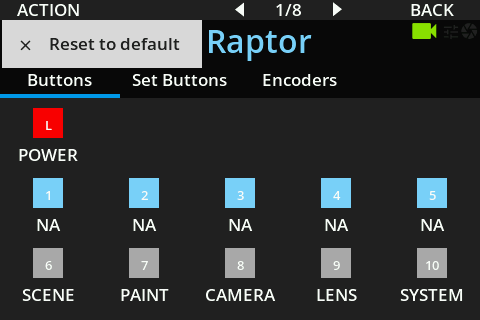
And click on Reset to default
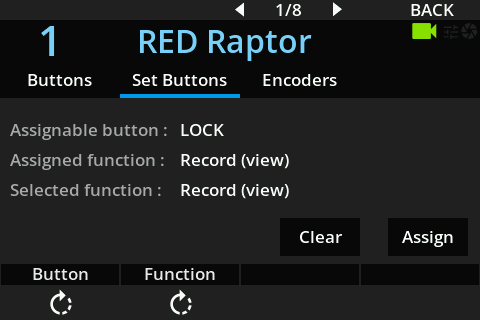
LOCK button
Path : MENU > SYSTEM > ASSIGN.
Go in Set Buttons and turn the first encoder (Button) to select LOCK:
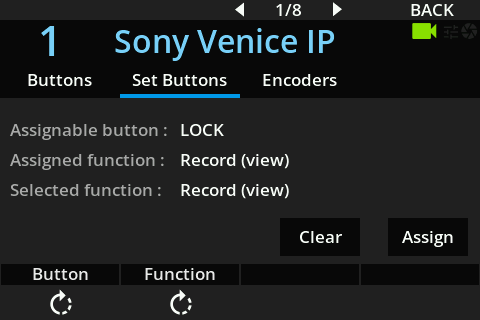
You can then chose 2 shortcuts for the LOCK button:
Power (view): typical use case in broadcastRecord (view): typical use case in cinematic
view means it's not a function and just a shortcut to a view, the list vary based on the selected button.
If Record is selected:
- The
LOCKbutton LED will reflect theRECstatus of the camera displayed on RCP - Once clicked, it will redirect you to the record page (REC on/off, status, TC, etc.)
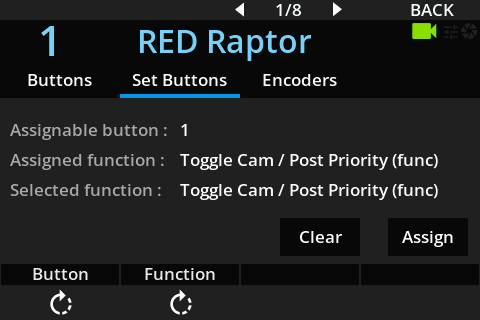
Assignables buttons
Path : MENU > SYSTEM > ASSIGN.
Go in Set Buttons and turn the first encoder (Button) to select one of the 10 buttons:
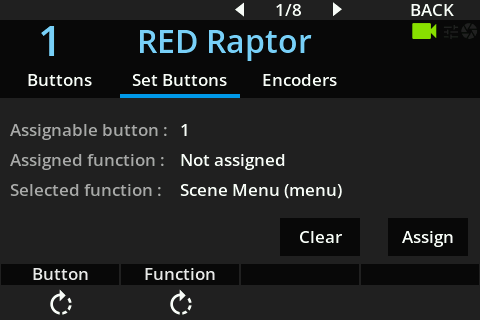
Once you have a button and a shortcut, you can click on:
Assign: to link button + shortcutClear: to remove the shortcut
For every button (1-10), you can set any view, menu or function:
view: it will redirect you to a view (i.e.RECwill redirect you to the record page)menu: it will redirect you to a submenu (i.e.Paint Menuwill redirect you to the paint submenu)function: it will execute/trig a function/action
The list:
Not assigned:NAScene Menu (menu)Scene Files (view)Scene Config (view)Paint Menu (menu)Filters (view)White (view)Black (view)Detail (view)Skin Detail (view)Matrix (view)Gain (view)Gamma (view)Knee (view)Shutter (view)Color (view)Look (view)Denoise (view)Camera Menu (menu)Auto (view)Menu (view)User Keys (view)Power (view)Sensor (view)Tally (view)Test (view)Lens Menu (menu)Lens (view)PTZF (view)Preview (view)Record (view)System Menu (menu)Assignable (view)Display (view)GPIO (view)Info (view)Units (view)Power (view)Priority (view)Settings (view)Toggle Cam / Post Priority (func): toggle priority betweencam > postorpost > camwhen combining the camera and post processorToggle Camera usage (func): toggle the camera when combining the camera and post processor (keep only the post)Toggle Post processor usage (func): toggle the post when combining the camera and post processor (keep only the camera)Toggle Enable post processor (func): toggle the post when combining the camera and post processor (the post is in passthrough mode)
Assignables encoders
You can customize the 4 encoders below the RCP main screen.
Path : MENU > SYSTEM > ASSIGN.
Go in Set Encoders and turn each encoder to the desired function.
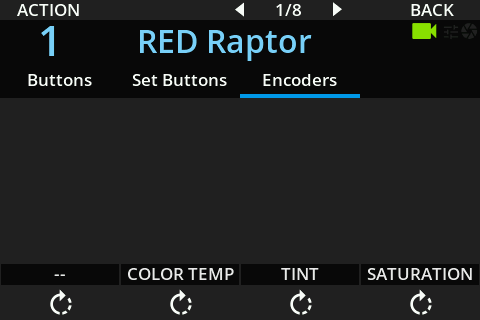
Each encoder can be assigned to:
--: nothing / NAM. GAMMAGAMMAND(presets and variable)SATURATIONCOLOR TEMPDETAILTINT
Just moving the encoder change the assignation, saved automatically.
If you want to reset it, you can click on the top left button of the RCP screen (ACTION) and click on Reset to default:
Example
RED Raptor
Path : MENU > SYSTEM > ASSIGN.
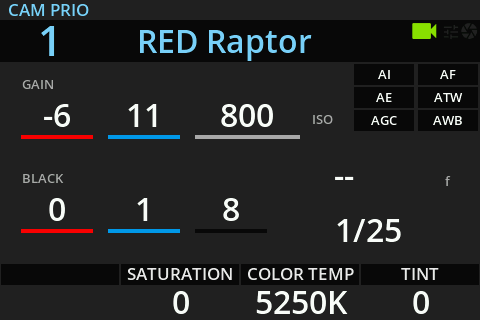
I setup the button 1 to toggle cam/post priority (useful if using a combo of RED Raptor + AJA colorbox, VP4, etc.):
I setup the LOCK button to Record menu (useful for every cinematic camera):
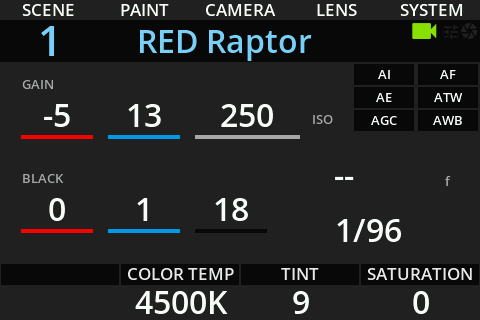
So it looks like this:
I also setup the encoders to saturation, color temp and tint:
So the main view looks like:
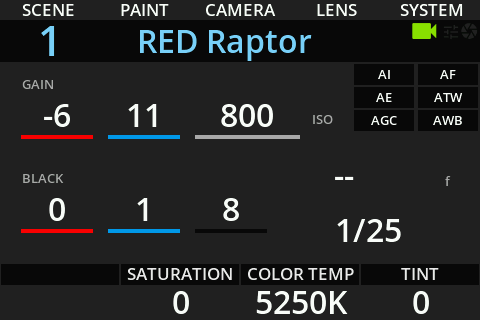
You see on the top of the screen the white (second line) of assignables buttons.
If you click on it (top of the screen), you now see the blue (first line) of assignables buttons.