Iris Joystick Manual
Overview
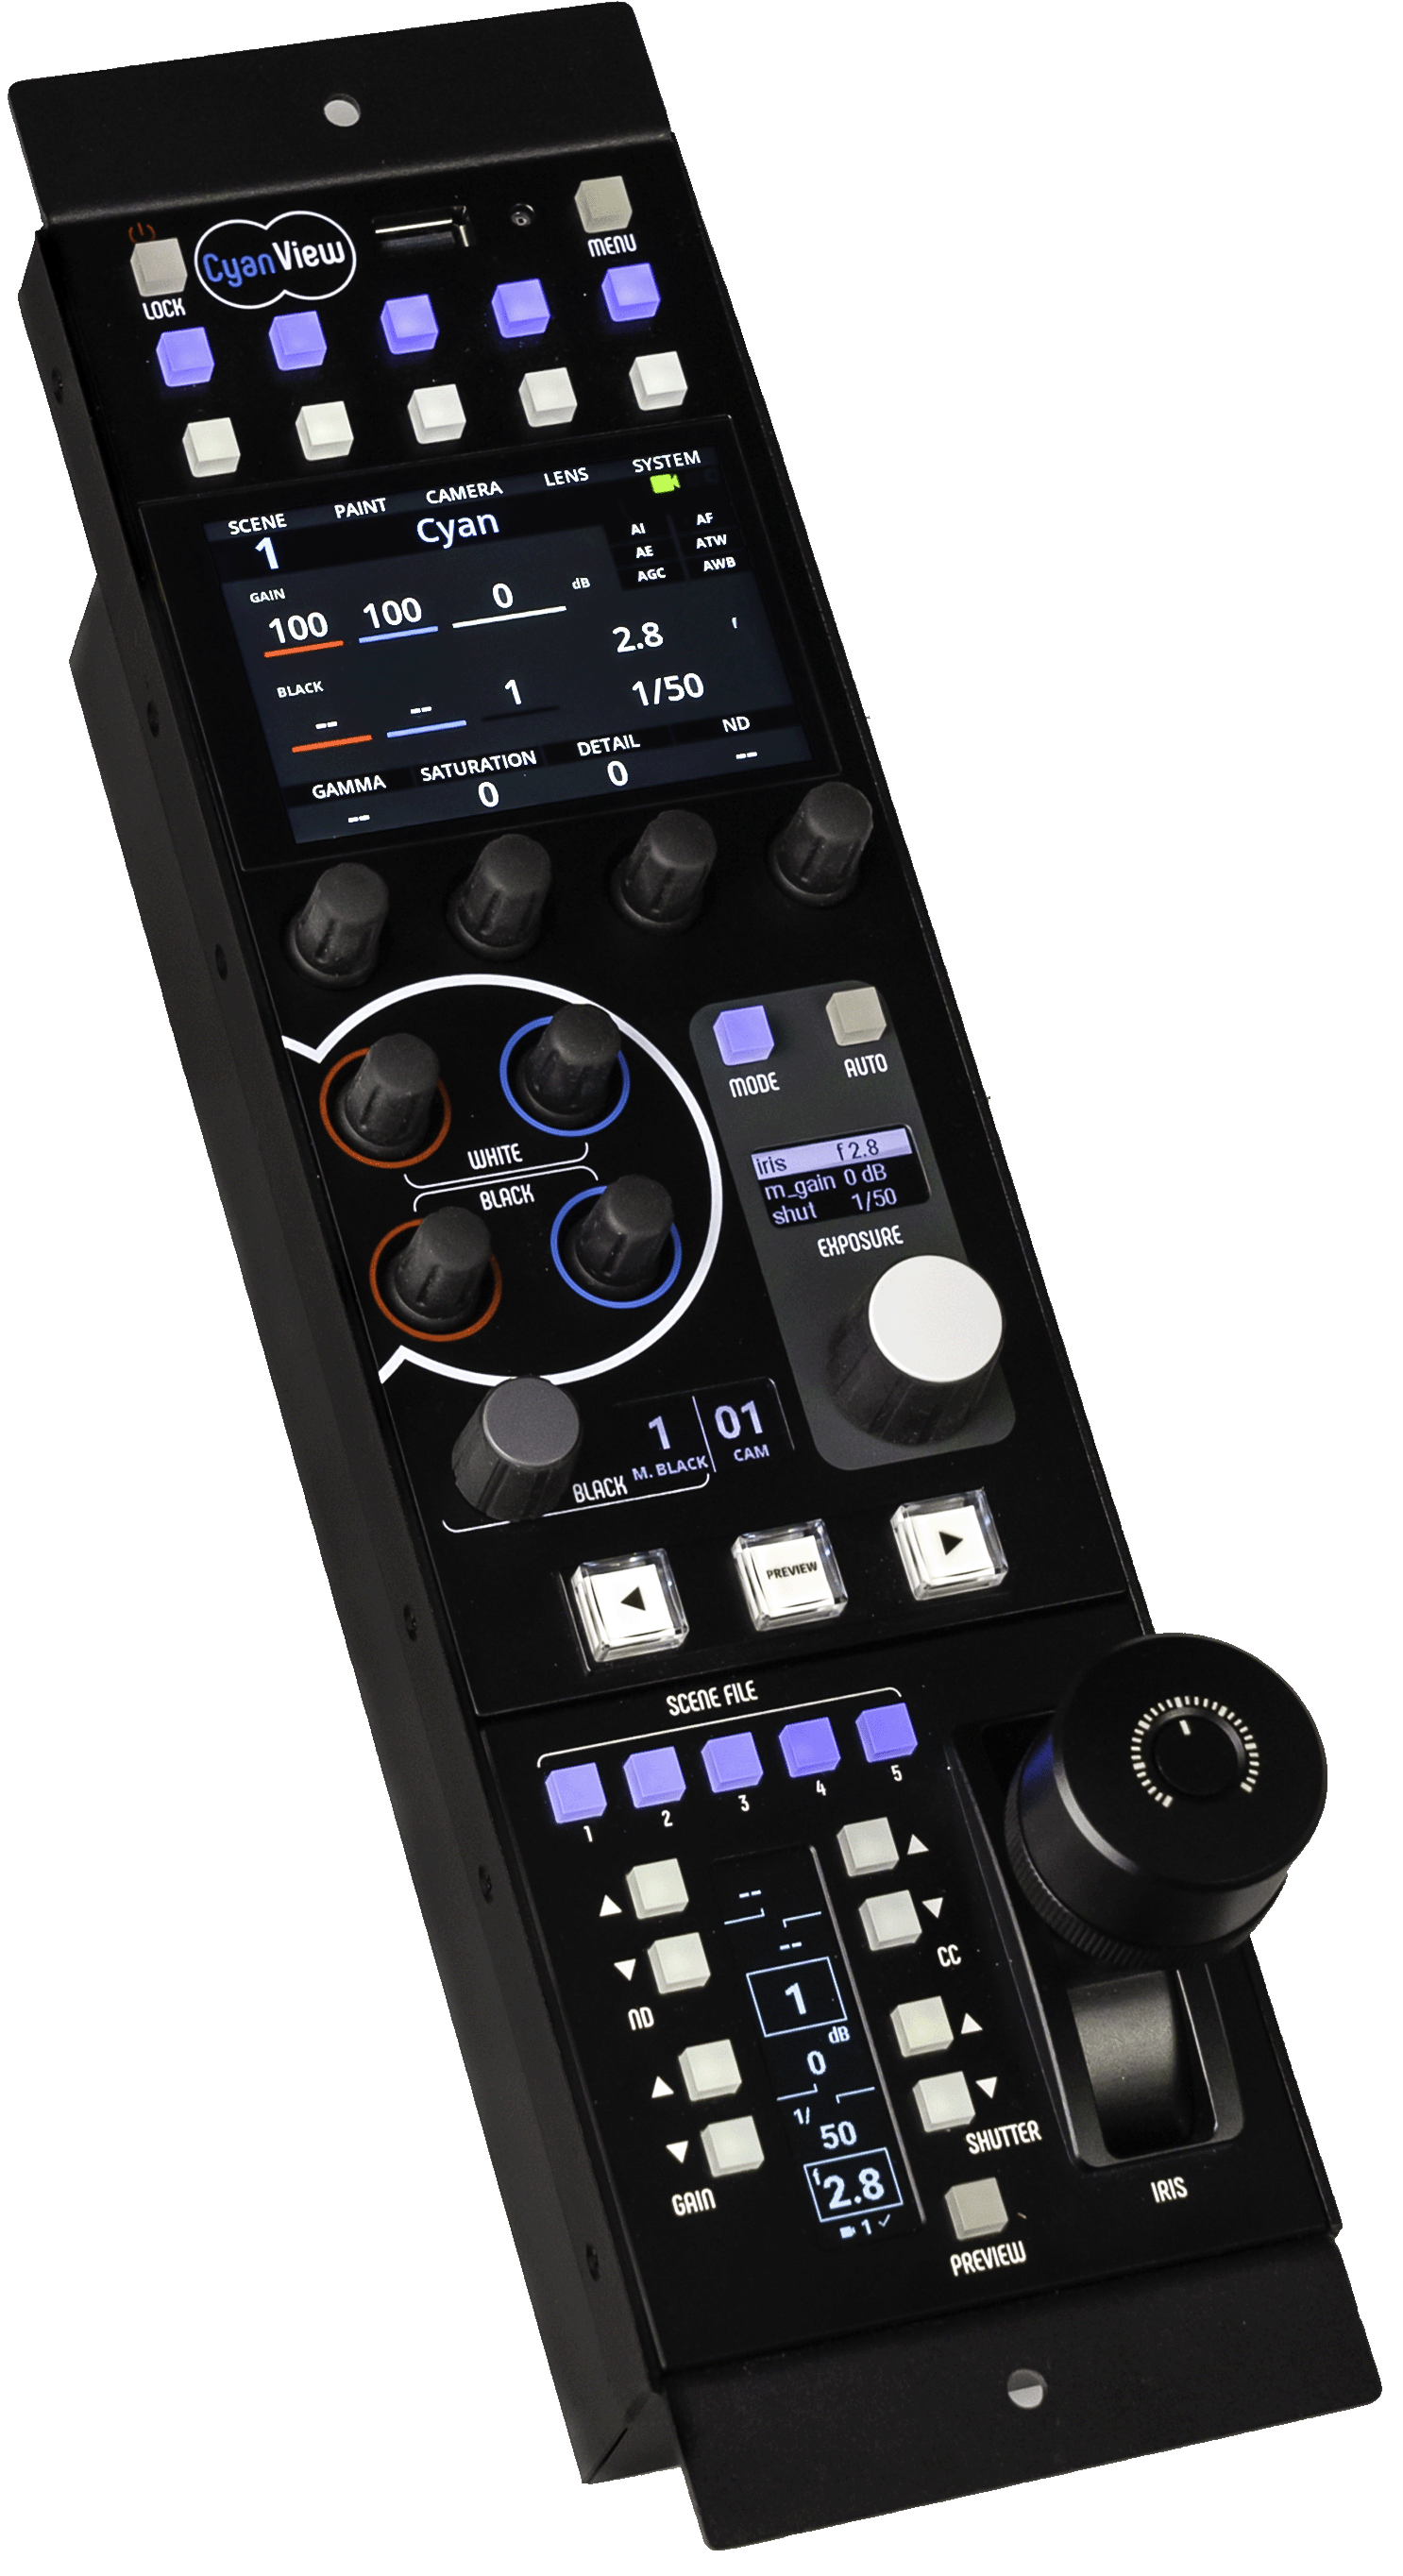
This page describes the configuration and usage of the joystick, which is an additional part of the RCP variant with Iris Joystick.
Configuration
Assign to RCP
The iris joystick must be linked to the RCP. To assign an iris joystick to an RCP, proceed this way :
- On the startup screen, press the button next to the gear icon (PREVIEW), and then select "Assign"
- On the assign menu, select the serial number of the RCP (in this case, 44-20 for RCP CY-RCP-44-20). To change the serial number, use the buttons ND UP/ ND DOWN and CC UP / CC DOWN.
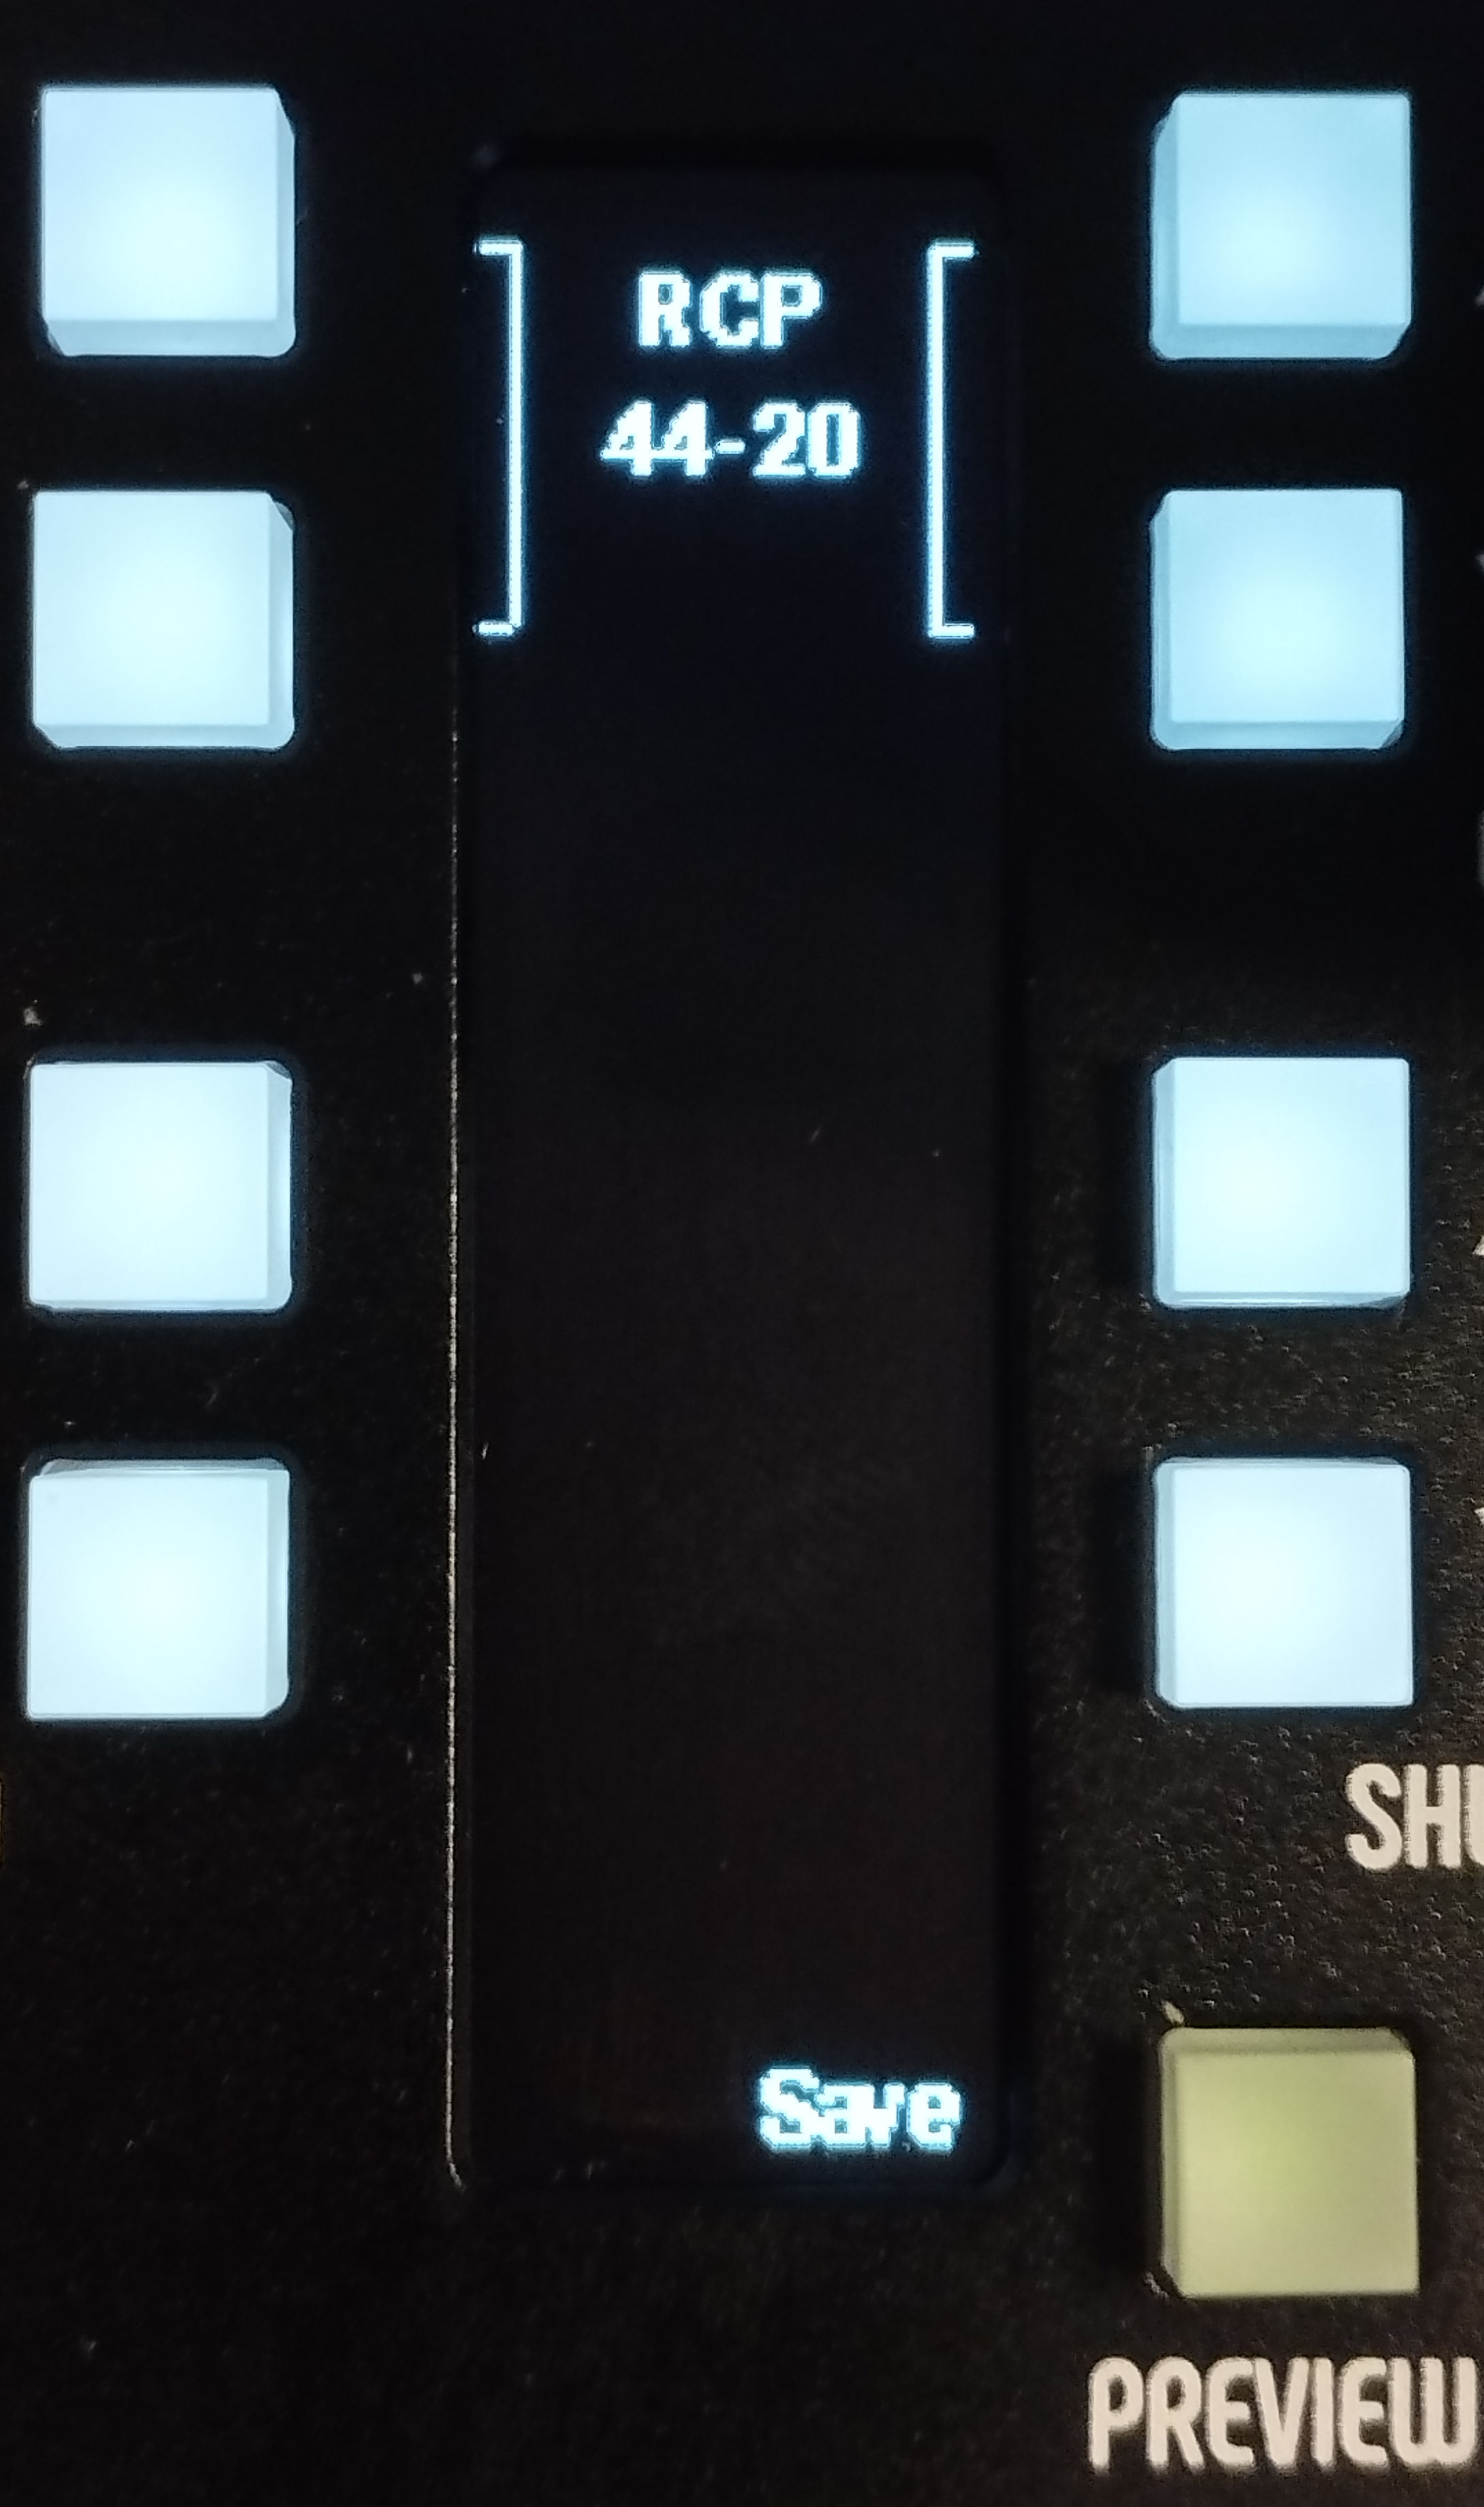
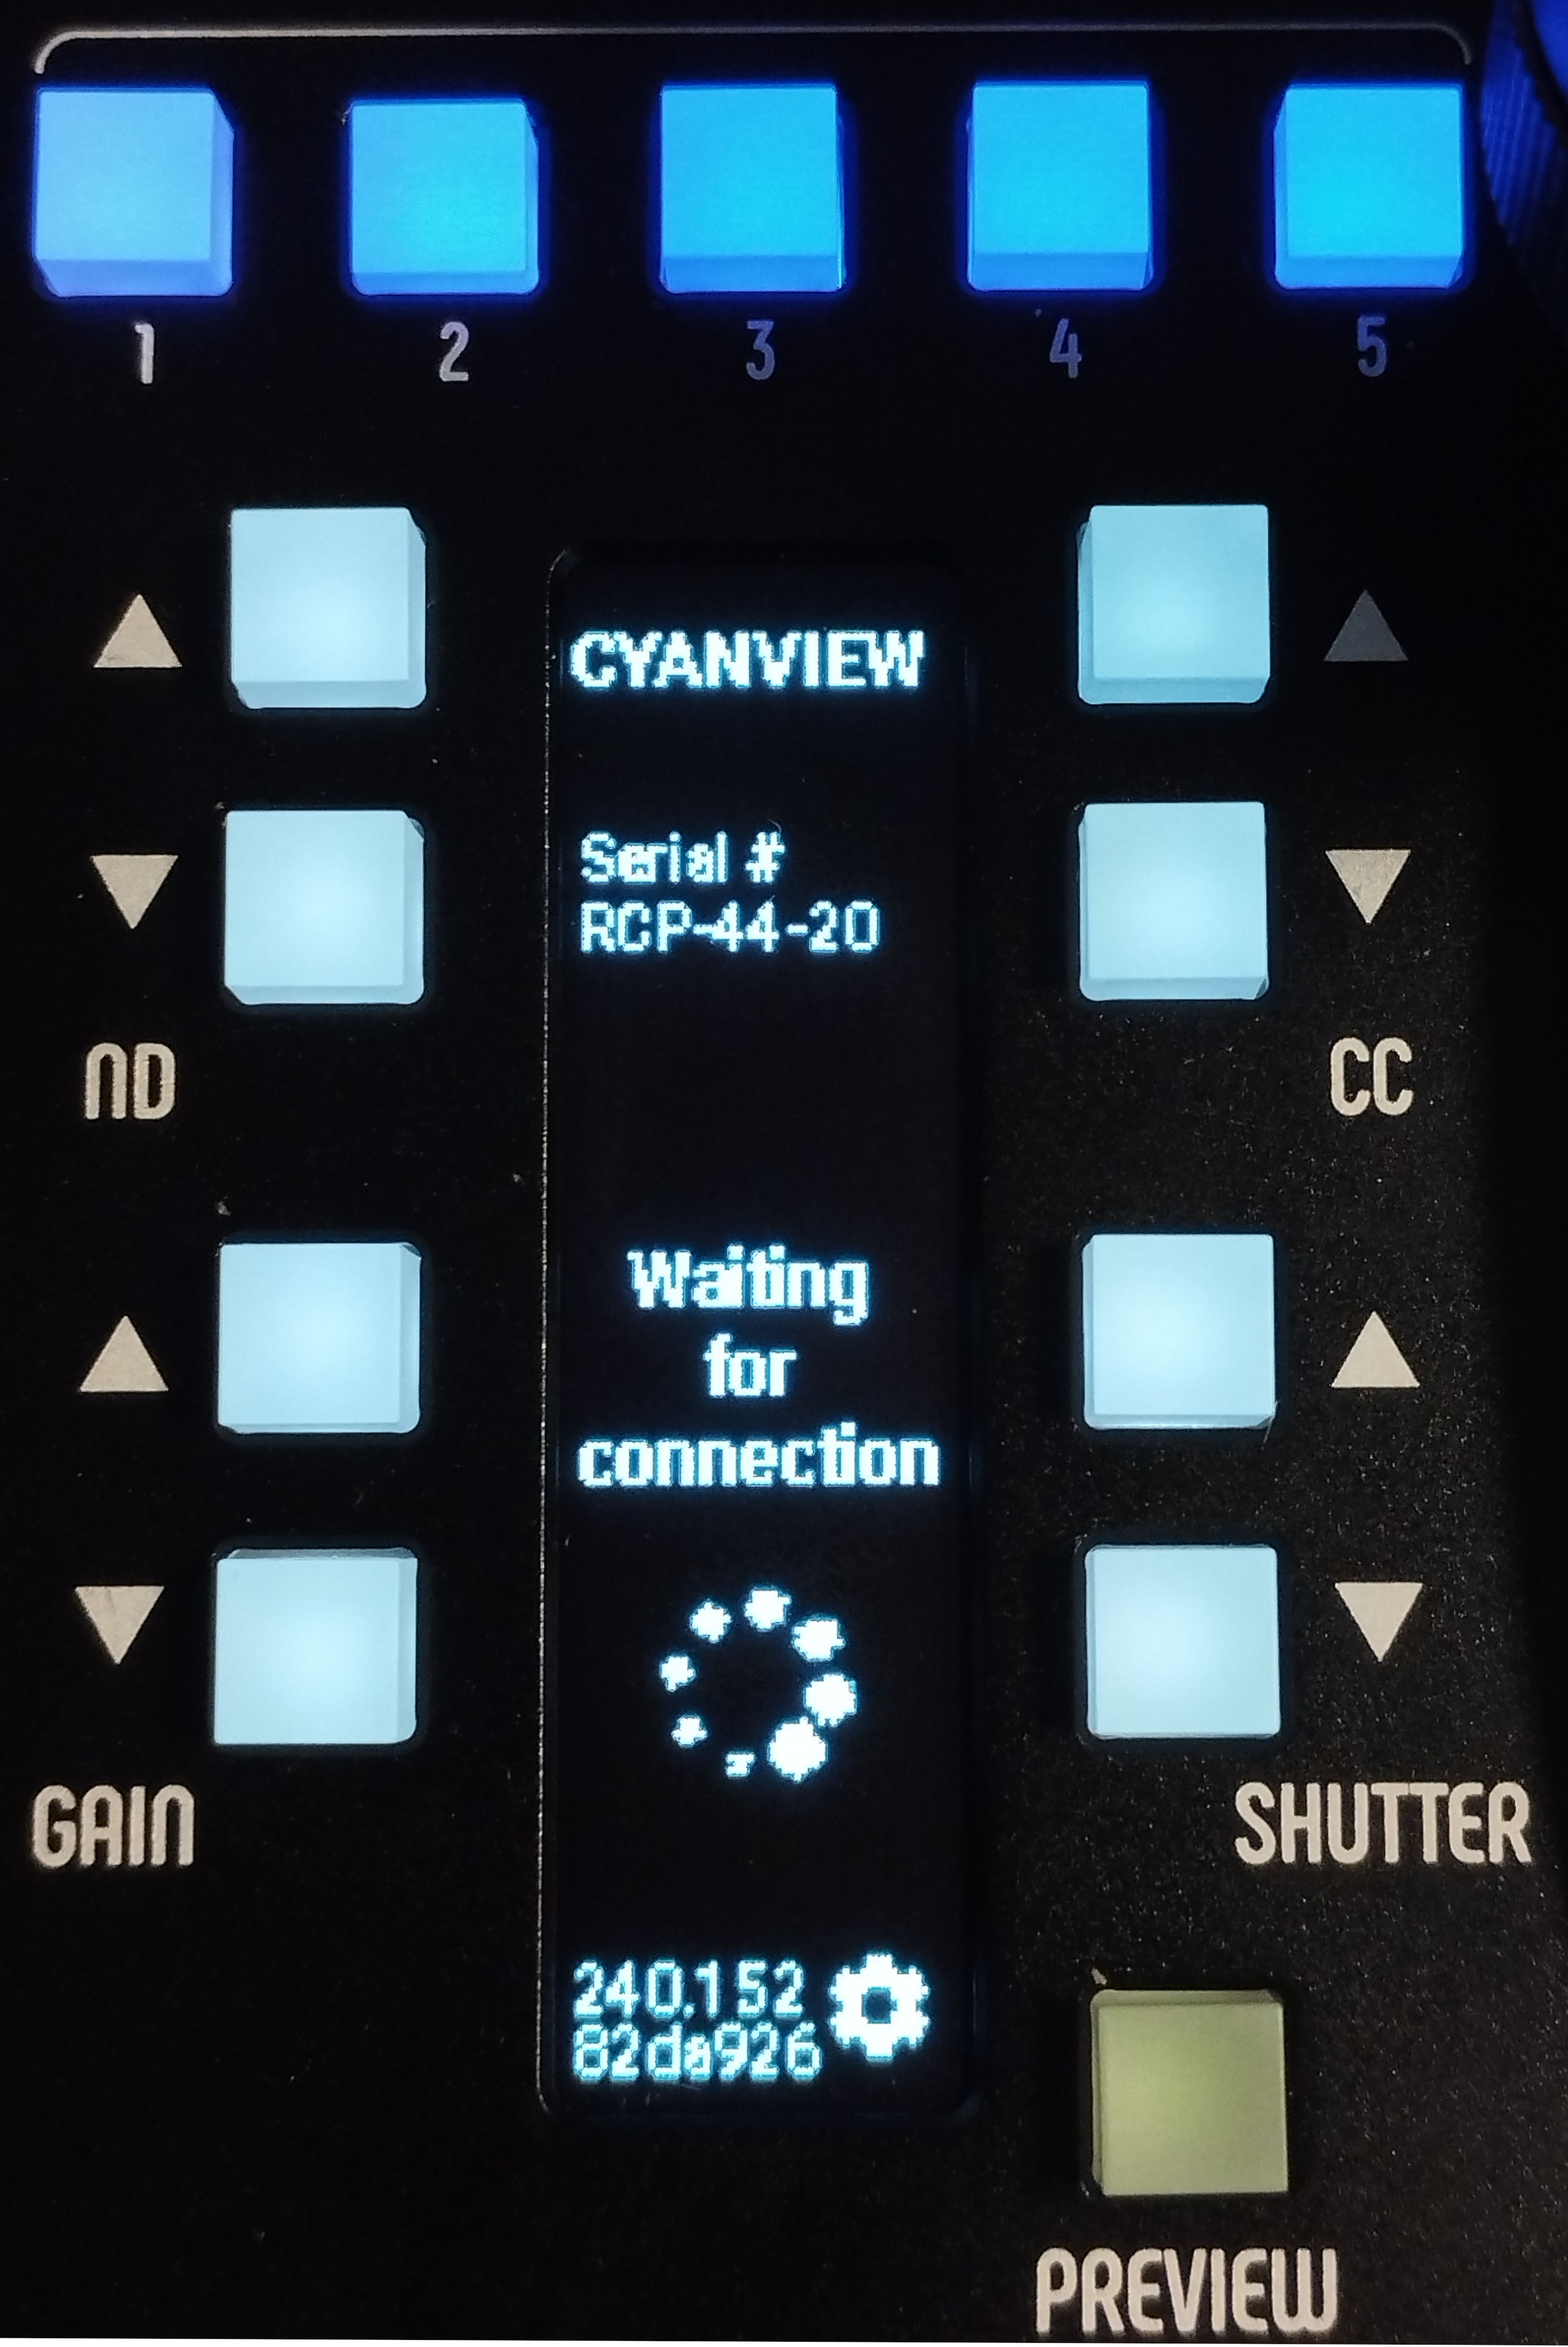
- Press "Save" button (PREVIEW). The Iris Joystick will reboot, and display "Serial# 44-20" in the startup screen.
Once the Iris Joystick is assigned to the RCP, the main screen will be displayed after a while.
Calibrate the Joystick
The joystick must be calibrated to work correctly. The goal of the calibration is to internally set and store the sensors' values for specific positions. The positions are :
- Iris Joystick opened (Joystick UP, without forcing the spring)
I open - Iris Joystick closed (Joystick DOWN, without forcing the spring)
I close - Maximum black value (black ring turned clockwise to its mechanical stop)
Black max - Minimum black value (black ring turned anti-clockwise to its mechanical stop)
Black min - Iris Joystick pressed (Iris Joystick shaft pressed)
J pressed - Iris Joystick released (Iris Joystick shaft not pressed)
J released
It is important to perform this calibration correctly to ensure the correct behaviour of the joystick.
The calibration menu can be accessed in two different ways :
- On the startup screen, press the button next to the GEAR icon (PREVIEW), and then select "Calibrate"
- On the main screen, hold the Iris Joystick and then press the PREVIEW button to enter the configuration screen, then the GEAR icon (SHUTTER DOWN), and finally select "Calibrate"
The calibration menu looks like this :
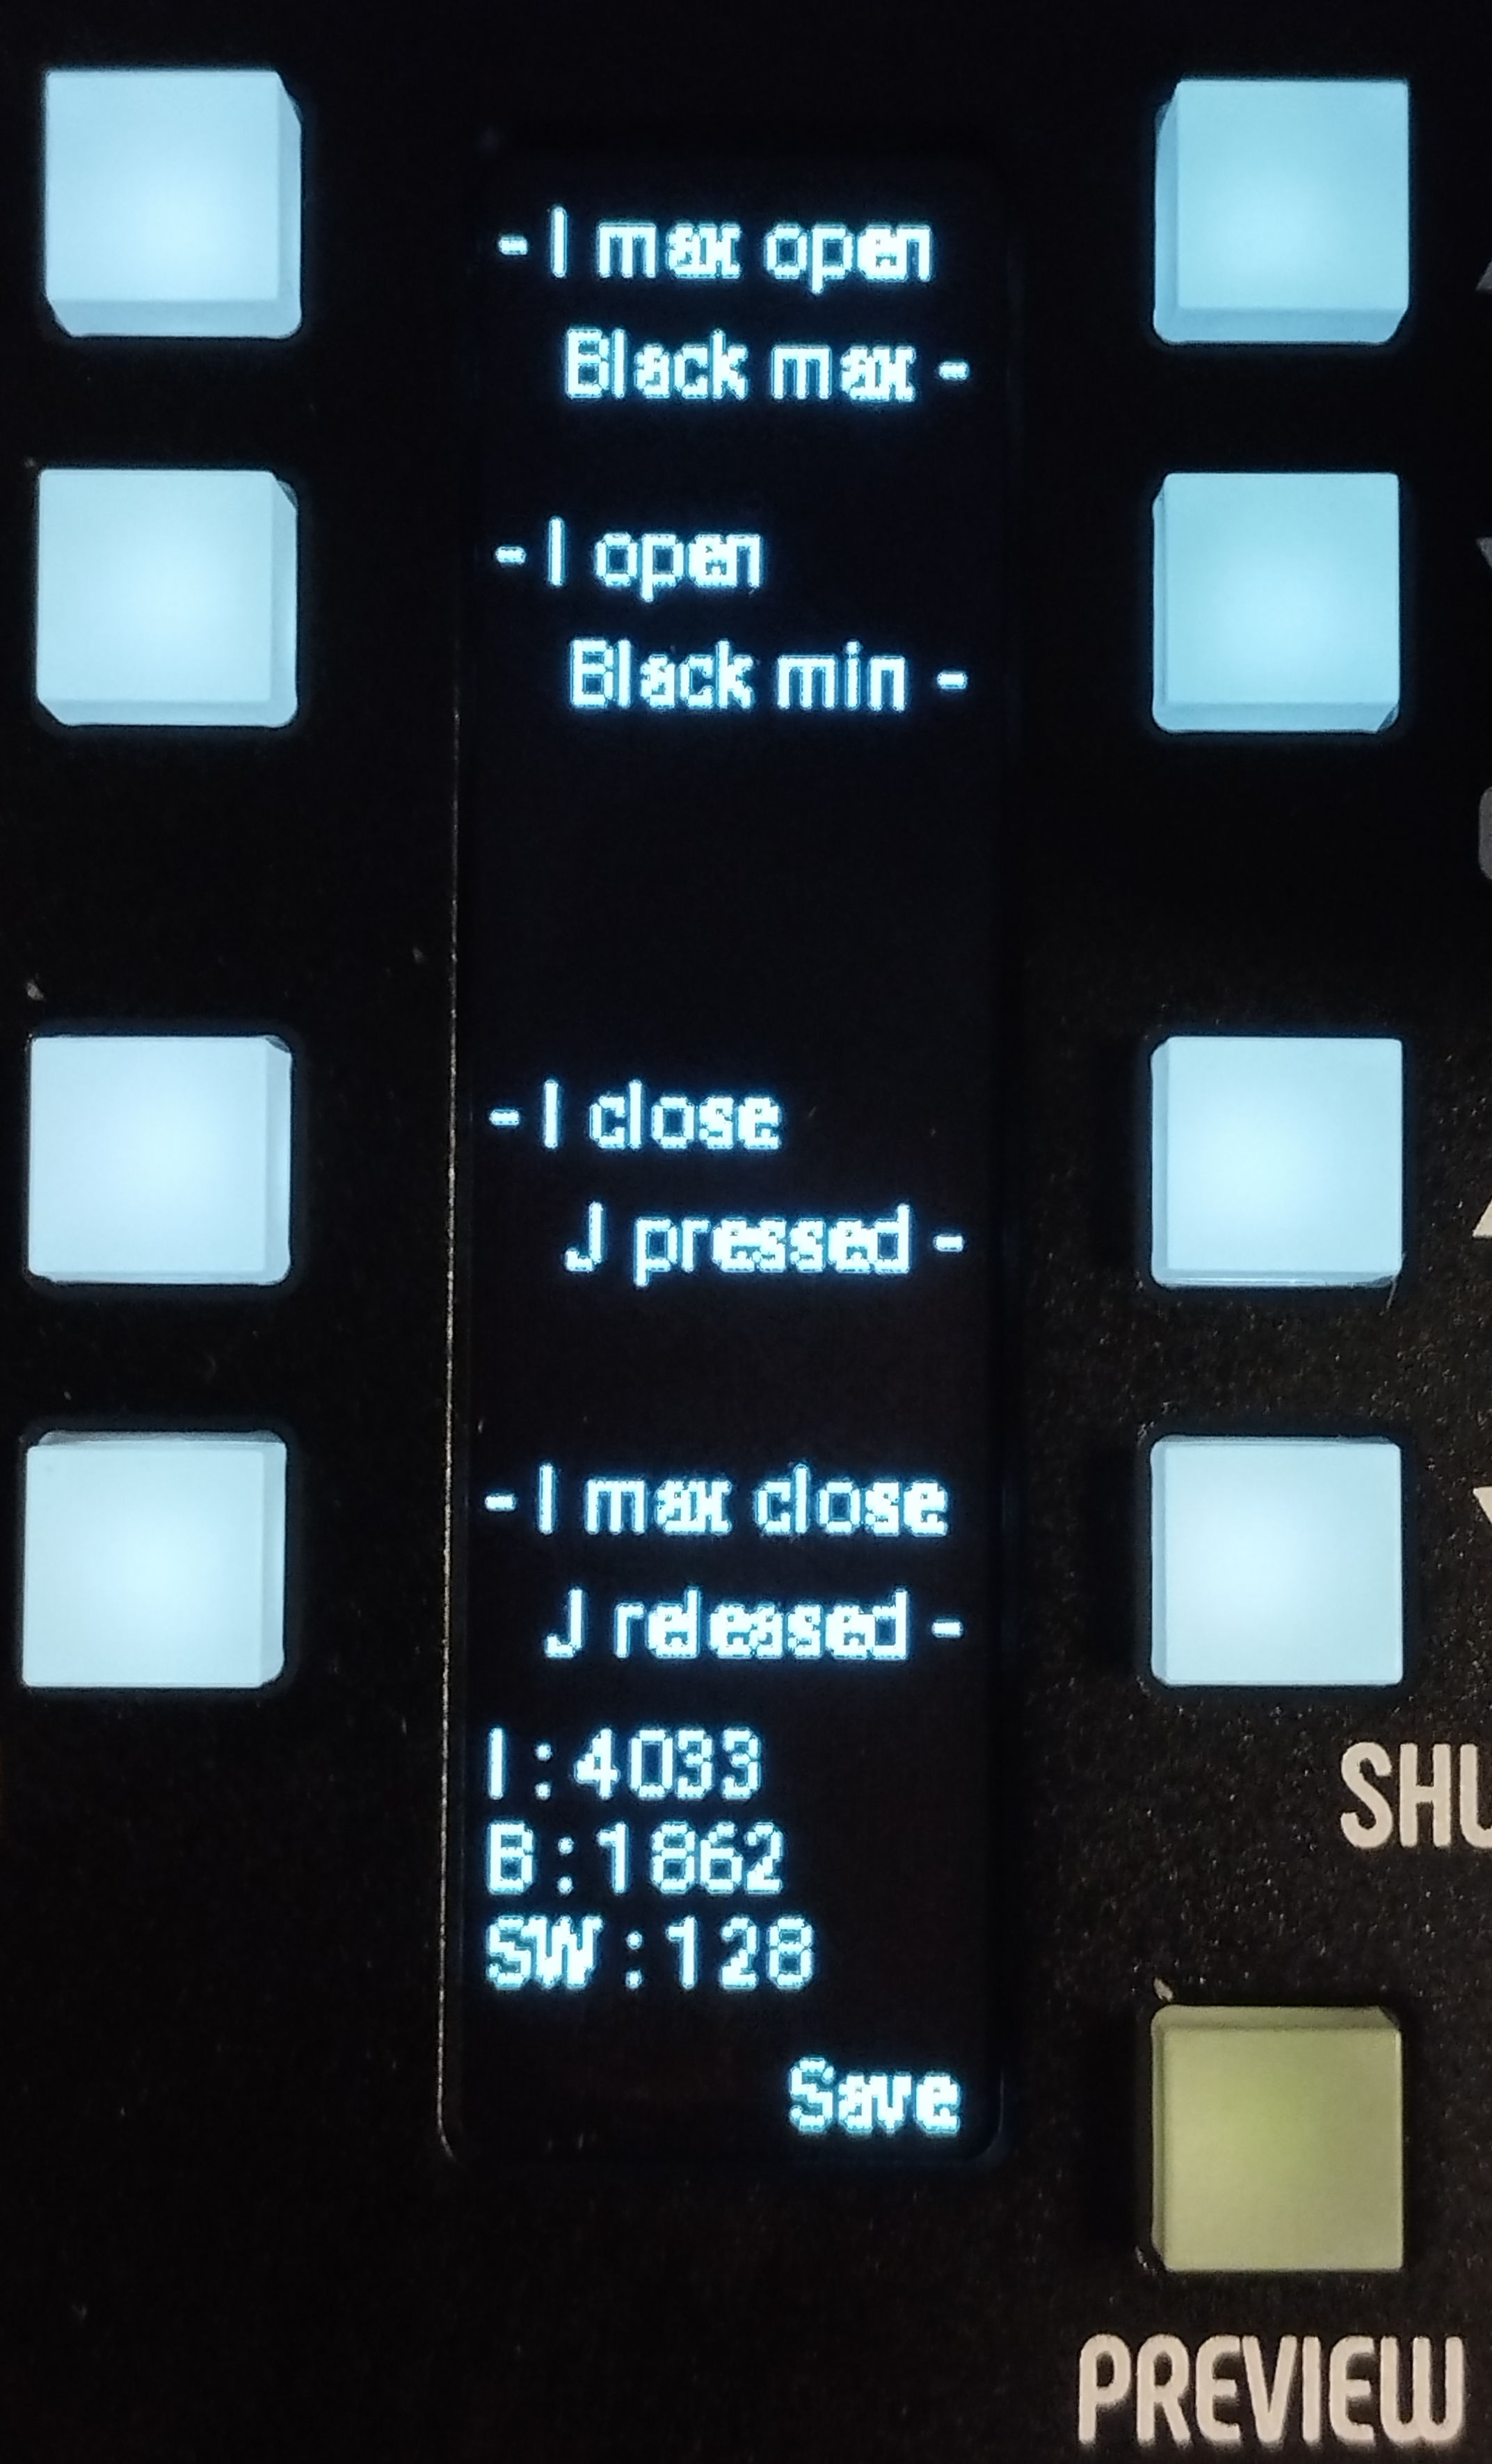
To perform a calibration :
- Place the Joystick, the black ring, or the Joystick shaft in the desired position, as described above, and then validate the position with the button next to the label.
- When the position is saved, the button is highlighted.
- In case of doubt or wrong position, the buttons can be pressed again. Only the last value will be saved.
At the bottom of the display, the following technical information are displayed :
I : 4033: This value represents the raw sensor value for the Iris Joystick.B : 1862: This value represents the raw sensor value for the black ringSW : 128: This value represents the raw sensor value for the joystick shaft
The values must change when the Iris Joystick, the black ring, or the Iris Joystick shaft are moved. If one of the values stay static regardless the mechanical positions, it could indicate a hardware problem.
Once the calibration is done, press the "Save" button (PREVIEW). The Iris Joystick will reboot and load the new calibration data.
Note : The calibration is saved internally. It is not necessary to perform the calibration each time the joystick boots. If the behaviour seems not correct, a calibration can be performed anytime to try to fix it.
Set the limits
This allows you to force the iris values and increase the resolution of the shaft.
Usage
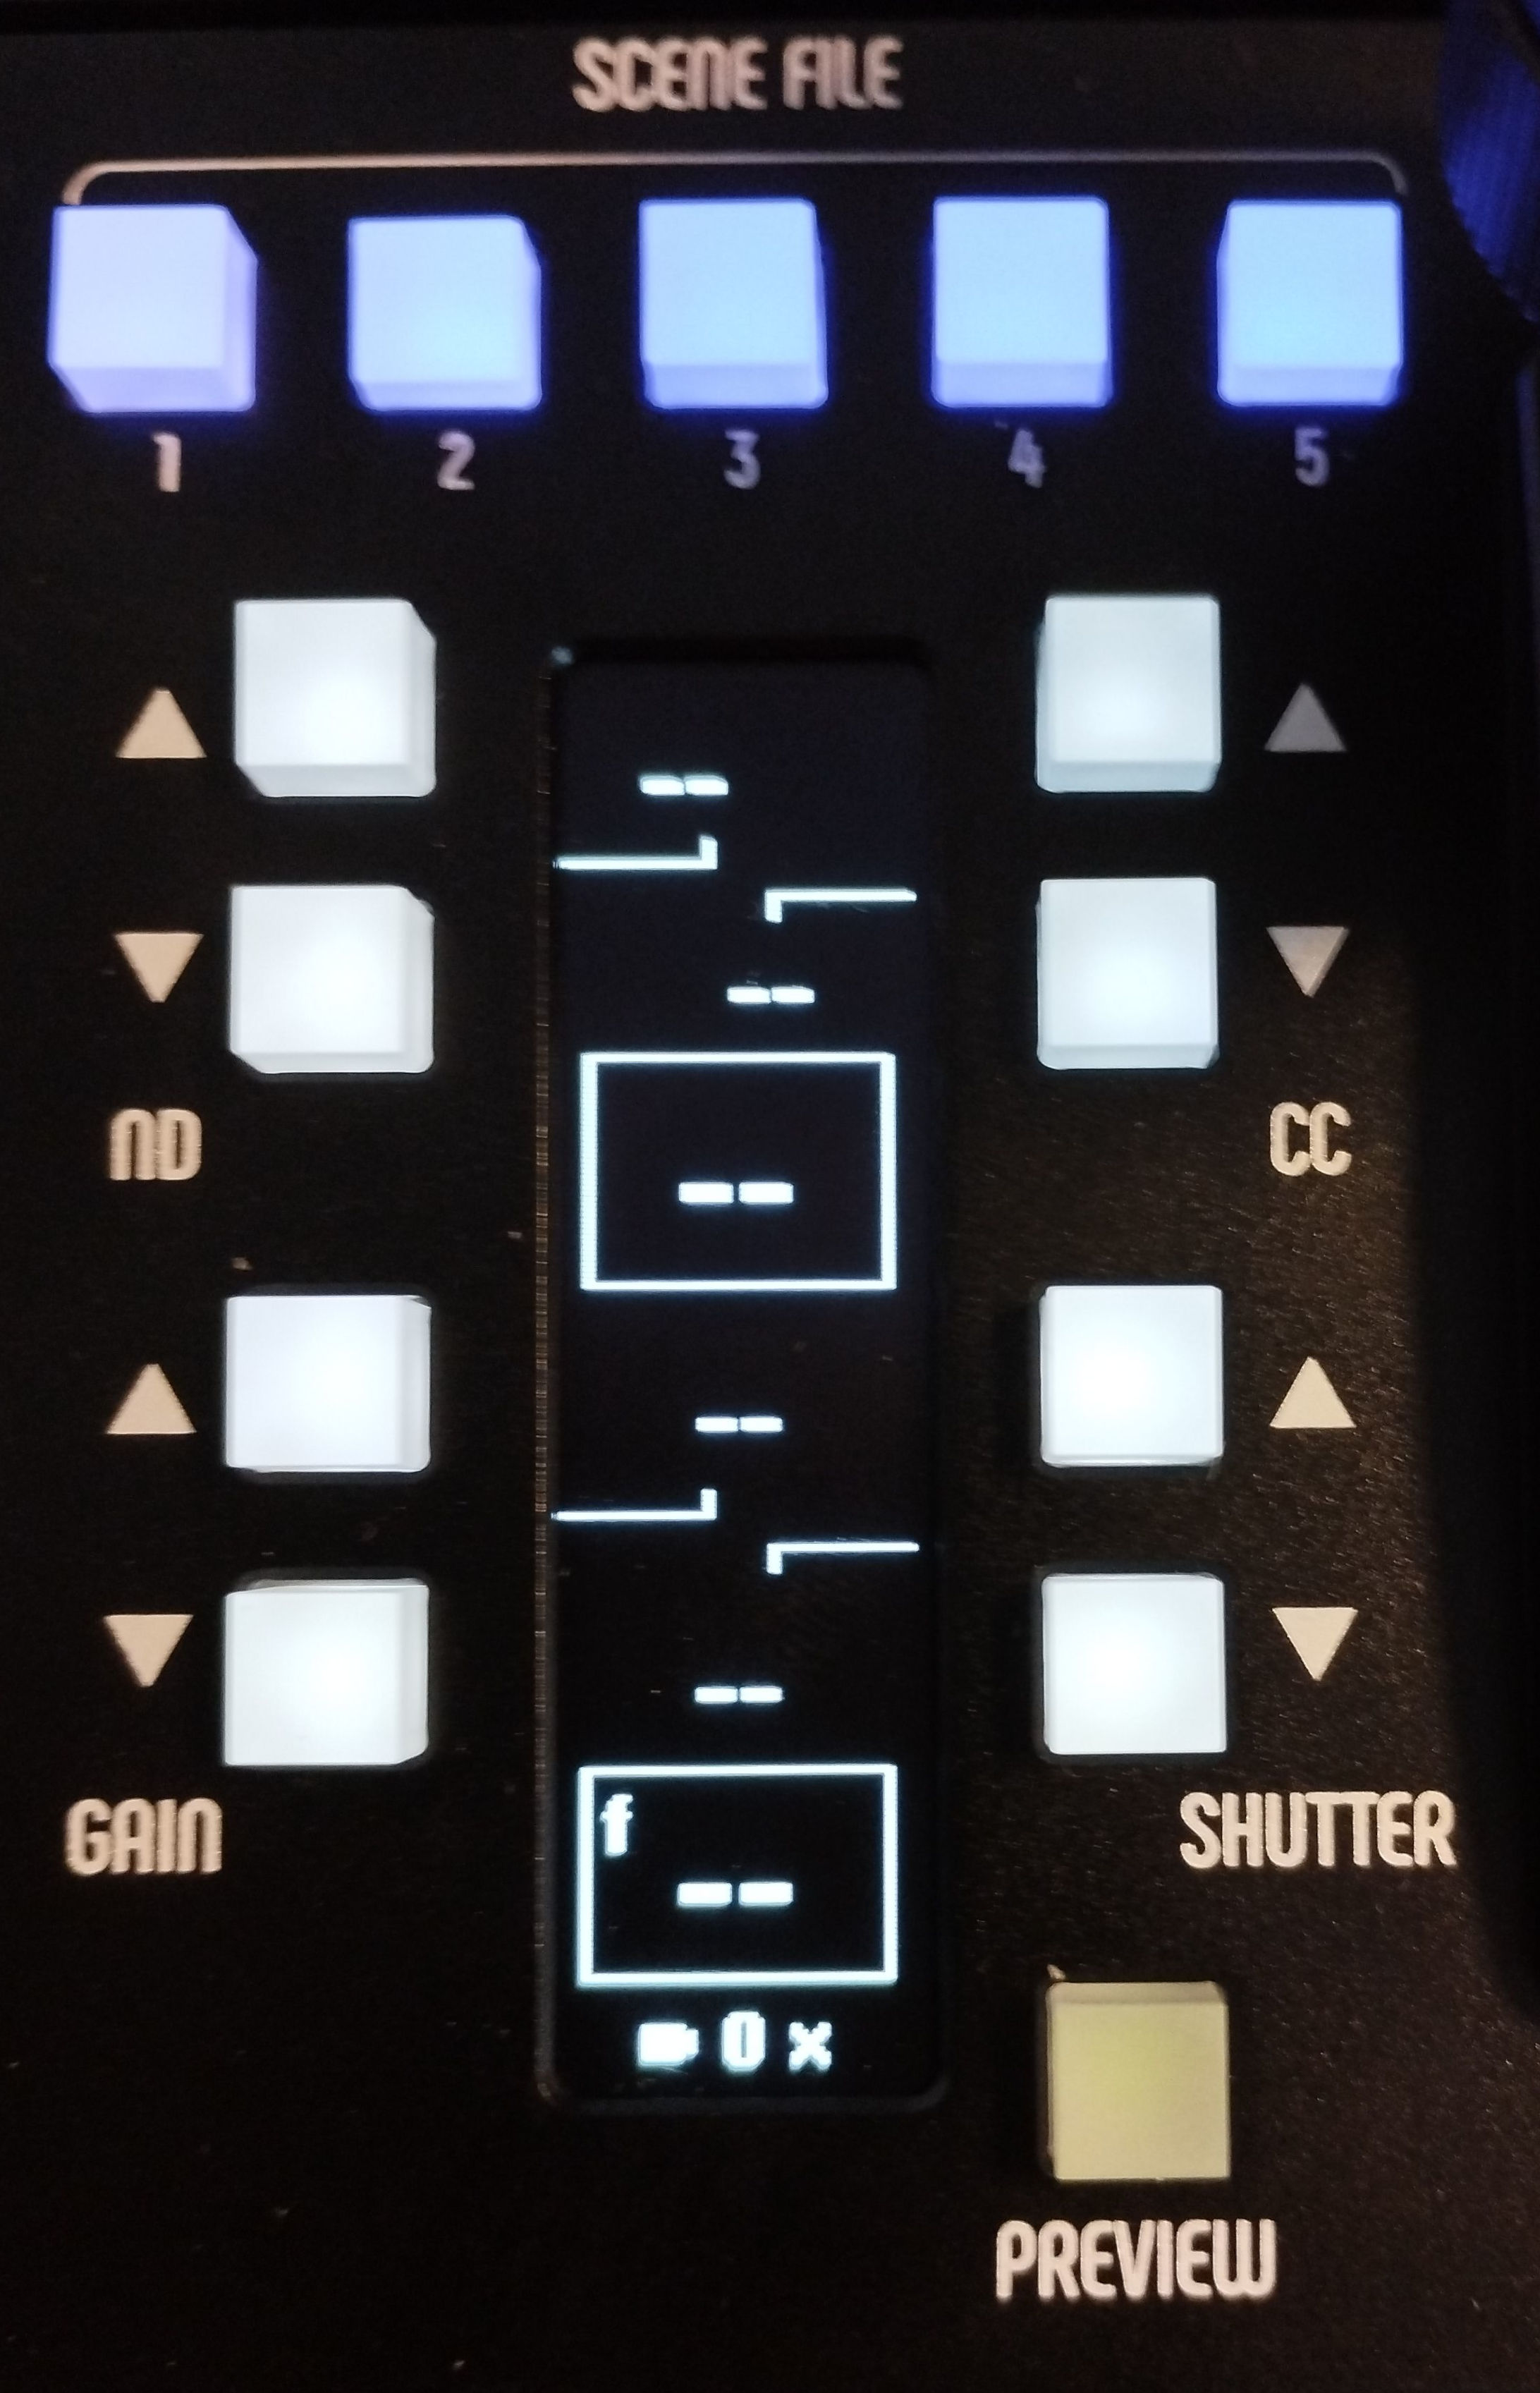
Main screen
The default screen allows to show and control the following parameters :
- Iris
- Black
- ND
- CC
- Shutter
- Gain
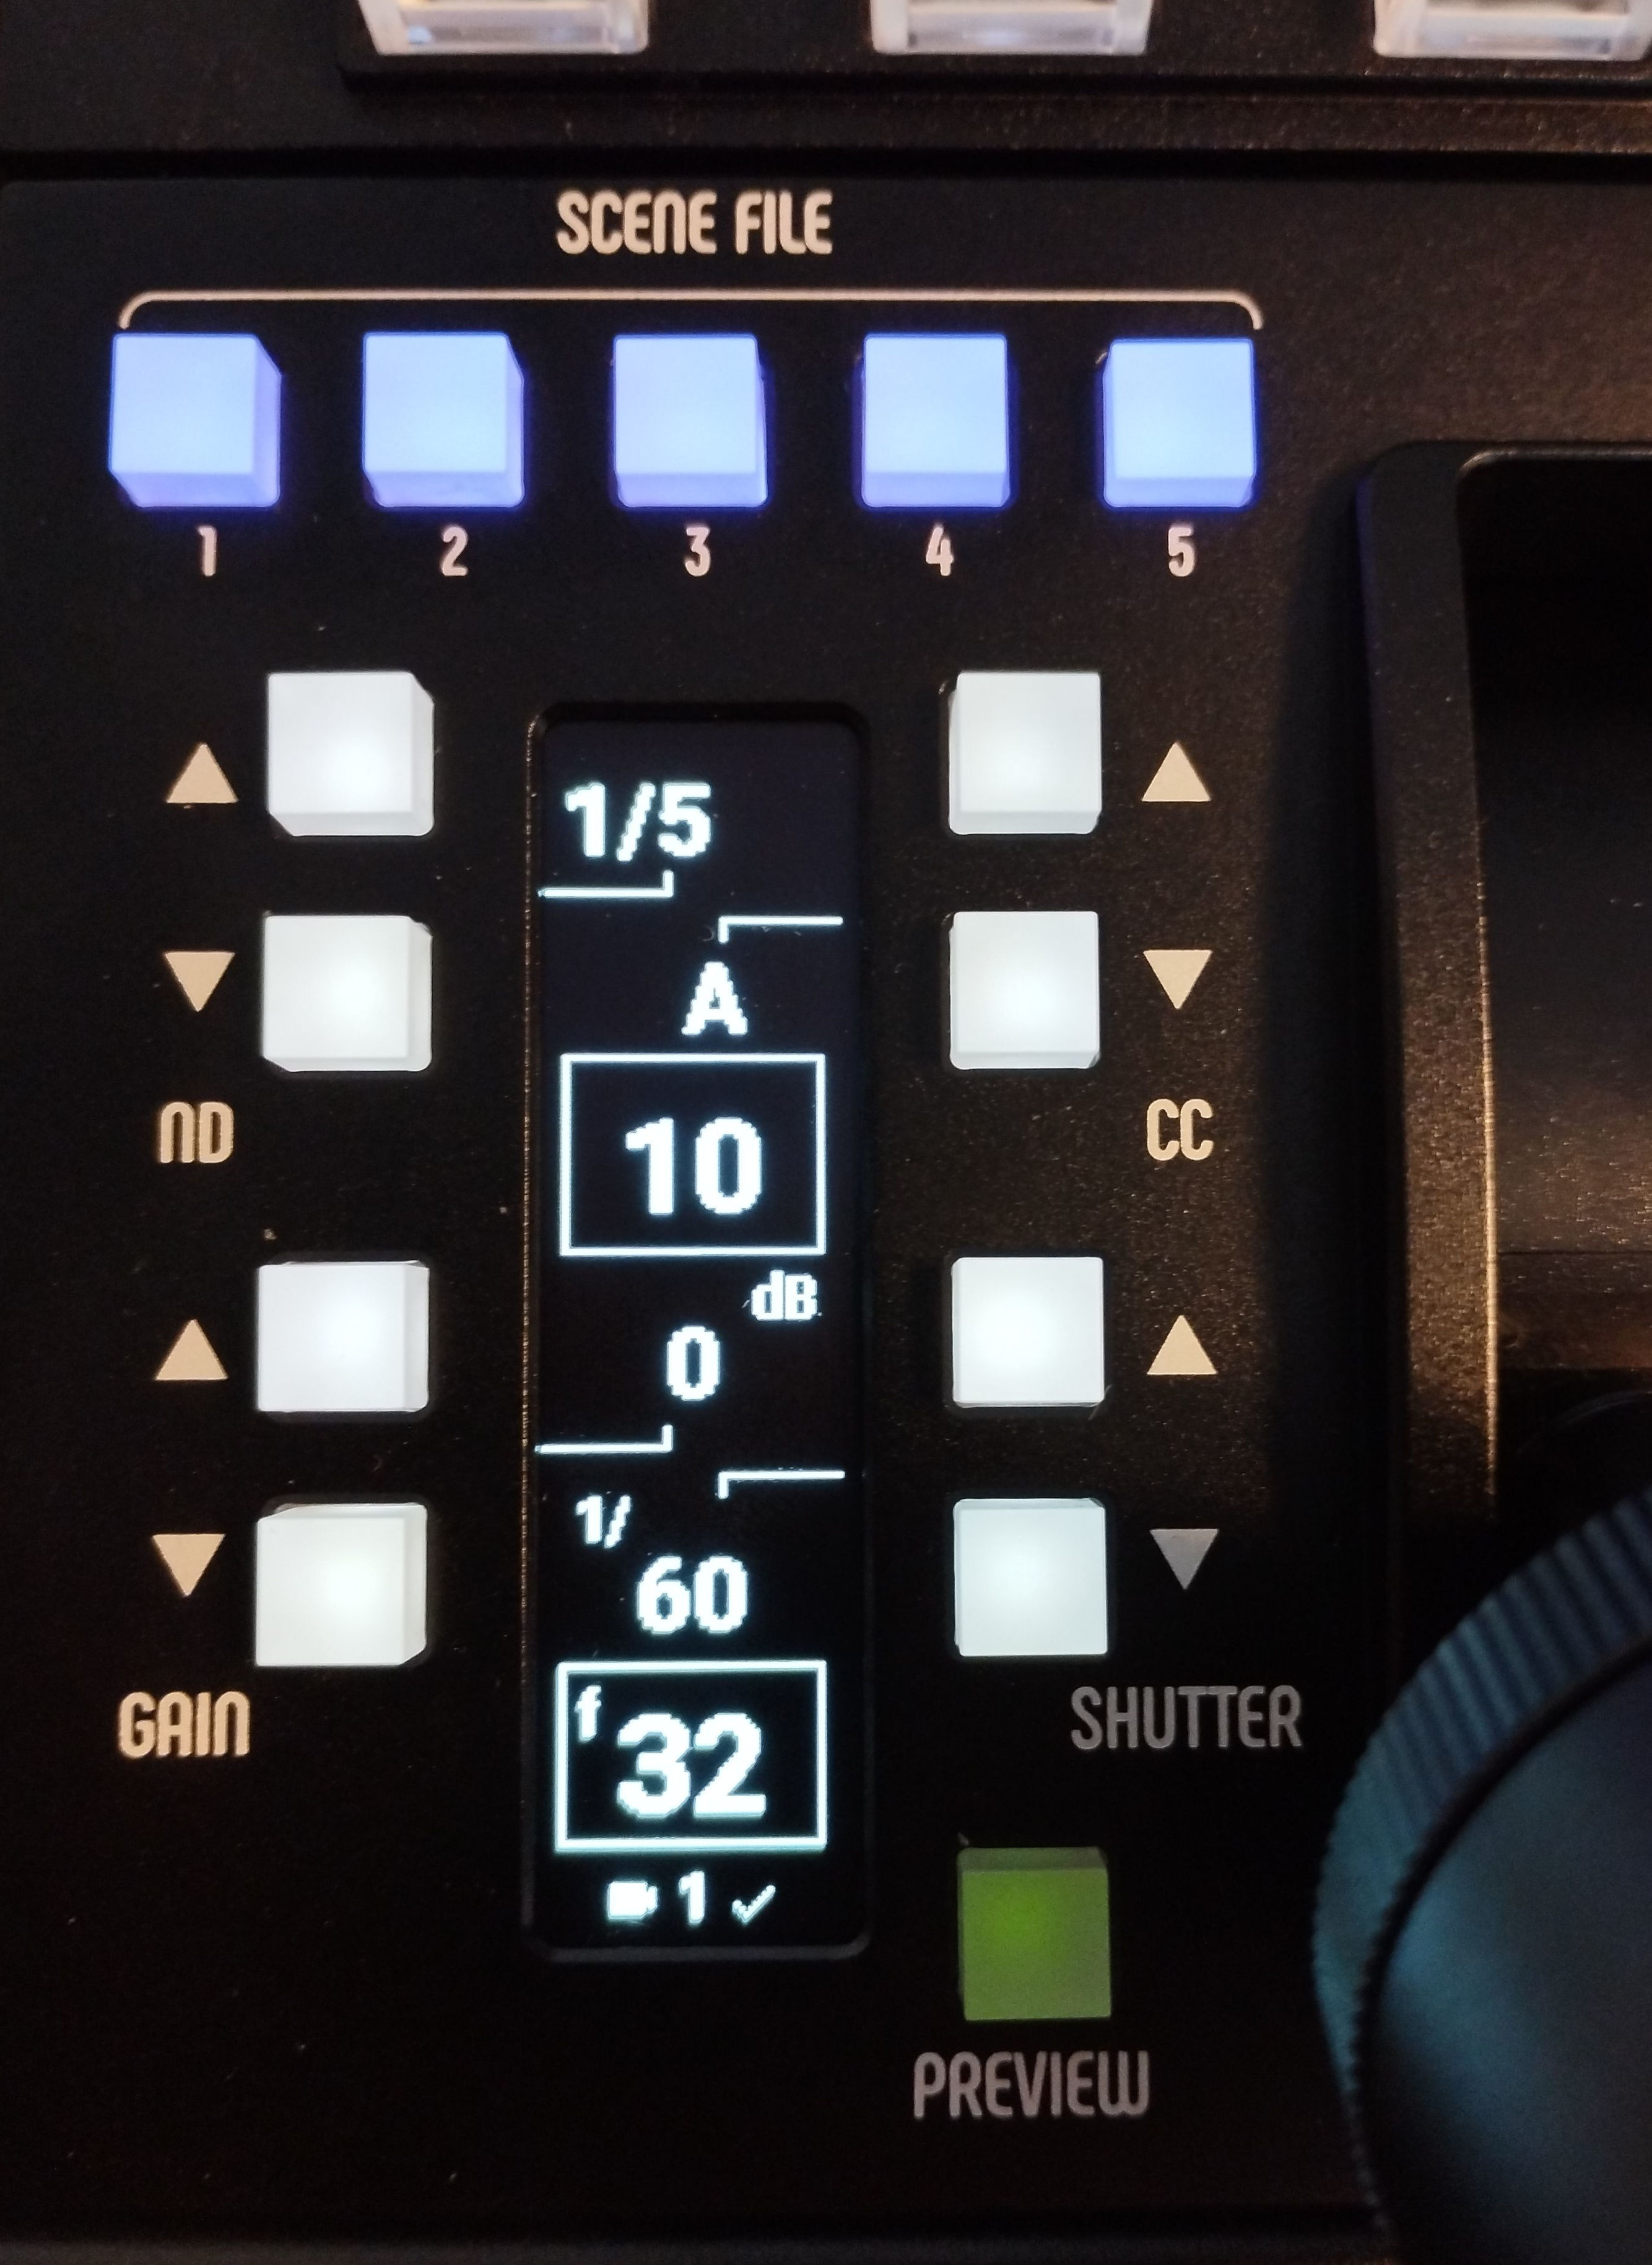
At the bottom of the display, the following information are given :
- The camera number (in this case, camera 1) is displayed.
- A tick mark or a cross that indicates the camera status (online / offline)
- A lock when the iris joystick is locked on a particular camera (see configuration screen)
The joystick button acts as a preview. It has the same behaviour as the green PREVIEW button.
When the PREVIEW button (green button) is held, the joystick and black ring are disabled. This allows to mechanically place the joystick or the ring without changing the value on the camera.
The five blue buttons at the top of the joystick part can be used to recall scene files (scenes 1 to 5). Scene files can't be saved from here. They must be saved from the RCP menu.
Configuration screen
A configuration screen can be accessed by holding the Iris Joystick shaft and then pressing the preview button together.
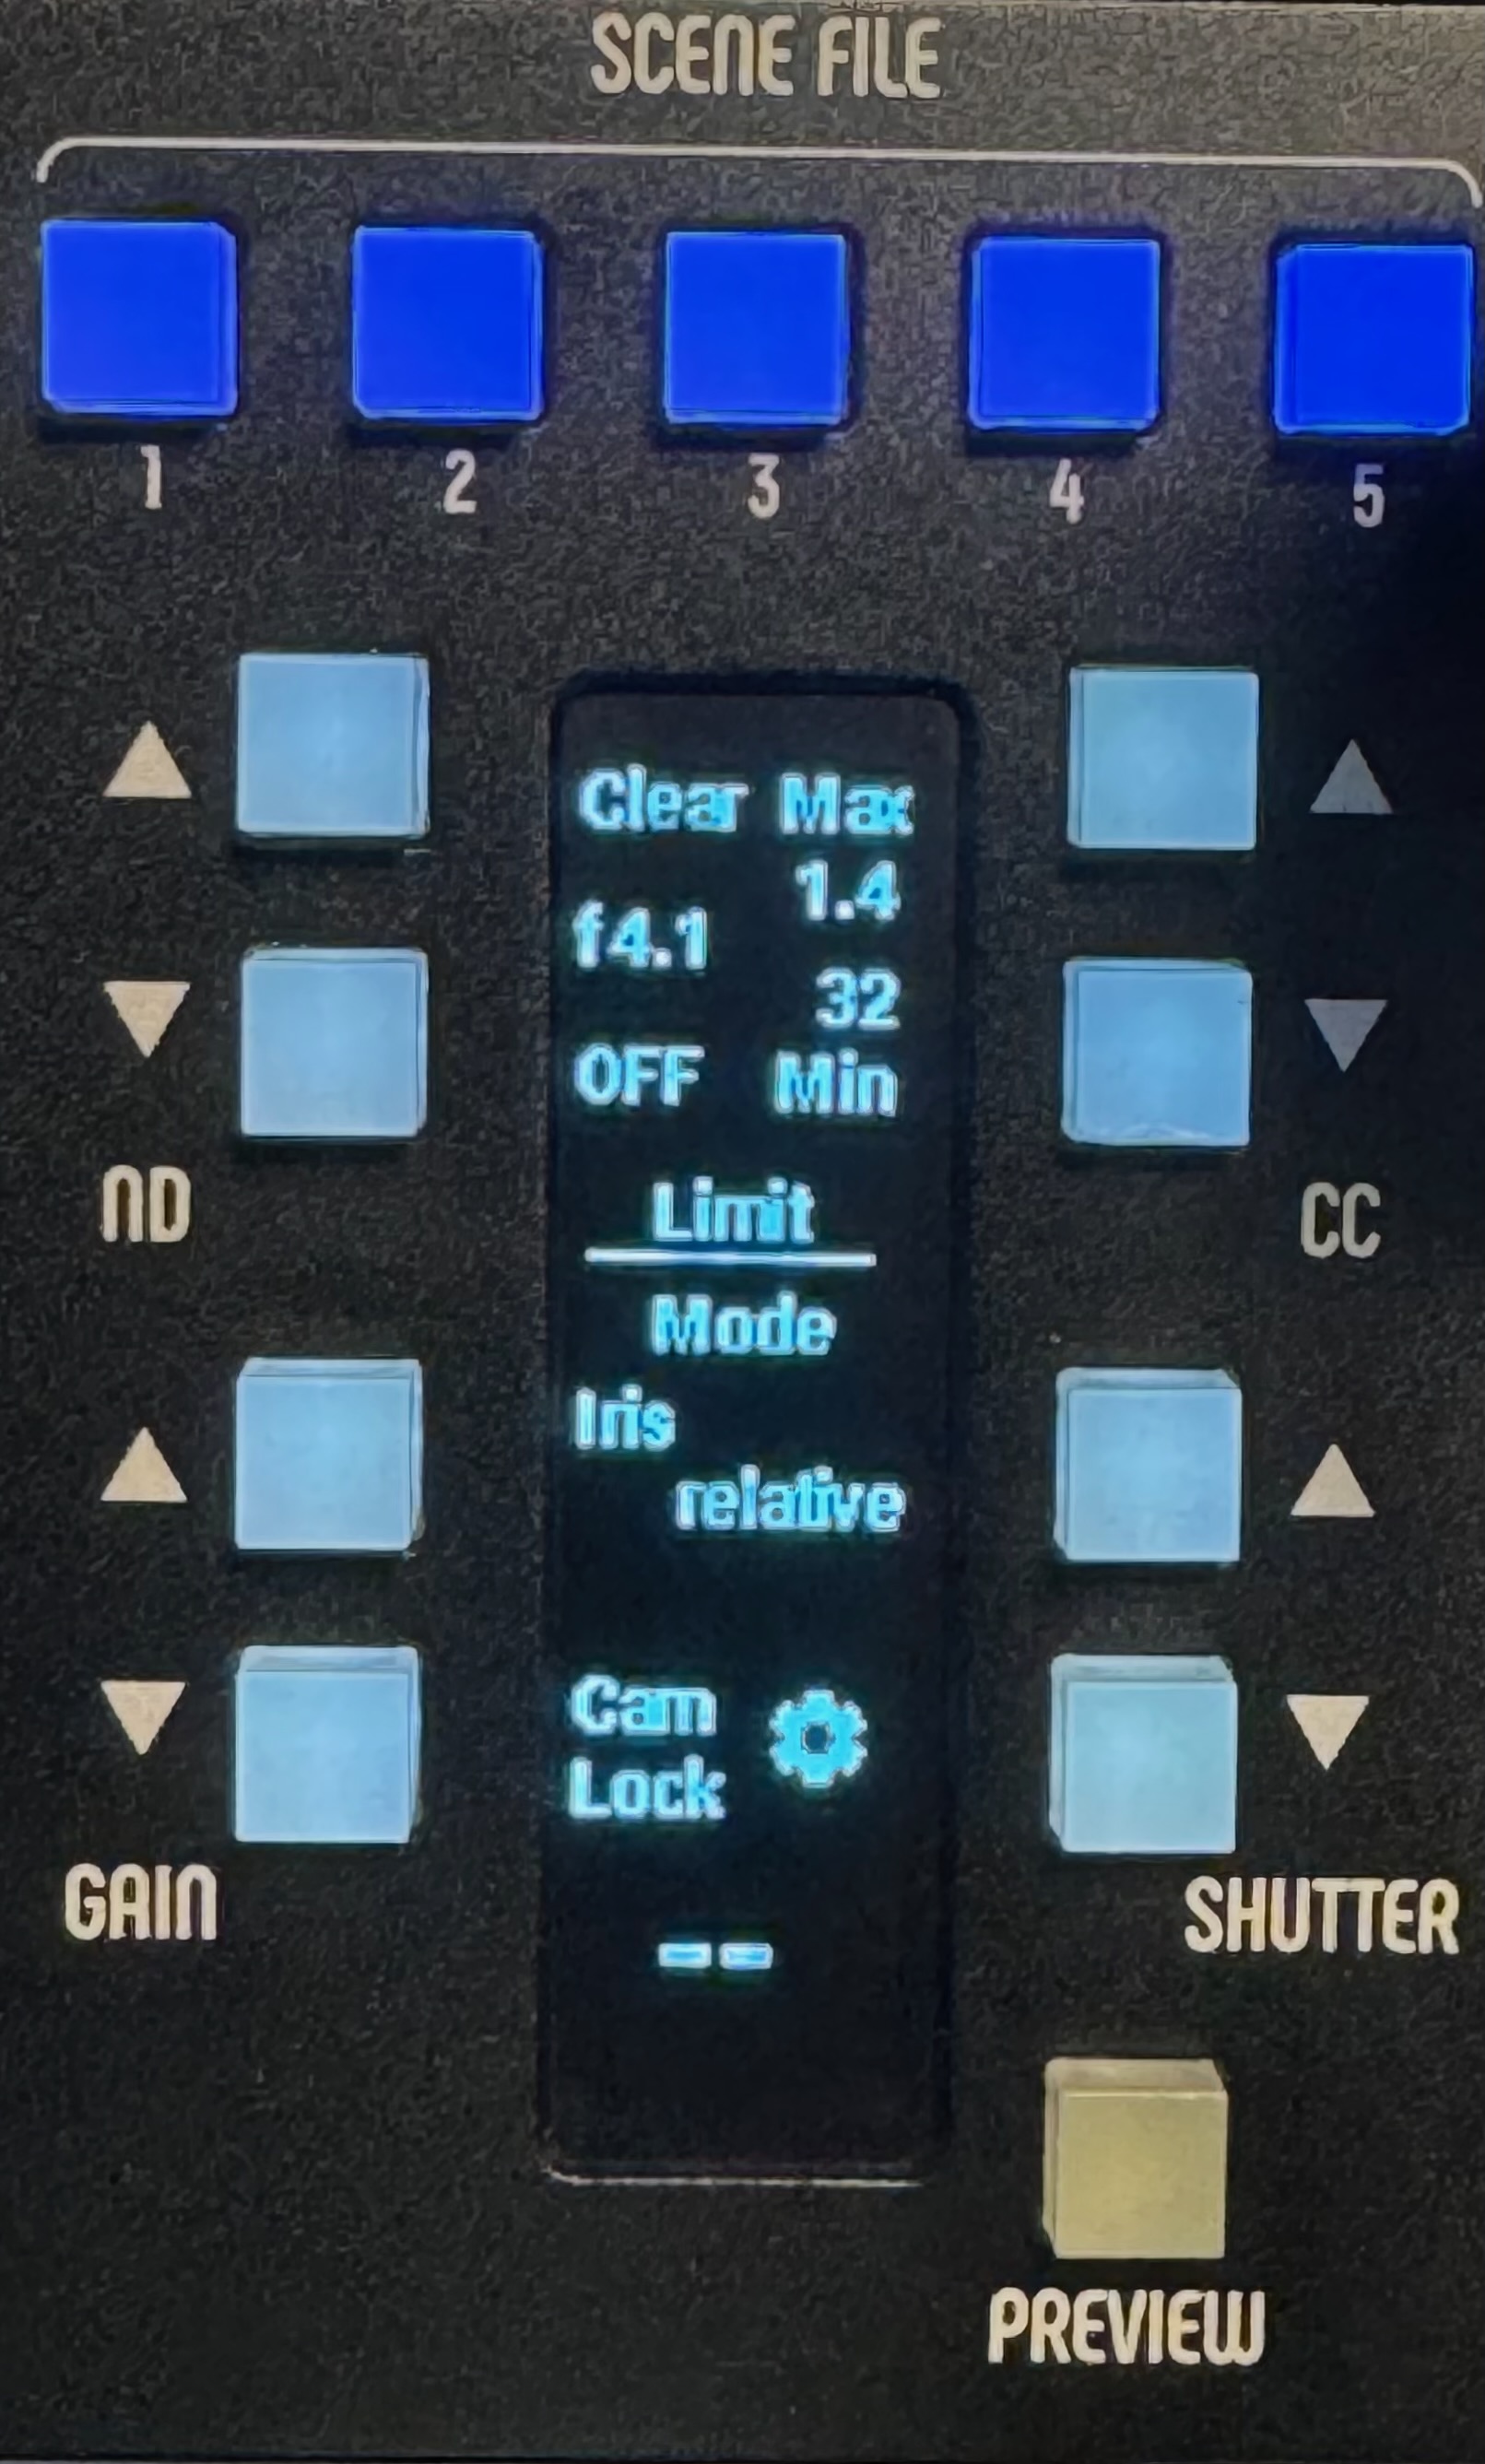
This configuration menu allows to change the following parameters :
- Set the joystick limits (Note : at that time, this function is not fully implemented and may be not functional on every camera model. If it is the case, feel free to report it to the support team).
- Clear : Clear the limits
- OFF/ON : Disable/Enable the hard limits. When enabled, the joystick works withing the limits. When disabled, the joystick works in a range (defined by the limits), but it can be outside of the defined range (with the springs/push).
- MAX : Set the maximum value (move the joystick to reach the desired value, and then set the value by pressing the Max button)
- MIN : Set the minimal value (move the joystick to reach the desired value, and then set the value by pressing the Min button)
Black 1X / 2X : When black is set to 2X, the range will be divided by two, allowing a higher precision. The parameter is toggled each time the button is pressed.This feature had been moved to the RCP main screen, see RCP Settings : Sensitivity.- Iris / ND / Shutter / Variable Gain: select the function assigned to the joystick lever, which by default is Iris. For example, for cameras that have continuous ND filters, the configuration can be set to ND. The joystick will then control the variable ND for exposure instead of the iris. Gain or ISO can be assigned if it can be varied continuously and not a set of fixed values.
- Joystick mode : relative or absolute.
- Relative mode (default) : movements of the joystick are reported to the camera and produce a change proportional to the movement. The camera setting value (iris or other) is not directly linked to the actual joystick physical position.
- Absolute mode : the joystick position is directly linked to the camera setting value. This mode is better suited for single camera workflows as switching between cameras and moving the joystick will produce a jump.
- Cam Lock : This setting allows to lock the iris joystick to a camera. To use the lock, select the camera on the RCP (with next/prev buttons), and then press "Cam Lock". The camera number will be displayed, and a LOCK icon will be visible on the main screen.
- GEAR icon : Access the technical menu
To go back to the main view, press the PREVIEW button (green button).
Technical menus
During loading, press the GEAR icon to active the technical menu. Or, on the main screen, hold the Iris Joystick shaft and then press the preview, and then the GEAR icon.
This menu allows to calibrate and assign the RCP (see Configuration of this page). In addition, a menu can display information about the iris joystick, such as IP address, MAC address, firmware version, and error codes.
The Reboot button reboots the iris joystick. The iris joystick can also be forced in bootloader mode to update the internal firmware with the latest available version. See Force bootloader.
Multi-camera operations
When using a single RCP to control multiple cameras, there are a few key features to consider related to the iris joystick.
-
The joystick operates on a relative basis, ensuring smooth camera adjustments without sudden jumps. When reaching the end of its range, it can either be pushed further with a spring effect—similar to a PTZ joystick—allowing continuous adjustment until released, or it can be repositioned by holding the preview button for a "FREE" effect. Additionally, the main exposure and master black encoders can be used for quick multi-camera adjustments without relying on the joystick.
-
As explained above, a feature allows the joystick to be locked to a single camera while the upper section of the RCP remains switchable between other cameras. This "split-camera" mode can be particularly useful when one camera needs constant access while the upper controls are used to adjust different cameras as needed.
Force bootloader
To force the joystick bootloader, open the technical menus, then use one of the following methods:
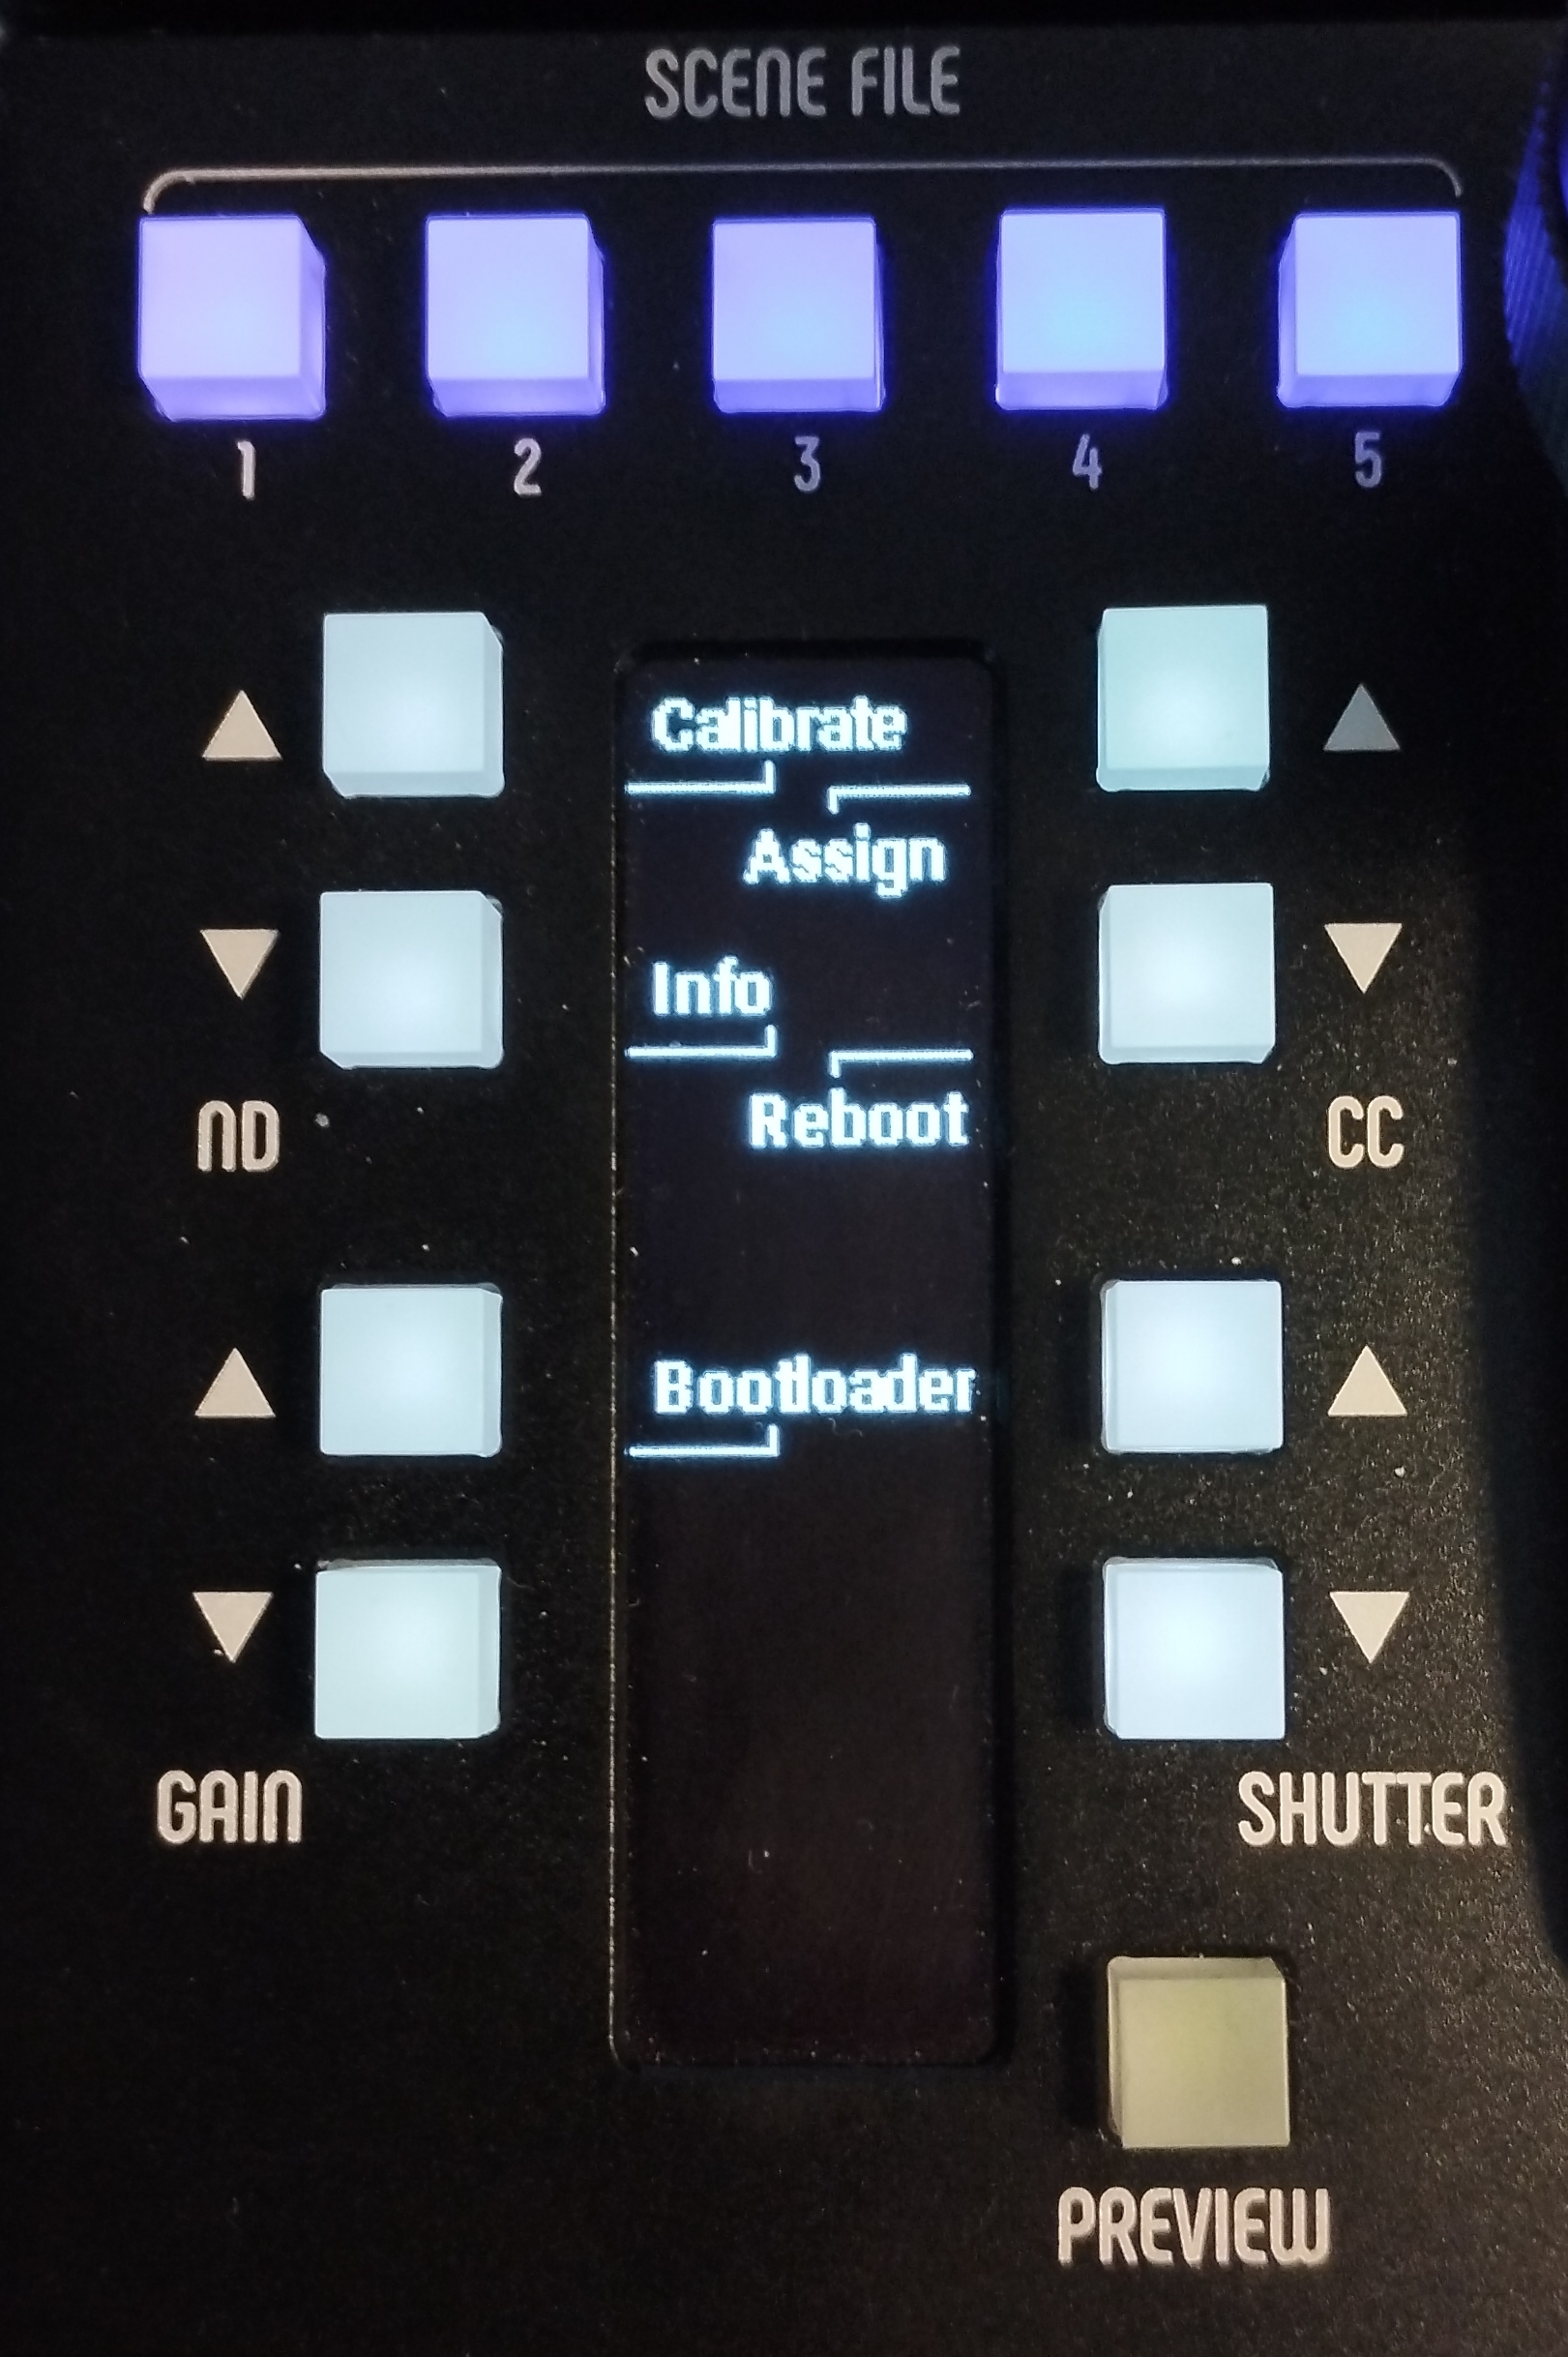
- Press Bootloader if it is present in the menu.
- Hold the Scene File 1 and Scene File 2 buttons, then press Reboot. Keep holding both Scene File buttons for two more seconds.
Troubleshooting
Joystick does not power on
If the joystick no longer shows any sign of life (screen off, buttons unlit), this may indicate either a hardware failure or a firmware issue.
In rare cases, the automatic firmware update may fail and the joystick may not restart correctly.
To help determine whether the issue is caused by hardware or firmware, the following procedure can be tested:
- Open the RCP.
- With the unit fully powered off, press the blue switch located on the PCB.
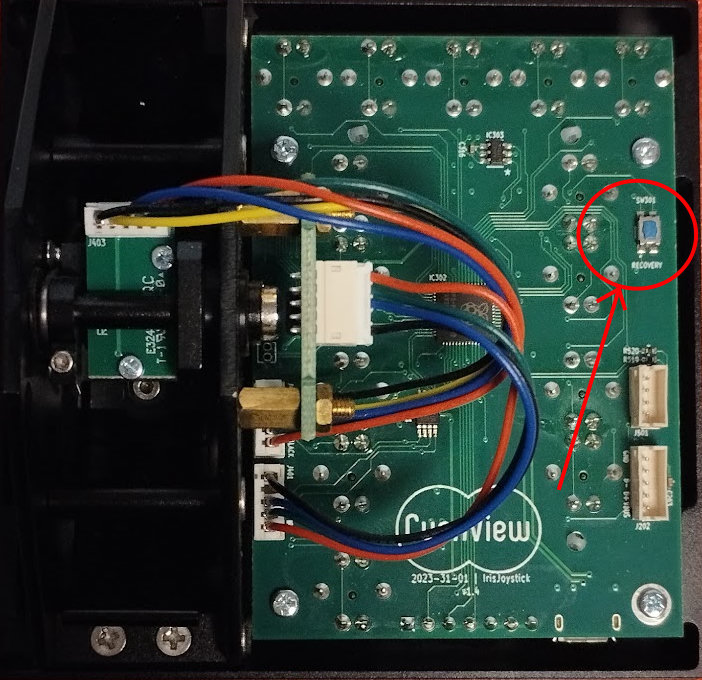
- While keeping the switch pressed, connect the RCP and keep the switch pressed for 2 more seconds.
- Within 1 minute at most, the joystick should power up again. If it does not, this most likely indicates a hardware failure. In that case, an RMA request can be submitted.