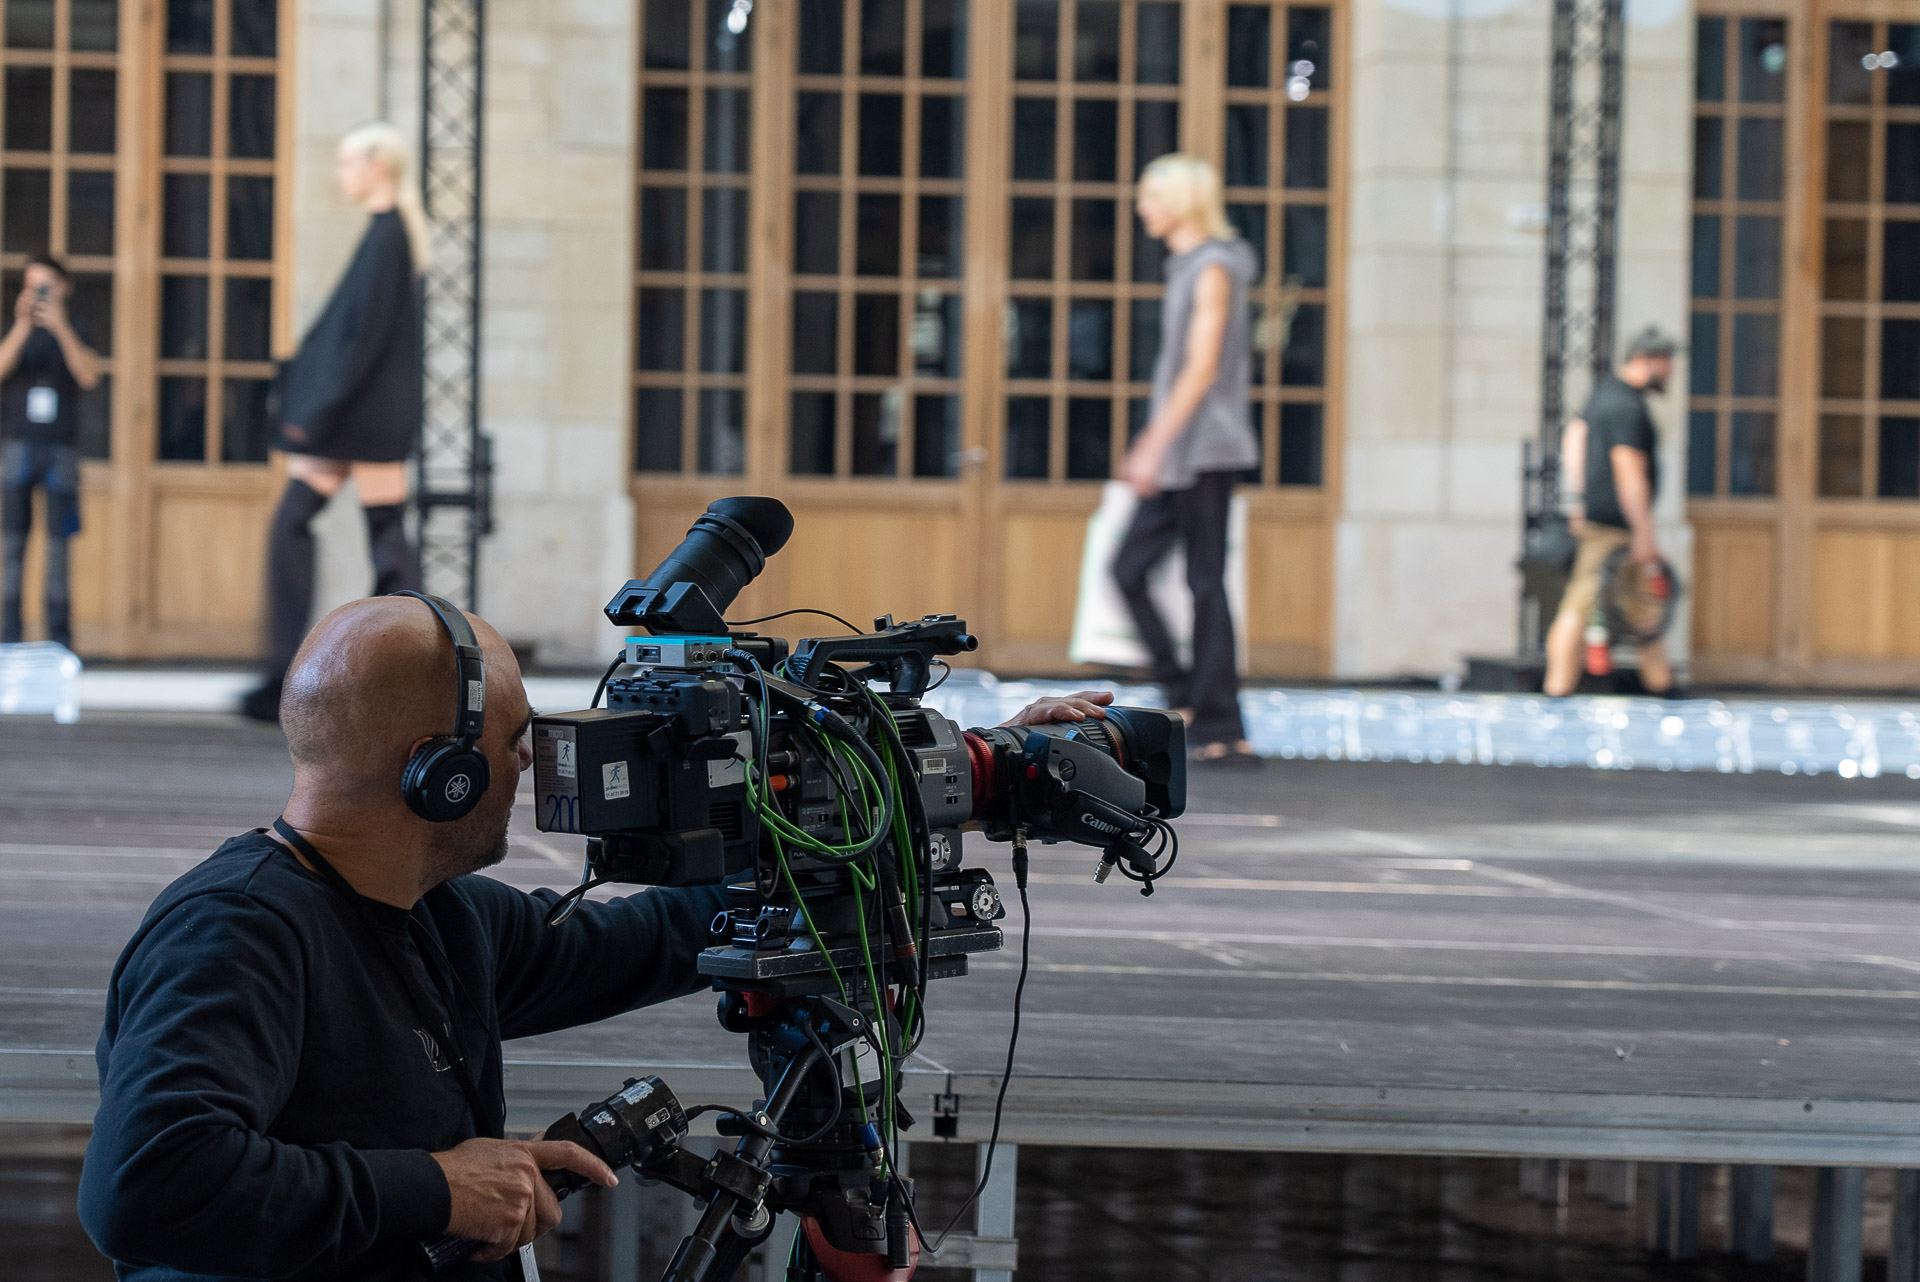
Paris Fashion Week Workflow
This article covers the technical details of this use case.
Paris Fashion week summer 2022:
- 9 fixed FX9 with 9 RIO LAN to control the PL lenses
- 3 mobile FX9 with 3 RIO in 4G to control the camera and the PL lenses
- 12 RCP, one per camera
- Tally integration
- Switcher integration
Introduction
We were present on multiple shows during the fashion week:
- Balenciaga
- LV
- Gucci
- AMI
- Rains
- Loewe
- etc.
This kind of shows used to only be recorded, and the image processing was taking care of in post-production to finally come a month later in the stores.
Now, everything goes faster, social networks are more and more present and are pushing the multi camera live workflow with large sensor cameras.
The two main choices on the fashion week:
- Sony Venice
- Sony FX9
Sony Venice allows you to control any B4 lens. But comes at a price. FX9 offers similar control, but is only compatible with E-mount lenses, limiting the possibilities.
What we will describe here:
- How to control your FX9's
- Integrate it with any lens (Fuji, Canon, motorized or prime)
- Using any kind of link: IP/SDI, Fiber, HF/4G
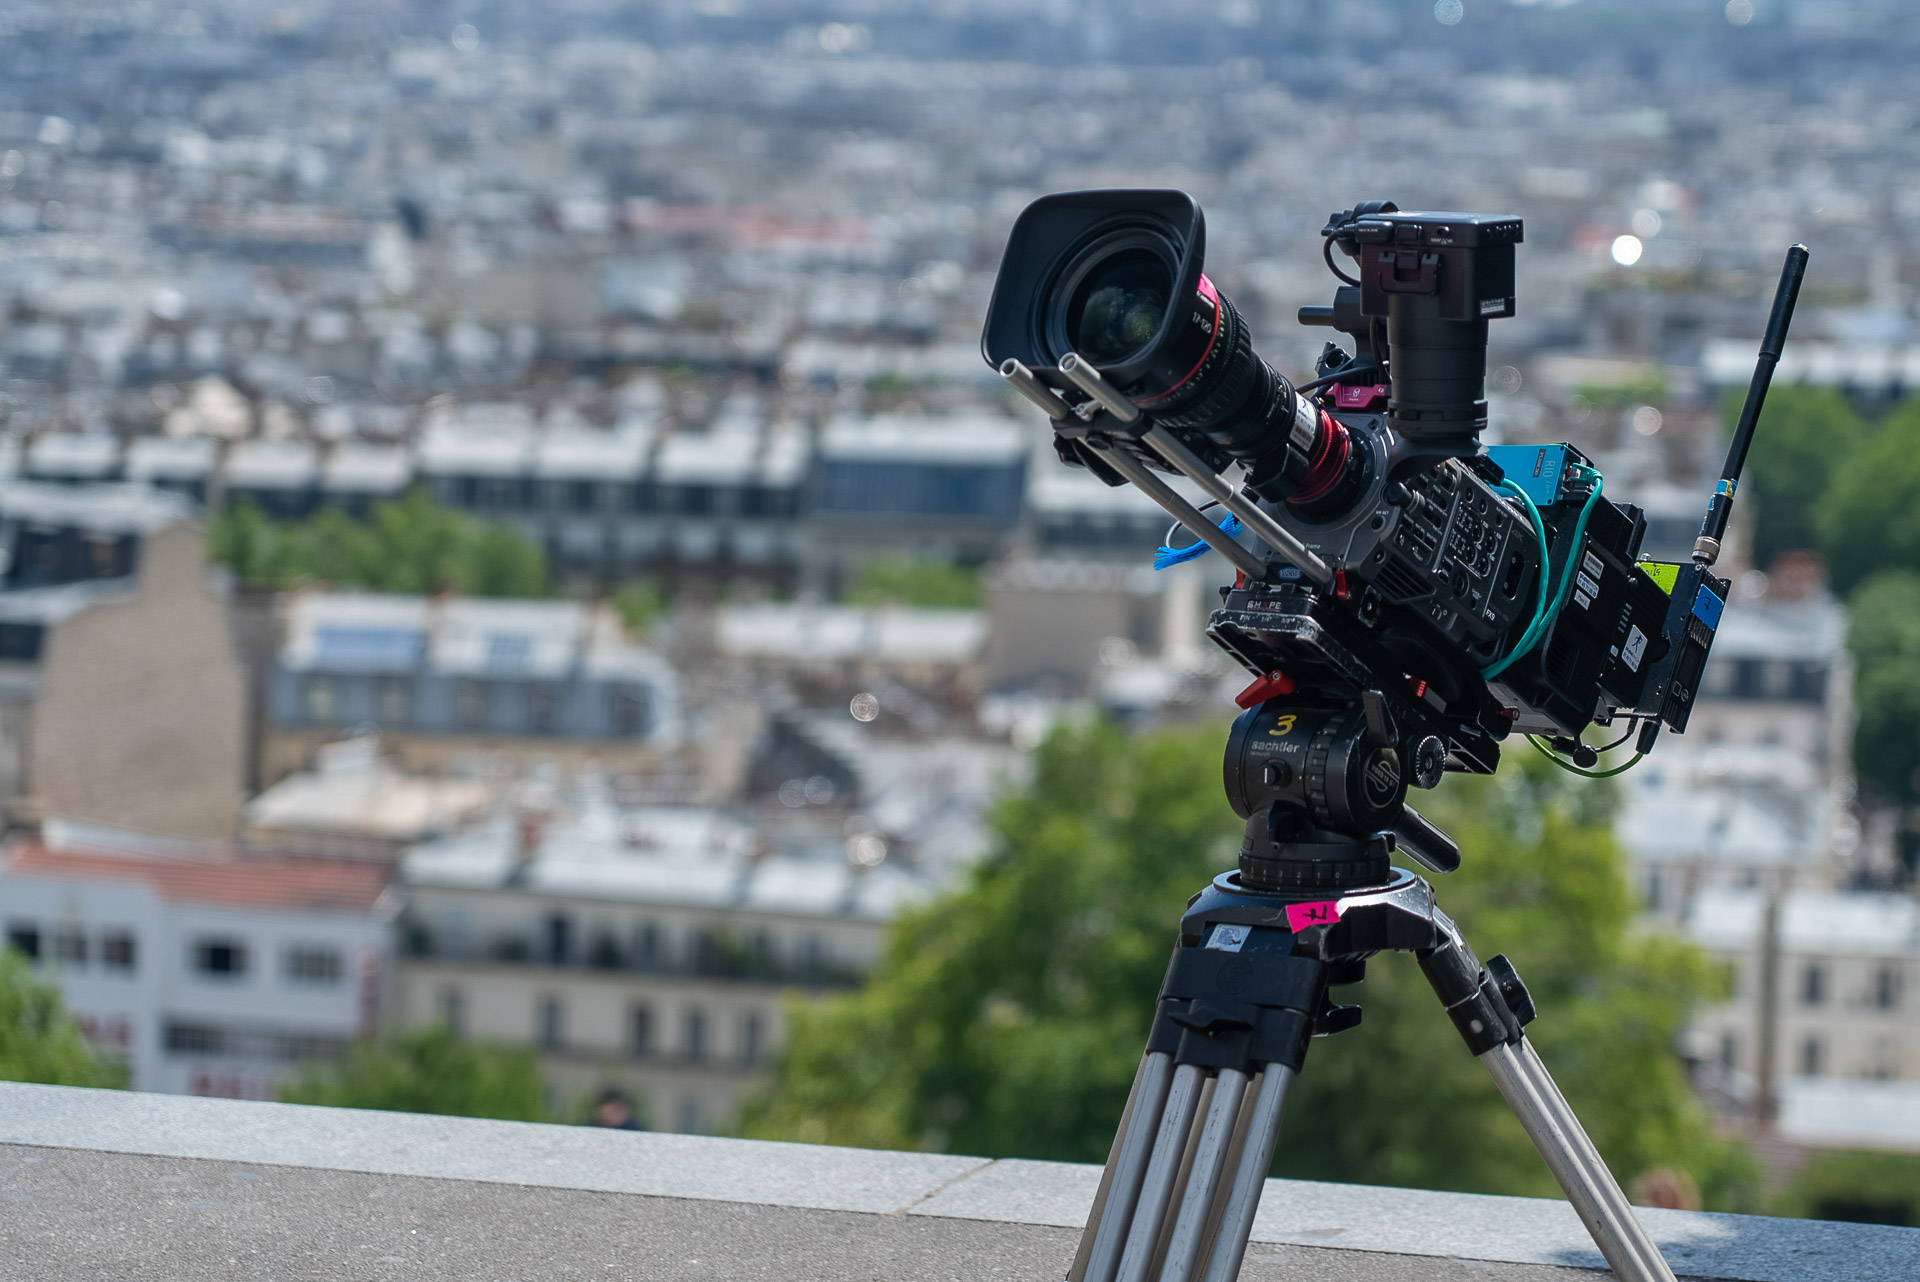
Set up the cameras
On these shows, they used mainly the FX9 and some GoPro's.
You can find a full integration guide here
But the main points are:
- We can control the FX9 over Ethernet (with XDCA accessory) or Wi-Fi (RIO acts as an access point).
- Enable control over Ethernet or Wi-Fi
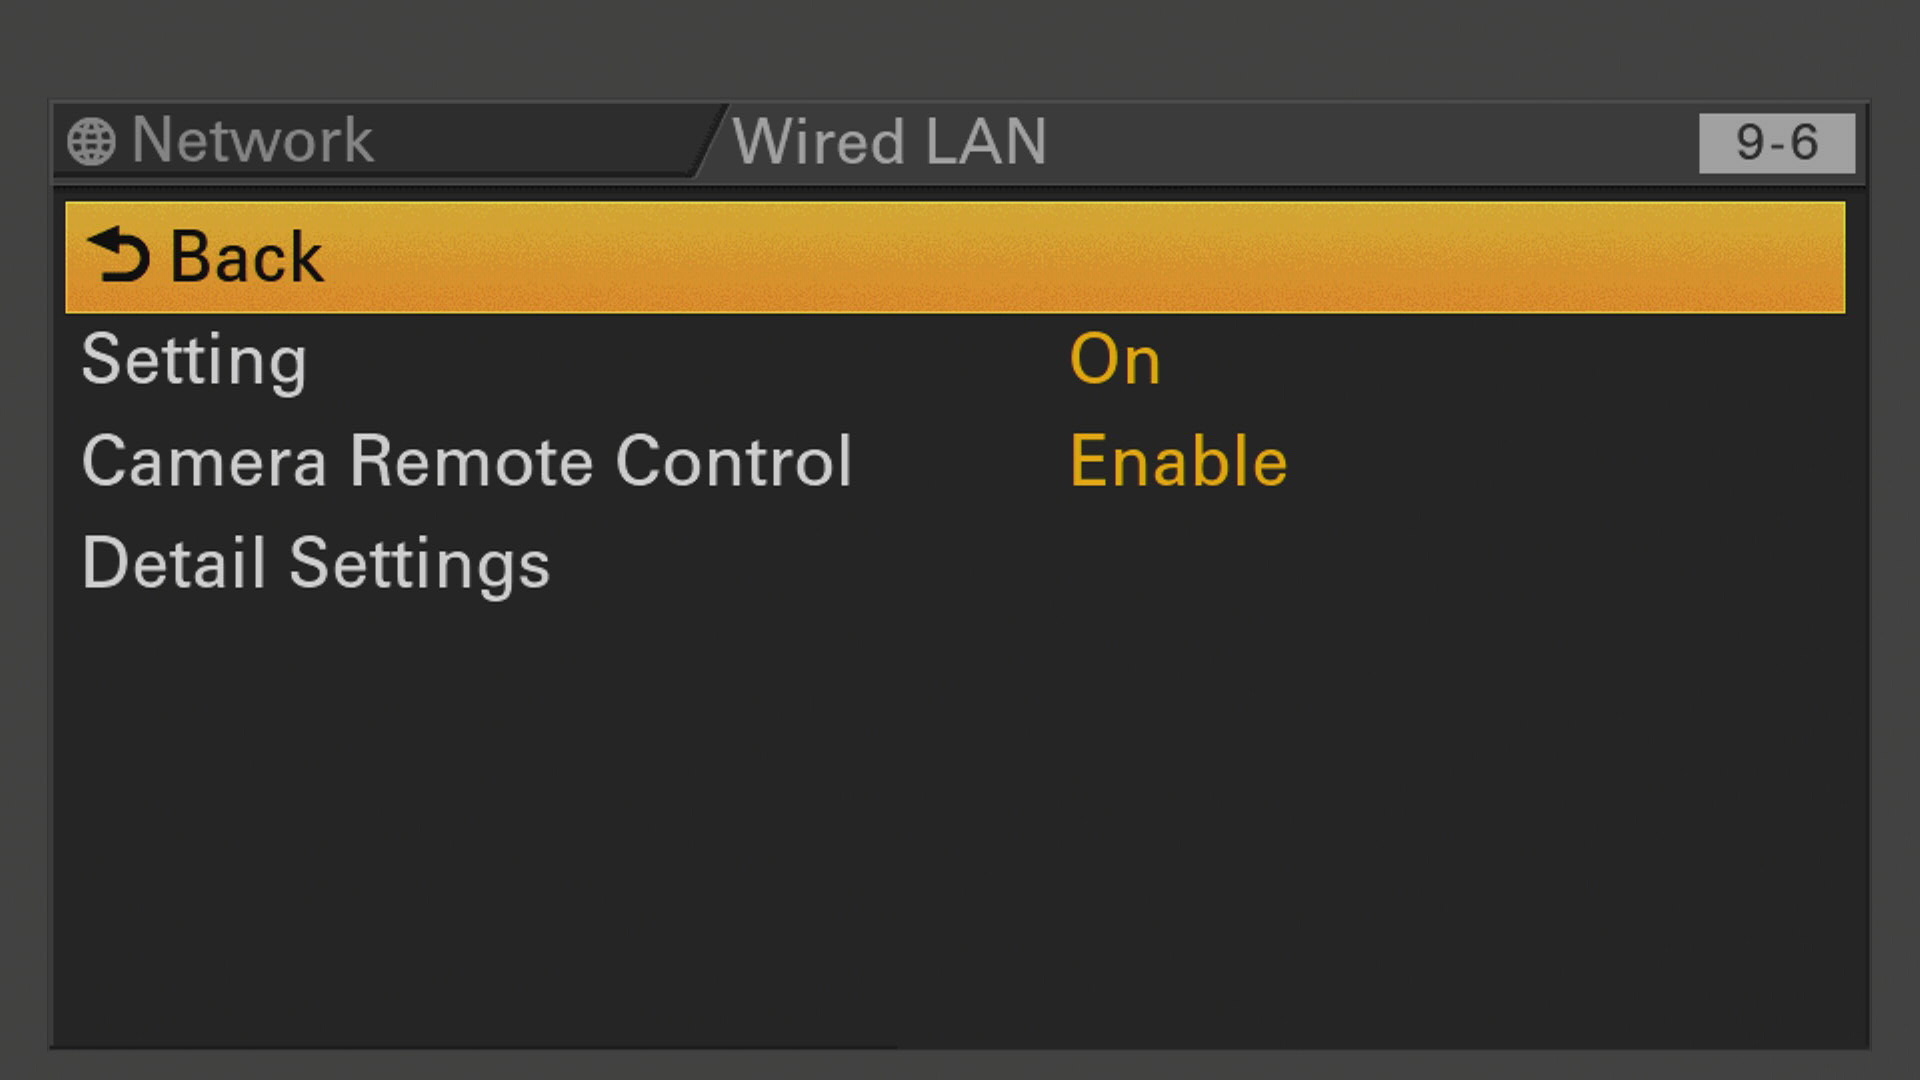
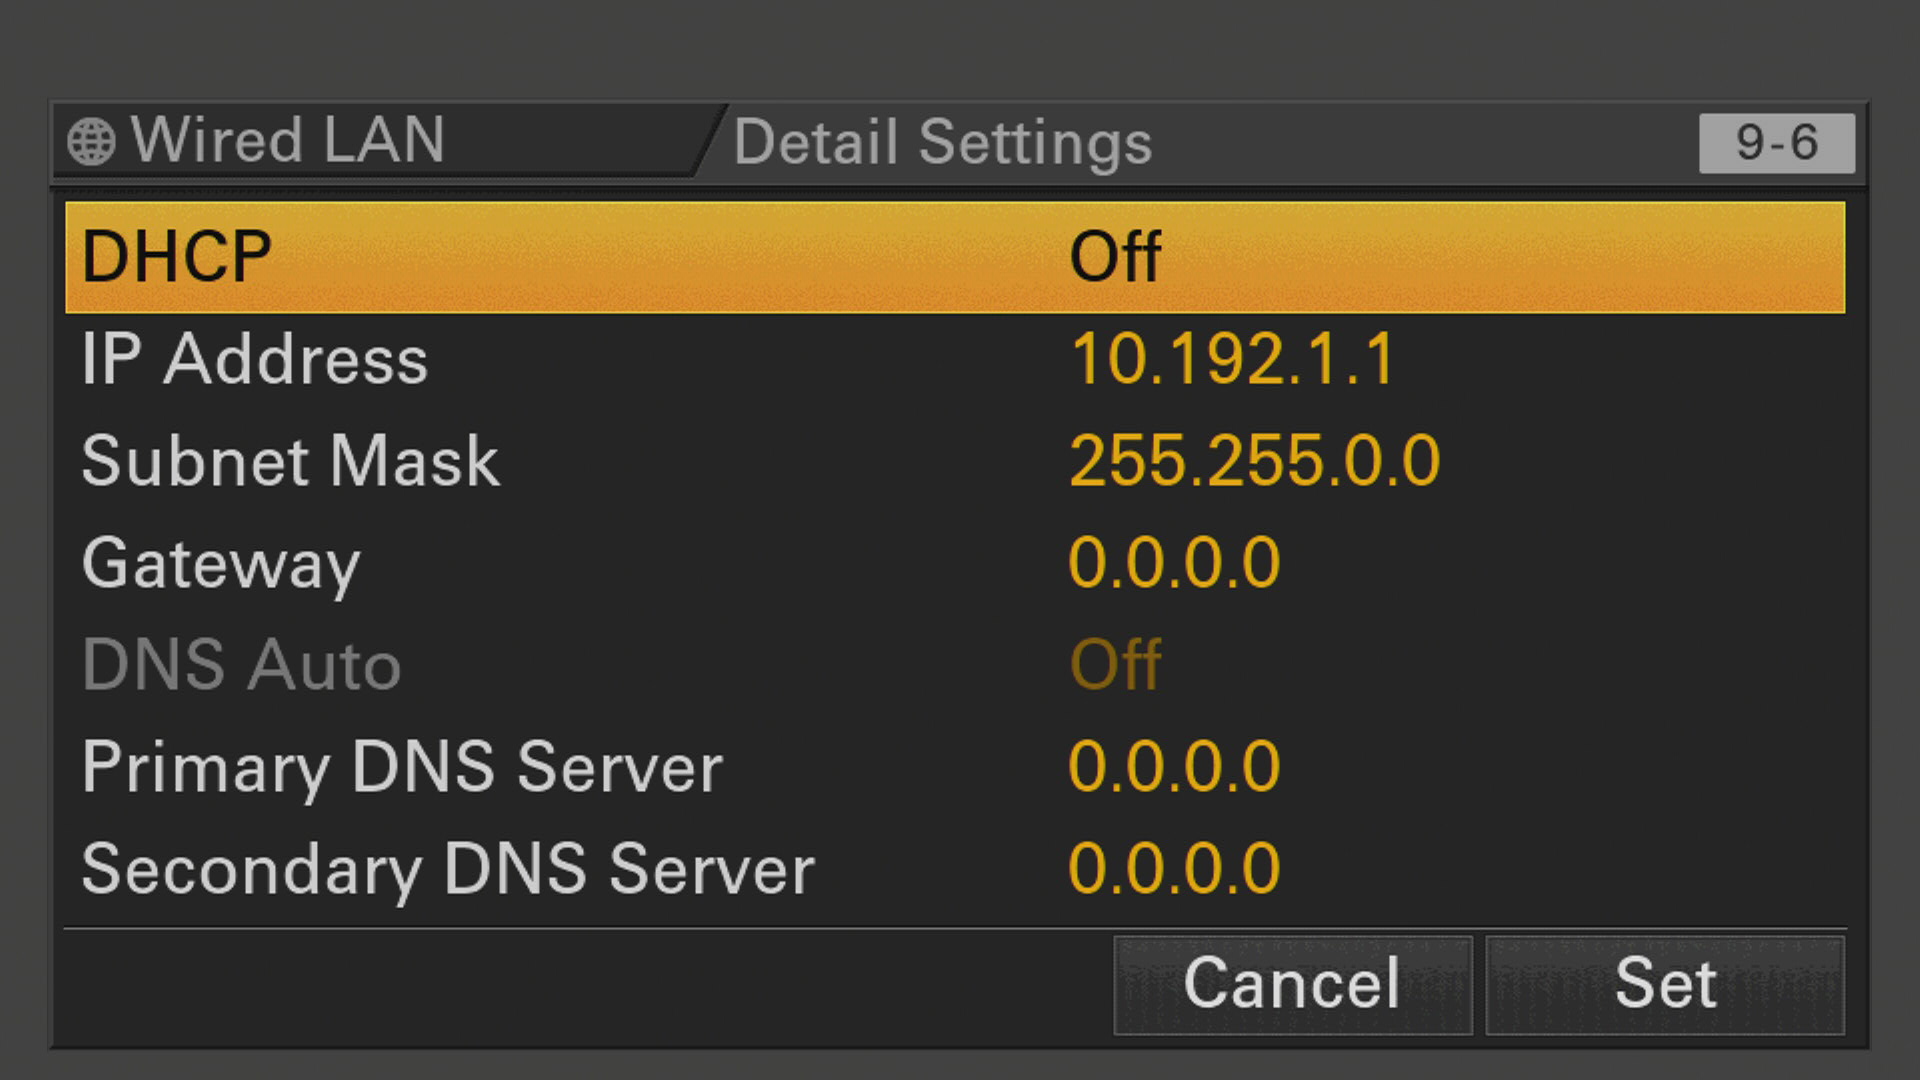
- Set up a fixed IP
You can find more about the RIO Wi-Fi possibilities here
Each camera IP was in the range 192.168.10.X/16 with X the ID of the camera
Set up the lens
You can find a full integration guide for B4 lenses here
If you need to motorize a lens (prime lens, photo lens or robotic applications), we used Tilta motors, the full integration guide is available here
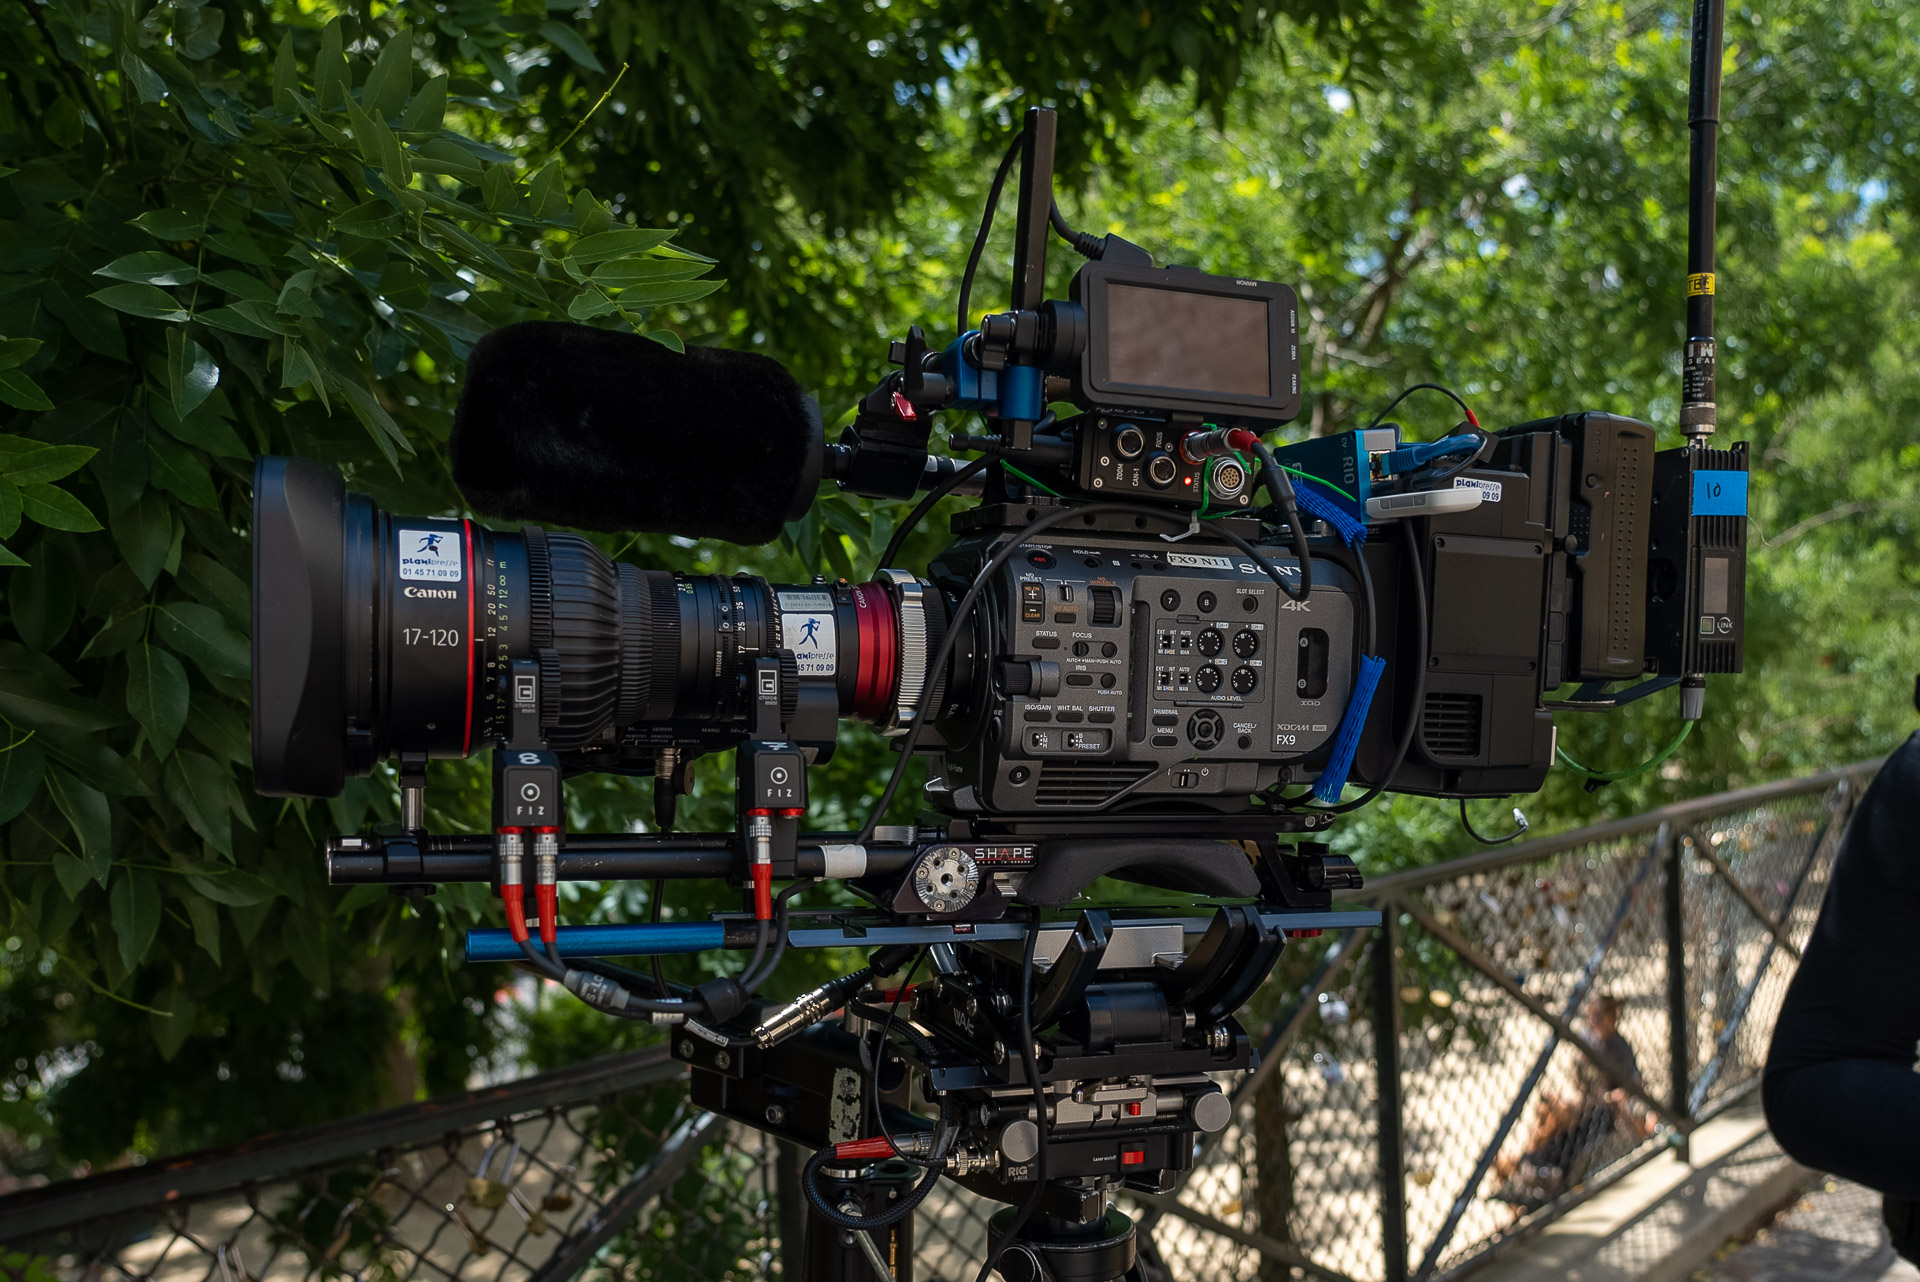
We had a big variety of lenses on this show:
- Canon Cine-Servo 17-120 mm (PL)
- Canon Cine-Servo 25-250 mm T2.95 (PL)
- Fujinon Cabrio 14-35 mm T2.9 (PL)
- Canon CN-E18-80 mm T4.4 (EF)
- Canon Prime 14 mm f/2.8L II USM (EF)
- Canon 11-24 mm f/4L USM (EF)
We can control Canon (using our cable CY-CBL-B4-6P) and Fujinon lenses (using our cable CY-CBL-6P-FUJI) with their own connectors.
PlaniPresse decided to use a Fujinon accessory to have a standard control over B4 (12pin) on all lenses to use only a single cable : CY-CBL-B4-6P
It makes the wiring and setup easier, but both solutions works.
Set up the RIO's
Here we describe how to configure RIO for the camera 1, but this is the same setup for all the other cameras.
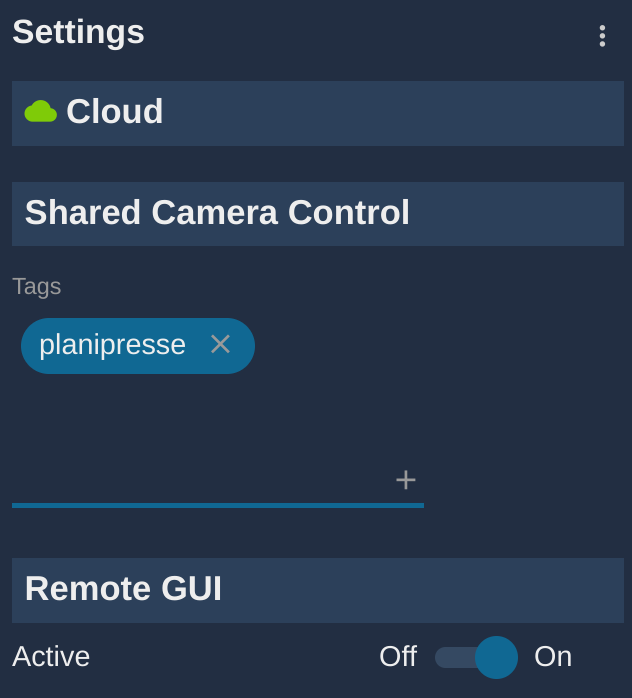
Configure the group control (REMI)
In each RIO, set up the REMI tags, this will allow any RCP in the same group to import/control the camera configured in the RIO.
In the RIO, in the REMI tab:

Set up a private group, here planipresse
Configure the camera control
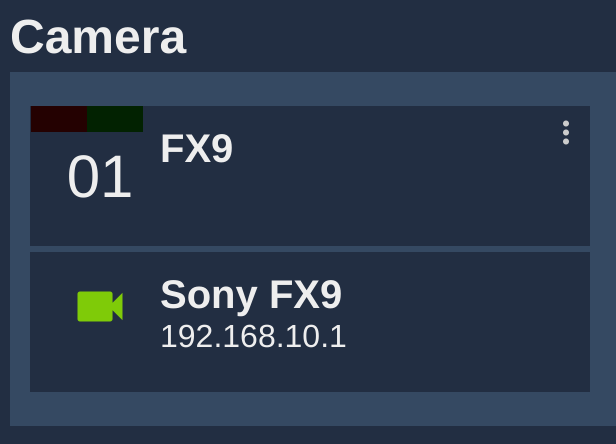
Create a new camera:
- Enter a number (here, the camera number, linked to the IP
192.168.10.X/16) - Enter a camera name (here, simply
FX9, camera number is enough to distinguish them) - Select brand, model (here
SonyandFX9) - Enter camera IP (here
192.168.10.1)
Configure the lens control
If the lens is controllable by the camera, we control iris through the camera protocol.
But for all the other cases, we need to control the lens directly in parallel.
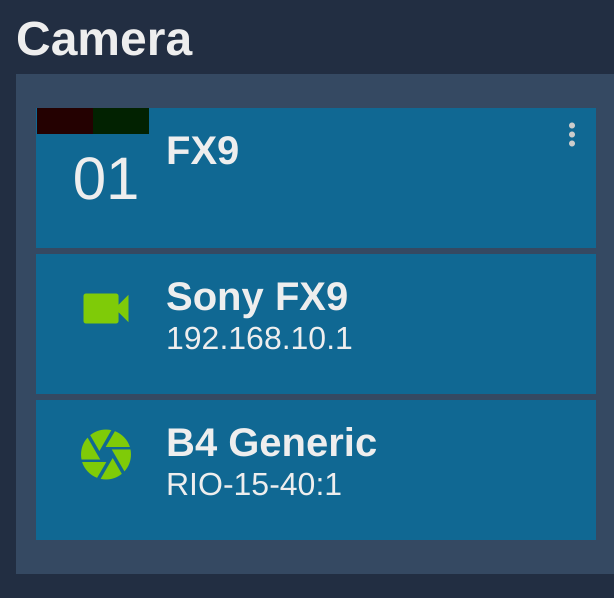
All the B4 (Fuji and Canon)
Select the camera you previously created:
- In the lens section
- Chose model
B4 generic - Select on which RIO port you plugged the lens (here port
1)
Robotic application lens control
In robotic application (AGITO, cable cam, crane, etc.), they usually use the 12 pin port already.
The analog/handle ports only offer zoom and focus, so they use the digital B4 port to have access to zoom/focus and iris.
In this case, Iris is not done by the robotic operator, but by vision engineer, but the B4 is already in use.
So we put the lens iris in manual and put a Tilta motor on the iris, connected to the RIO to allow:
- robotic operator to handle zoom/focus (through B4)
- vision engineer to handle iris (through Tilta)
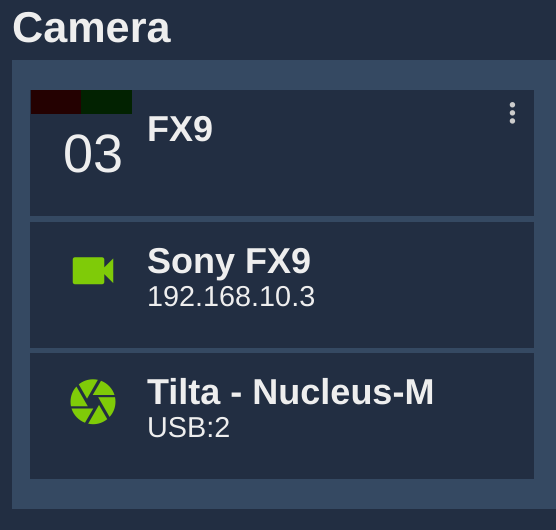
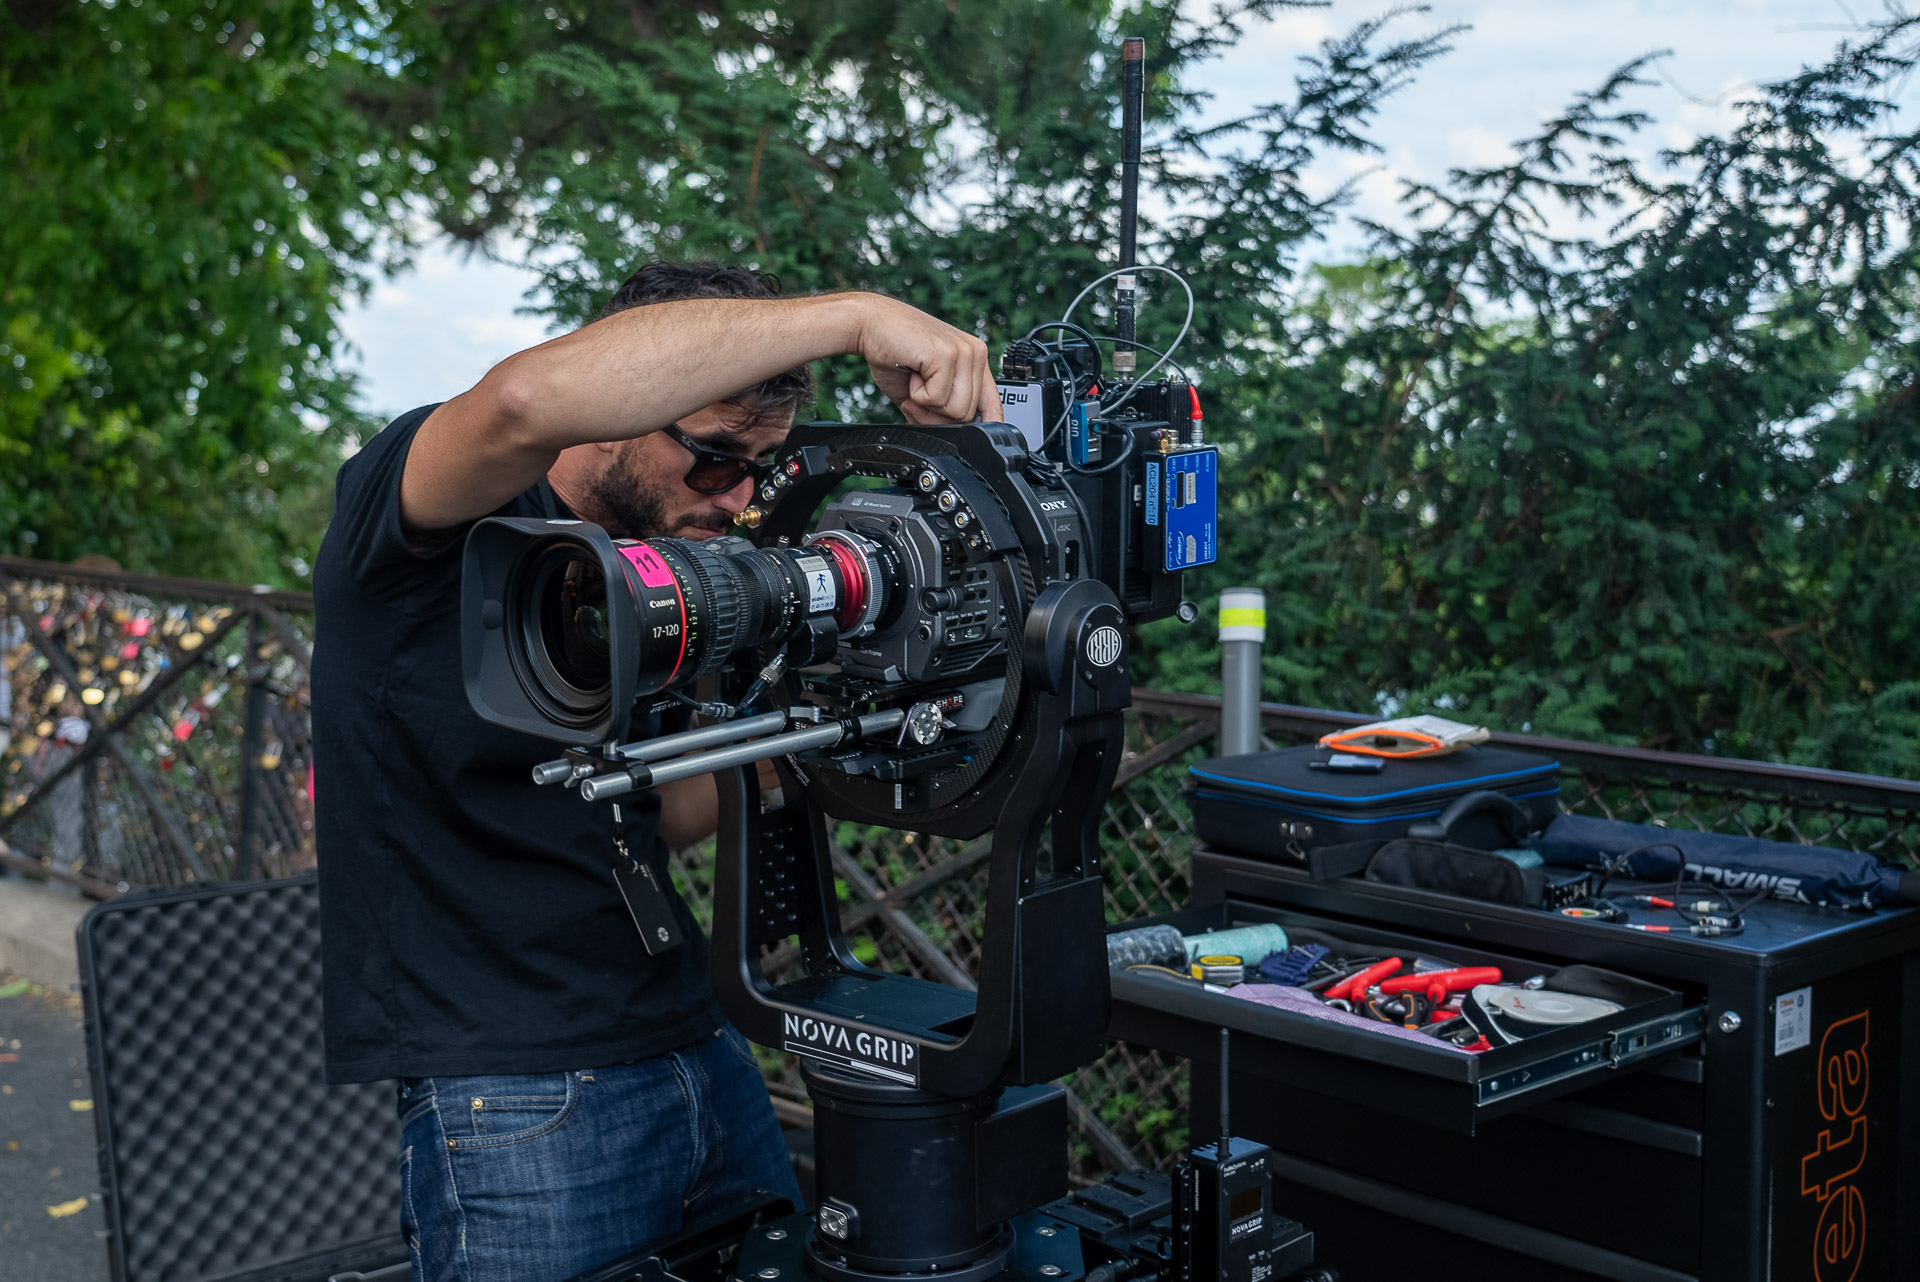
Other lens
Some lenses are simply not motorized, so we can put a Tilta motor like we did for robotic application.
And some lenses don't have any B4 control at all, so we also use Tilta motor in this case.
The Canon CN-E18-80 mm T4.4 (EF) for example has only one connector to control the zoom with a handle. This port is analog, and we can't control iris through it.
We can see here this lens:
- Zoom handle
- Manual focus control
- Tilta motor on iris
- RIO to provide camera + iris control to the CCU room
Configure the 4G control
We had 3 remote cameras:
- Steadicam : video in HF with Vislink
- AGITO : video in HF with Vislink
- Beauty shot : video in 4G with TVU
We plugged a 4G dongle in each cam's RIO to allow remote control.
To control a camera locally or with 4G, nothing change in the configuration.
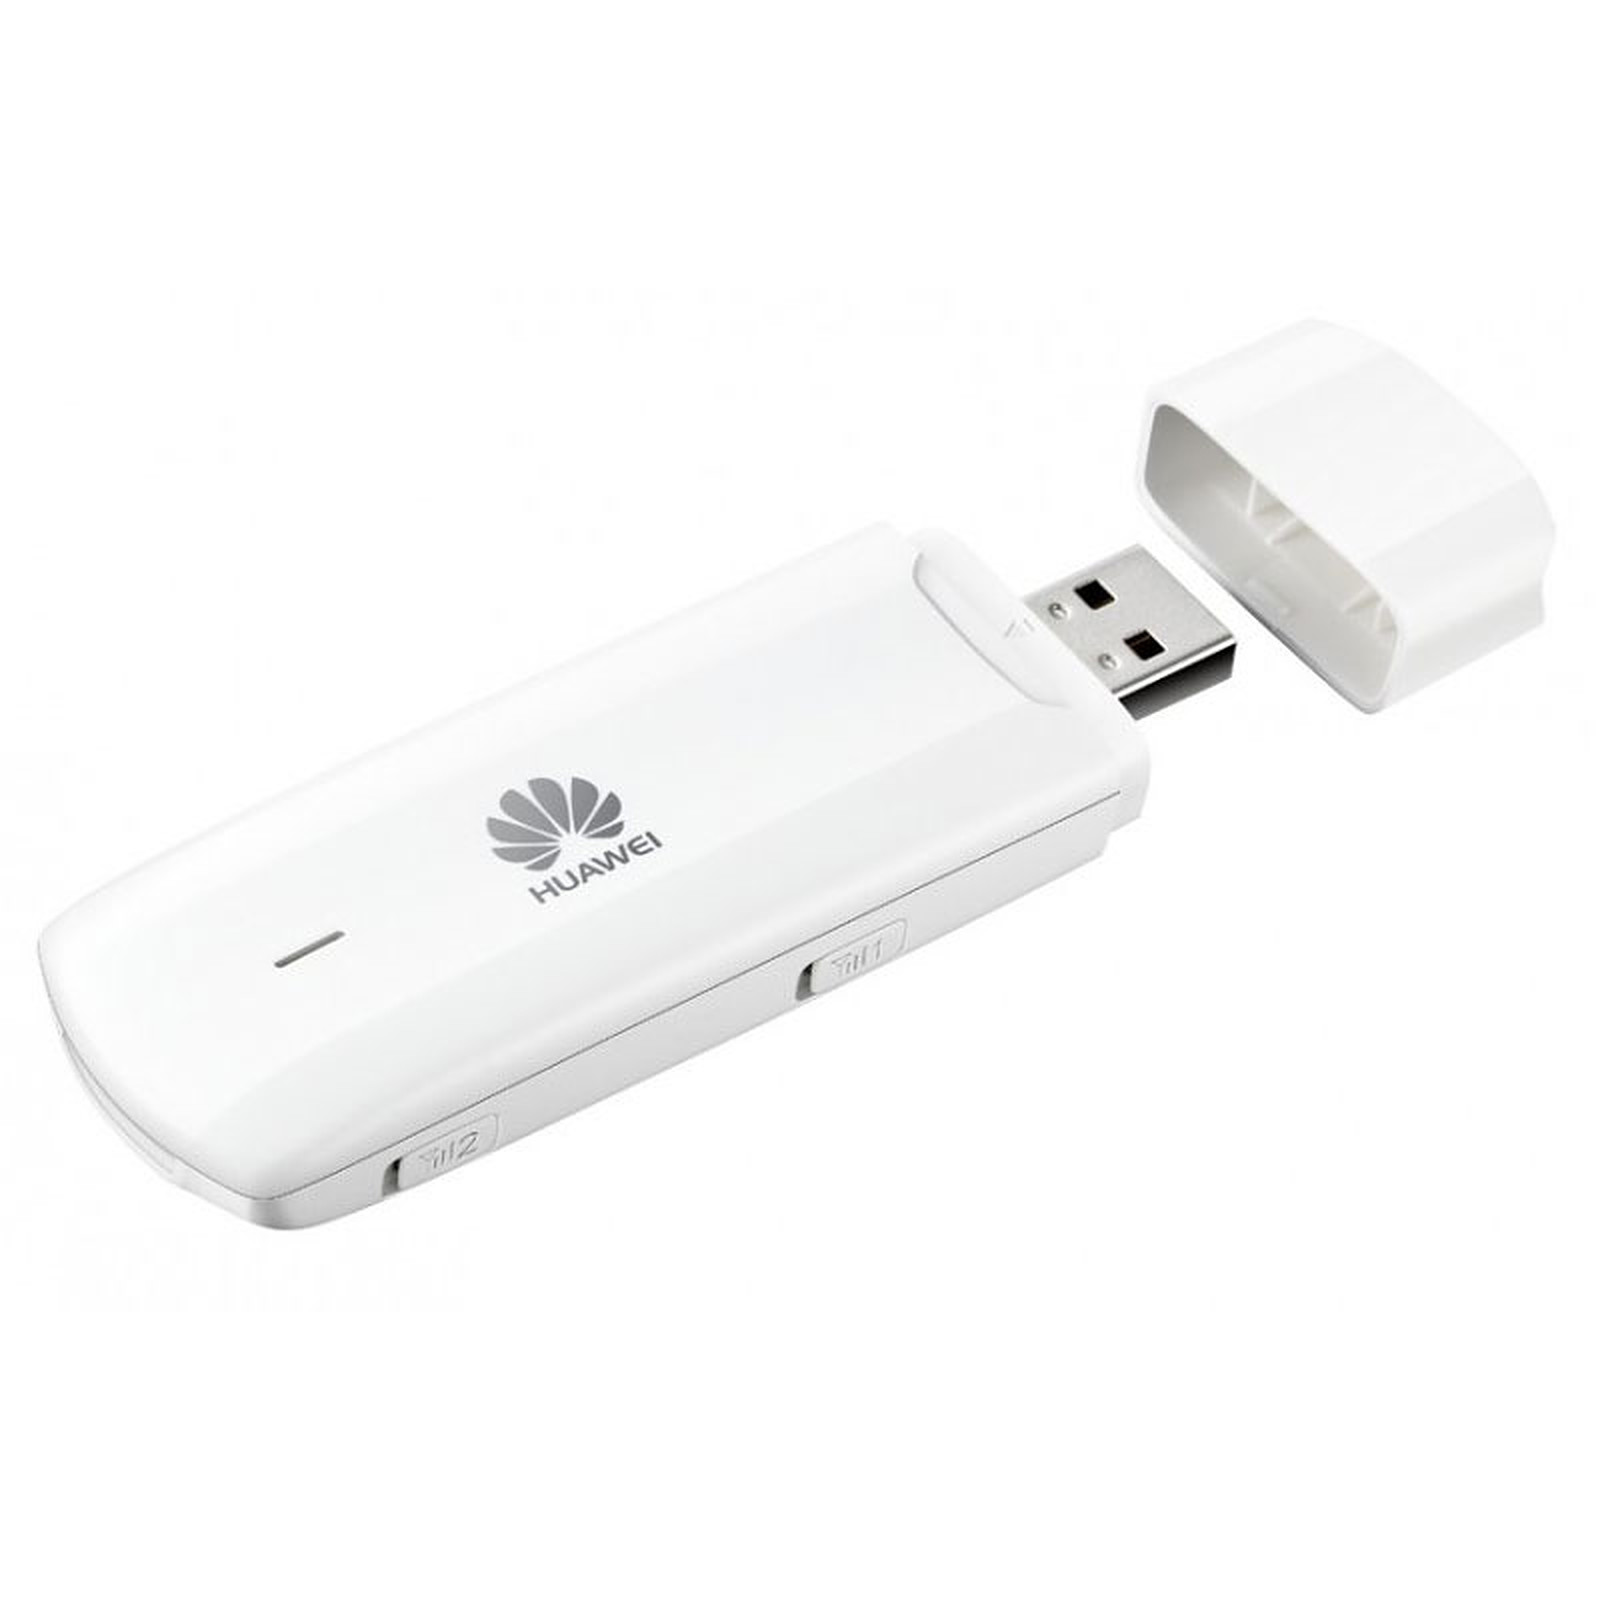
You just need to set up the 4G dongle, and then it is plug and play:
- Plug the dongle in your computer
- Unlock SIM with PIN
- Enter APN, login, password
- Do a speed test to ensure it works
Unplug from computer, plug in RIO, and you're good to go.
You can see it, here, connected to RIO:
Here, latency is not an issue (+/- 60ms) and stability neither as we use such a small amount of data that we experienced no drop, even with the full crowd at peak hour in a touristic place in Paris.
Configure the FX9 web interface access
The RIO is connected to the FX9 either on Wi-Fi or Ethernet (using XDCA).
The RIO needs also an Ethernet link to the RCP (CCU room) using Ereca CAM Racer fiber solution (provide power and transport video + Ethernet over SMPTE fiber).
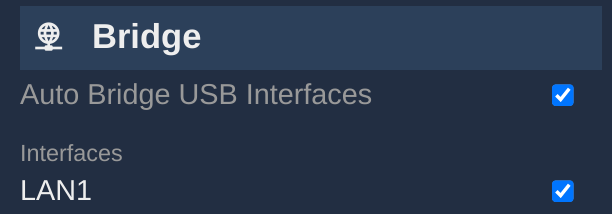
You can plug a USB Ethernet dongle on the RIO to have a second Ethernet interface.
And we can bridge both Ethernet together, this way, the RIO acts as an Ethernet switch.
If allows you to get control of the camera and access to the FX9 webpage from the CCU room without adding anything.
In the IP configuration of each RIO, simply cross the checkbox Auto Bridge USB Interfaces, this way any USB dongle will be bridge automatically.
Shading a GoPro using our VP4
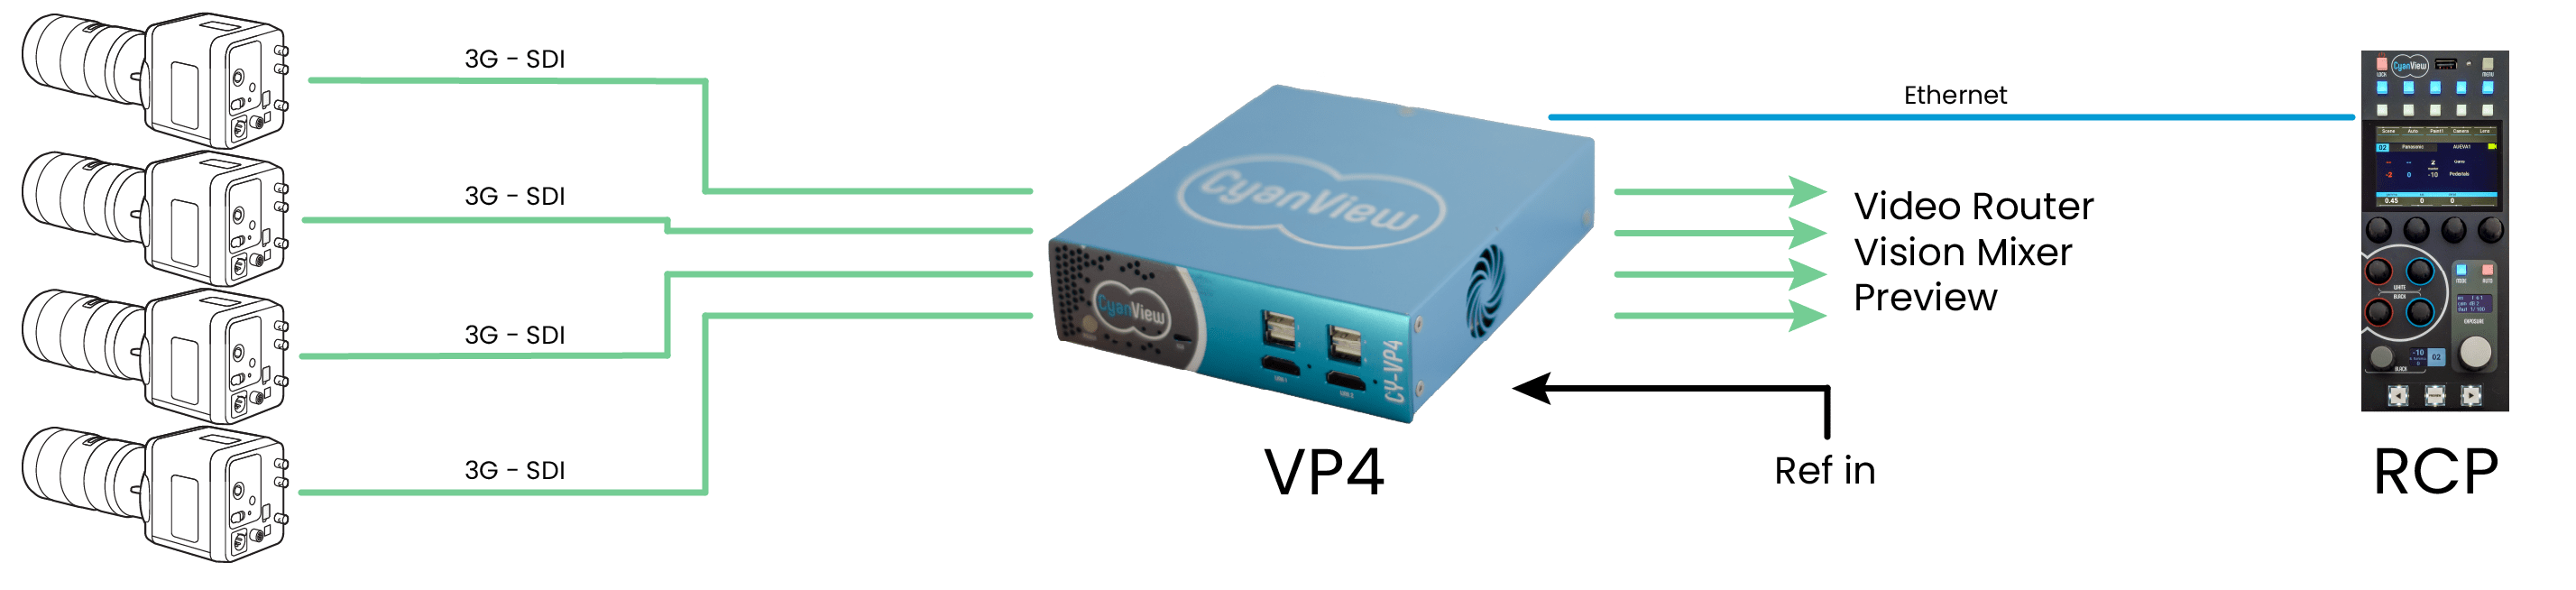
GoPro doesn't offer any way to control the camera, but here, we shade it using our advanced color corrector : the VP4.
They first convert the HDMI to SDI using a Decimator
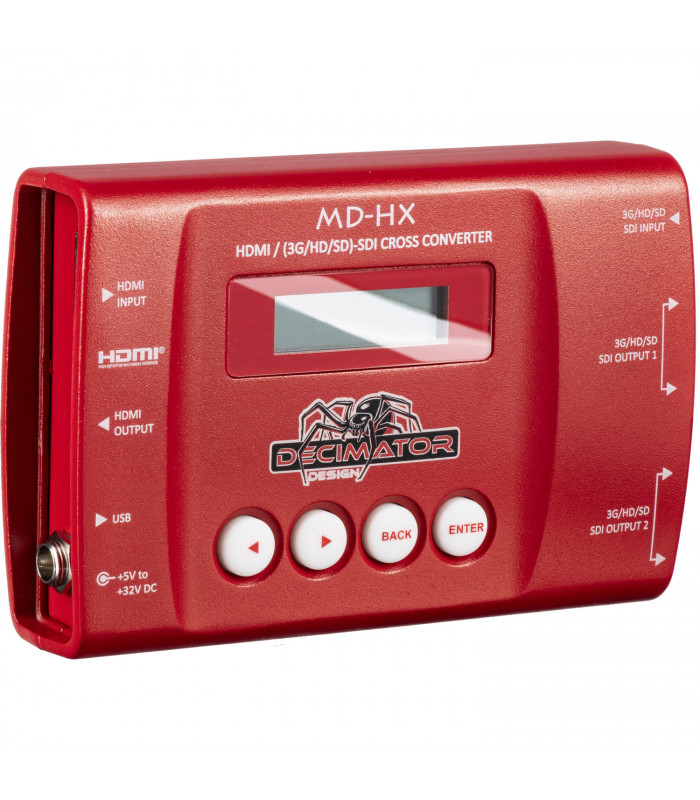
You can get a full integration guide for the VP4 here
The only setup in the VP4 is the format and genlock options:
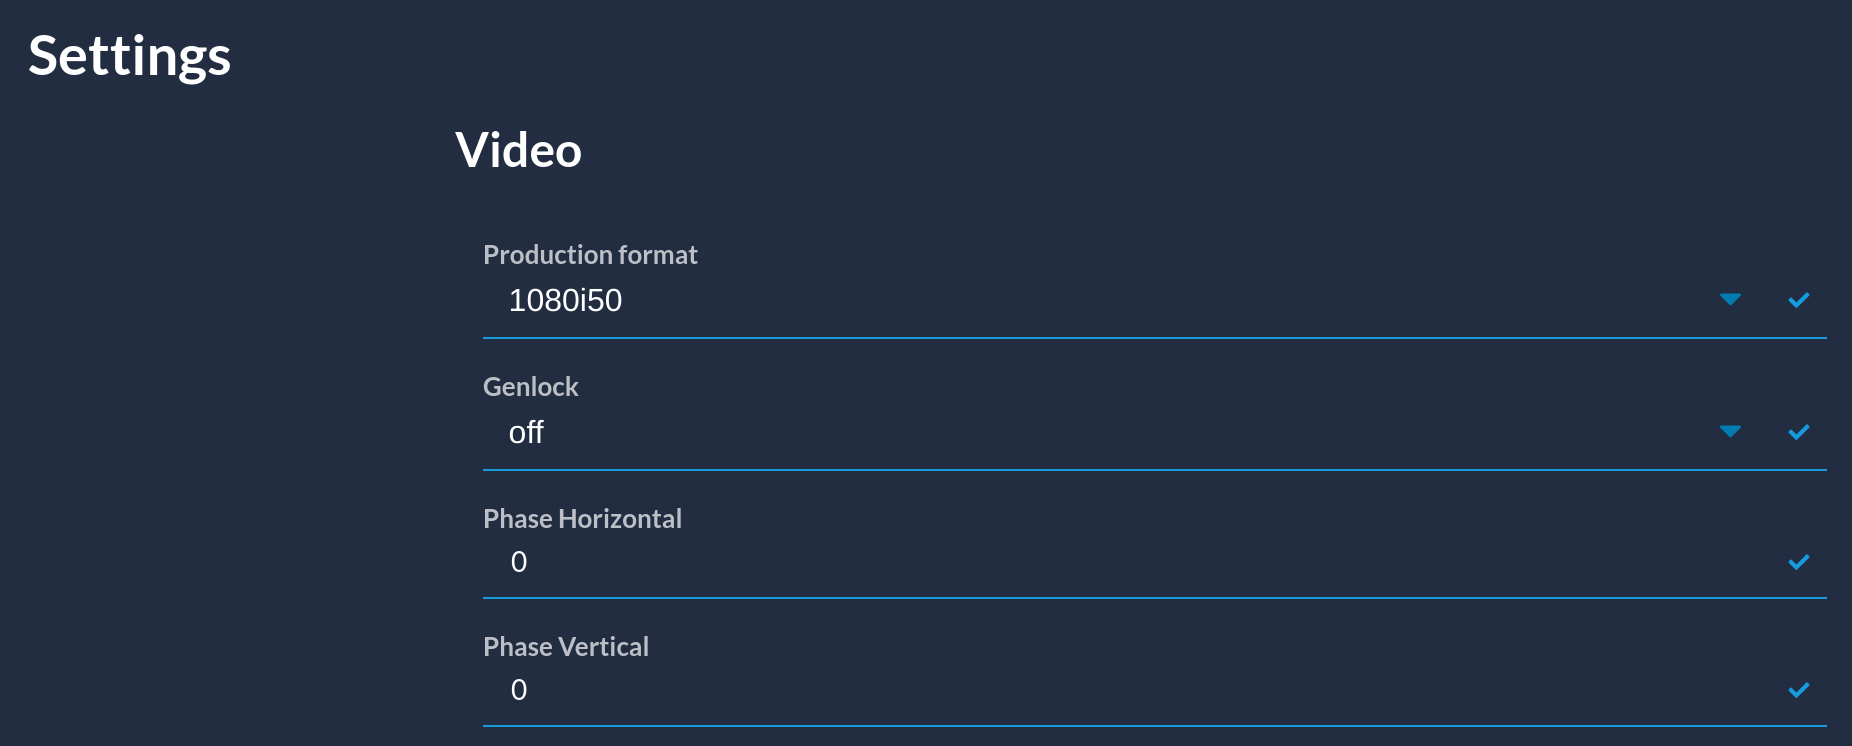
The VP4 can be use in standalone (using the web interface) or from the RCP.
They chose here to have a dedicated RCP to shade the GoPro's.
Set up the RCP
Here we describe how to configure RCP for the camera 1, but this is the same setup for all the other cameras.
Configure the group control (REMI)
In each RCP, like you did on the RIO's, in the REMI tab:
Set up a private group, here planipresse (same as in the RIO)
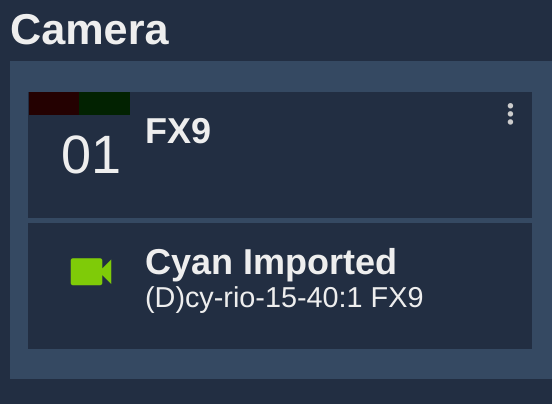
Configure the camera
In each RCP, we have only one camera.
Navigate to the REMI tab, there, you will see the list of device in your group planipresse.
Cross the checkbox to import the desired cam in your RCP.
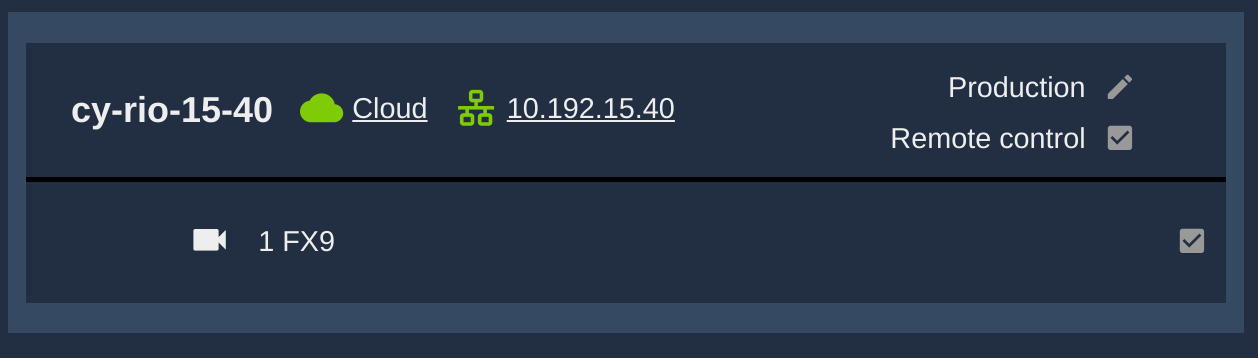
And it will appear like that in your RCP configuration:
Tally
The tally input was done using the ATEM, you can find a generic integration guide here.
As the ATEM is limited to 12 simultaneous connections, we tried to limit as much as possible the number of device connecting to it, so instead of having each RCP connecting to the ATEM to have the tally input.
We imported all cameras (12 in total) on RCP 1 and linked each camera to our ATEM configuration:
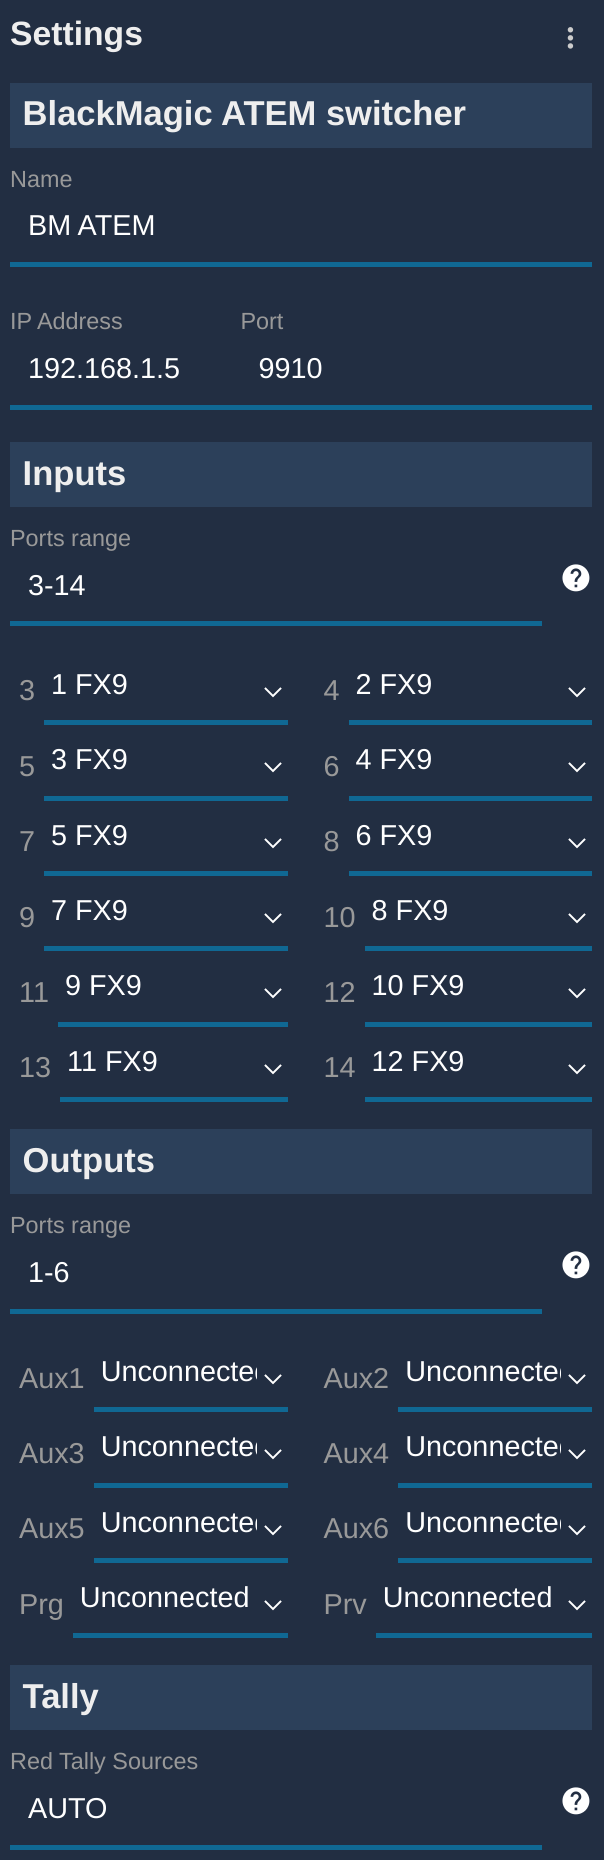
This way, tally input is routed correctly to each camera:
- Visible on the camera side
- Visible on each RCP preview button (red light)
- Visible on each RCP display (camera name is red or green)
Preview button
For the vision, we use an AJA KUMO, this is one of the few switchers that supports as many inputs/outputs and have a clean switch.
You can find a generic integration guide here.
Each RCP as a preview button that allows to call the camera on a switcher.
We had 12 RCP for 2 Vision engineers:
- V1 had RCP 1 to 6
- V2 had RCP 7 to 12
They both had a display linked to an output of the KUMO:
- V1 screen to output 1
- V2 screen to output 2
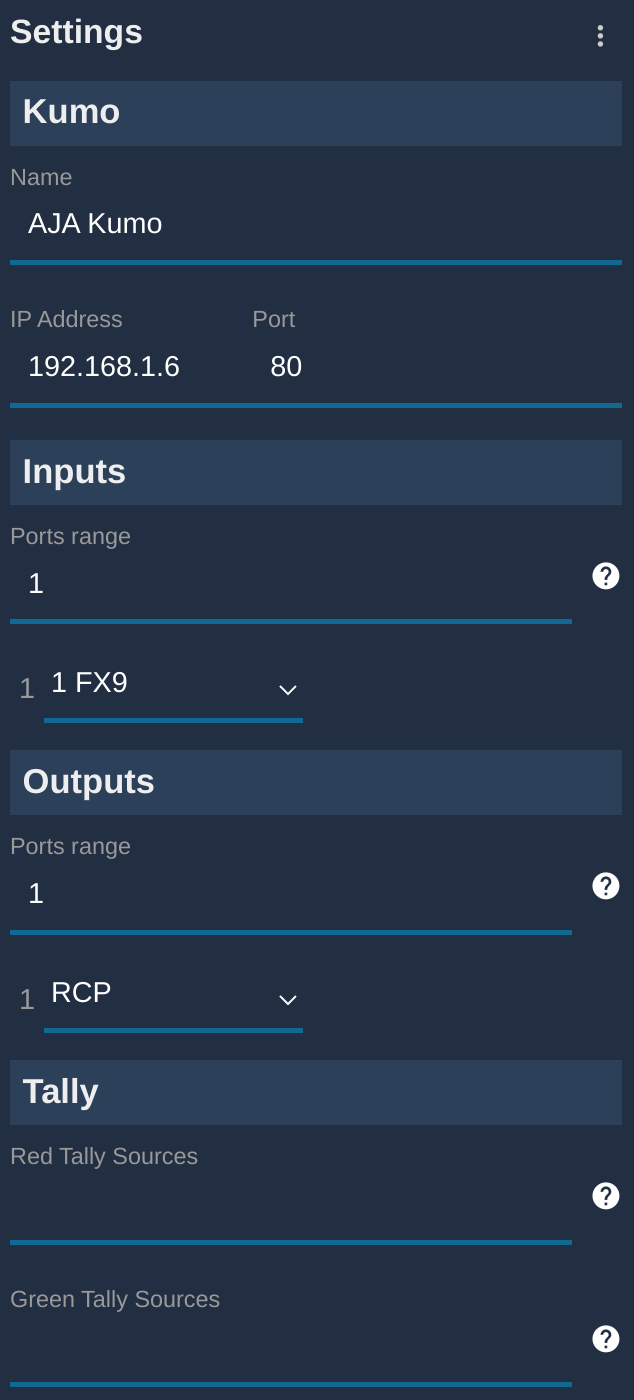
Each RCP had a AJA KUMO block:
- camera imported linked to correct input (here, for cam 1 it was input 1)
- RCP linked to vision screen (here, for V1 it was output 1)
Once this setup is done for 12 RCP:
- When touching preview on an RCP
- The camera of this RCP is on the display
Trigger REC button remotely
All this setup was hybrid. We were streaming (YouTube, Instagram, etc.) and recording at the same time.
Ensuring that all cameras are recording is really important and is painful:
- You need to get into each camera web page
- Click on REC
As we have:
- 1 RCP with all the cameras imported for the tally here
- As we control the REC trigger of the camera in the protocol
- We can use the group control feature (described here) to trig REC on all cameras at the same time
You simply put the RCP in "group control" mode and navigate to Camera > OSD menu in the RCP and click on REC.
Now, all the 12 cameras are switched to record.
It is especially convenient for HF cameras:
- With fiber, we can have clean signal and OSD at the same time
- With HF, it is not possible (only the clean signal)
We can stop record the same way.