Haivision Panasonic Varicam beauty shot
Wiring
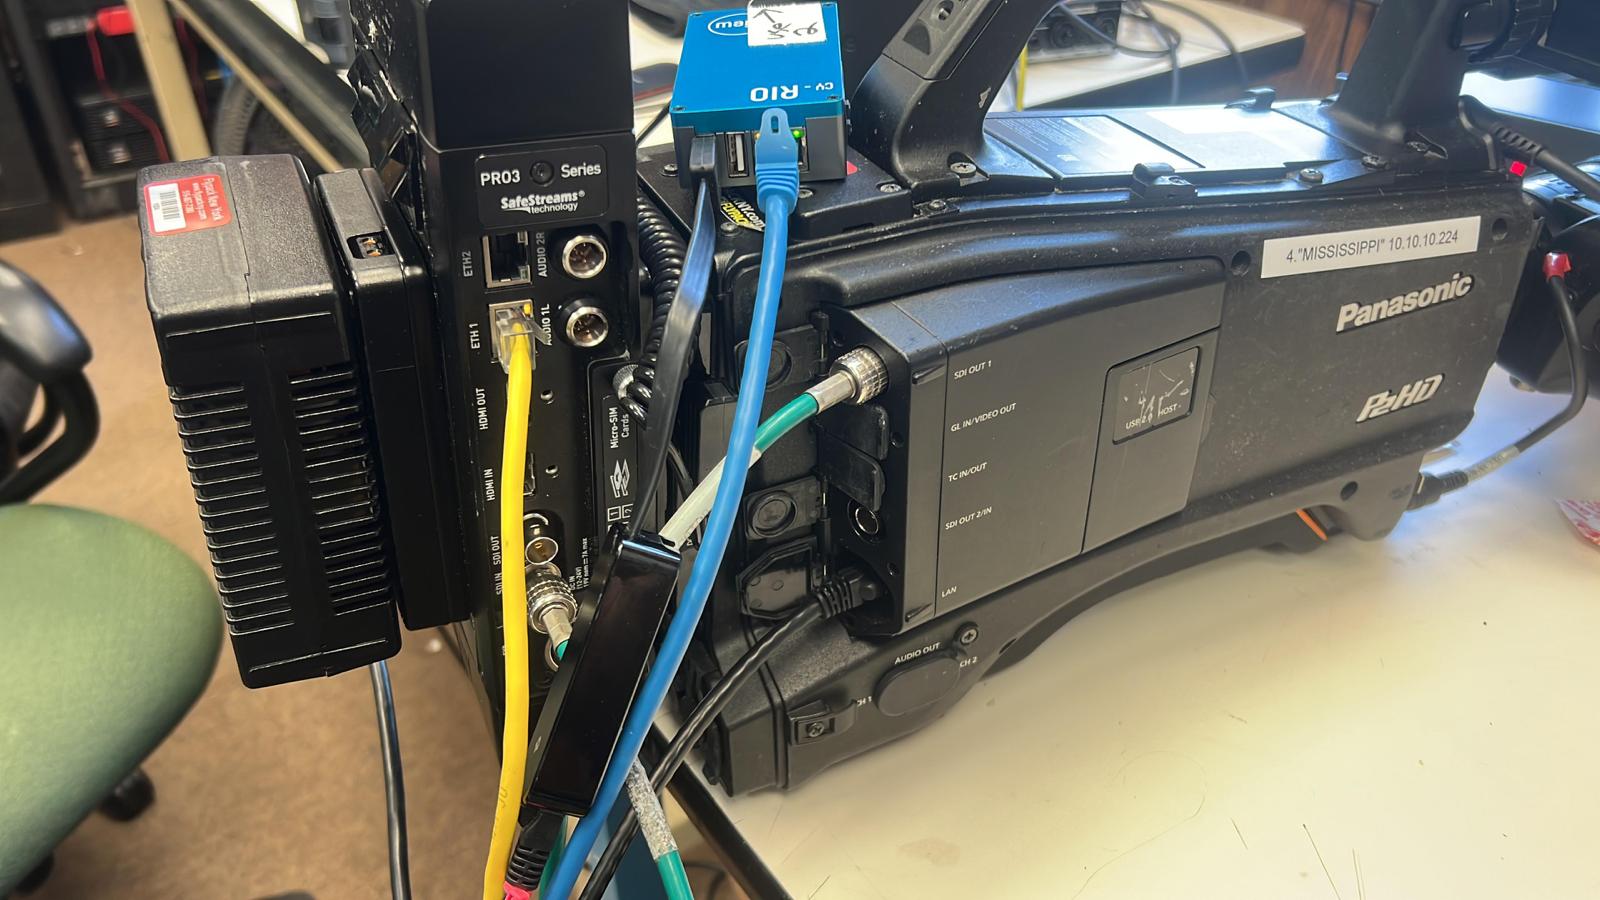
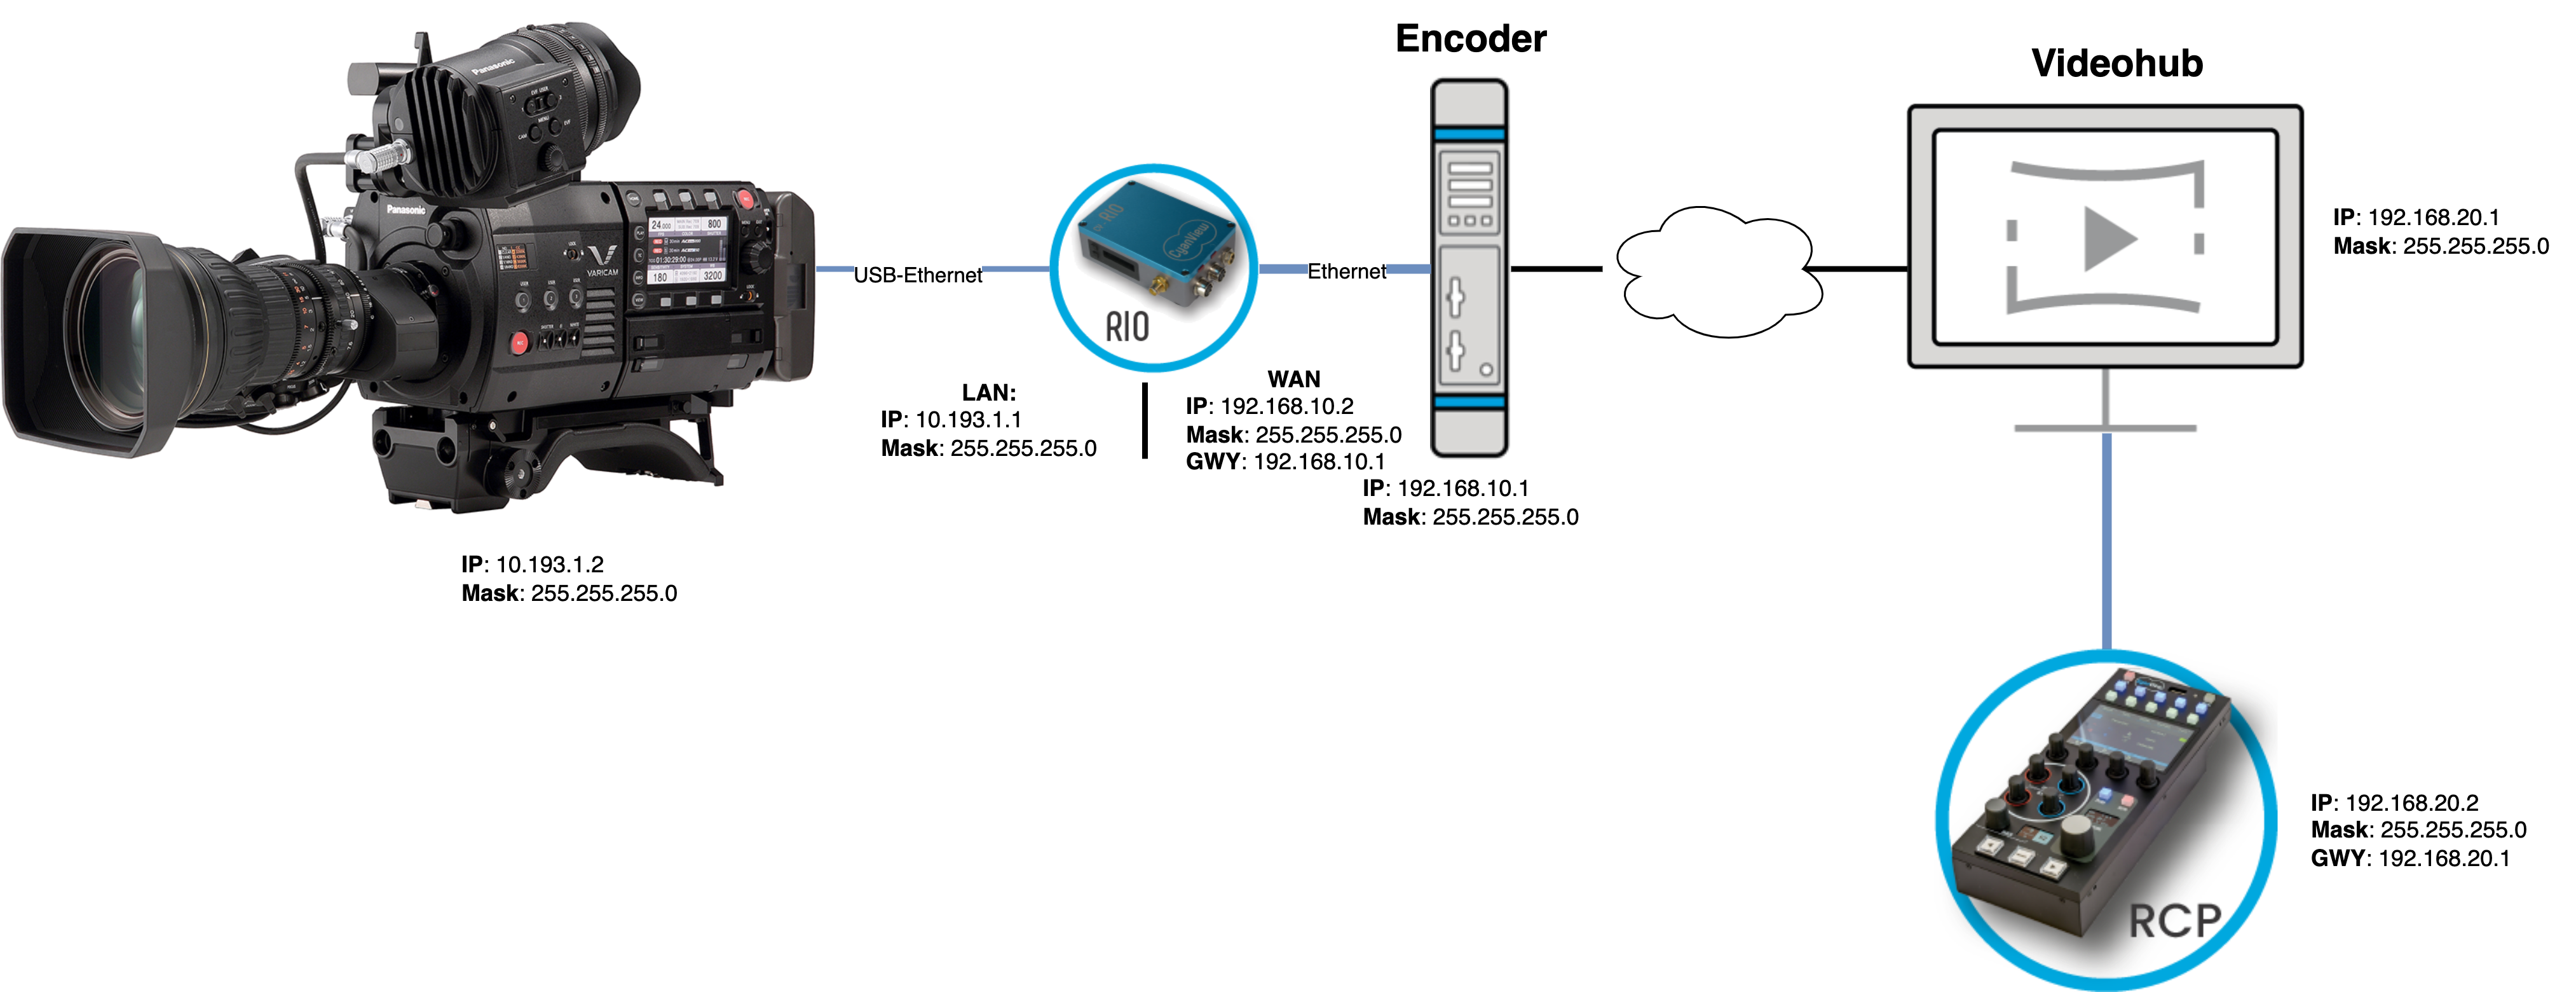
The RIO is connected to:
- Haivision data bridge using the onboard Ethernet.
- Panasonic Varicam using a USB-Ethernet dongle plugged on RIO USB port (because RIO has only one RJ45 port)
Then RIO/RCP communicates using:
- REMI
- Through the Haivision data bridge
Setup
Ensure:
- your encoder/decoder are properly setup.
- your decoder has the
Data Hot Spotlicence activated. - your have your LAN port and LAN IP of your encoder (for RIO static WAN setup)
- your have your LAN port and LAN IP of your decoder (for RCP static WAN setup)
- your Panasonic Varicam IP is
10.193.1.2with netmask255.255.0.0
You can follow this guide
RIO/Camera/Encoder side
First, we configure the camera.
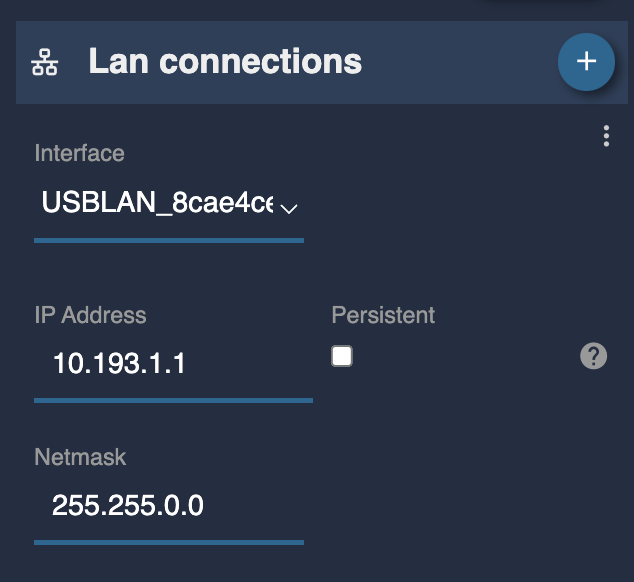
We need a static LAN IP to communicate with the camera:
On your RIO web UI:
- Click on
IP Connections:
- Add a new static IP:
10.193.1.1/16:
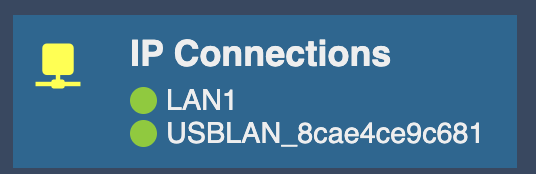
Here on the RIO, you see that we have 2 connections:
- LAN1
- USBLAN_8cae4ce9c681
The LAN1 is the onboard RJ45 port.
The USBLAN_8cae4ce9c681 is the USB-Ethernet dongle plugged on the USB port of the RIO.
In case you have multiple ones, 8cae4ce9c681 is the mac address of the dongle (i.e 8C:AE:4C:E9:C6:81)
The green doesn't mean it's configured, just that we have a carrier (i.e. cable is plugged into something).
Now we can configure the camera:
- In
Configuration, create a new camera - Select
Panasonicbrand andVaricammodel - Enter the IP of your camera:
10.193.1.2
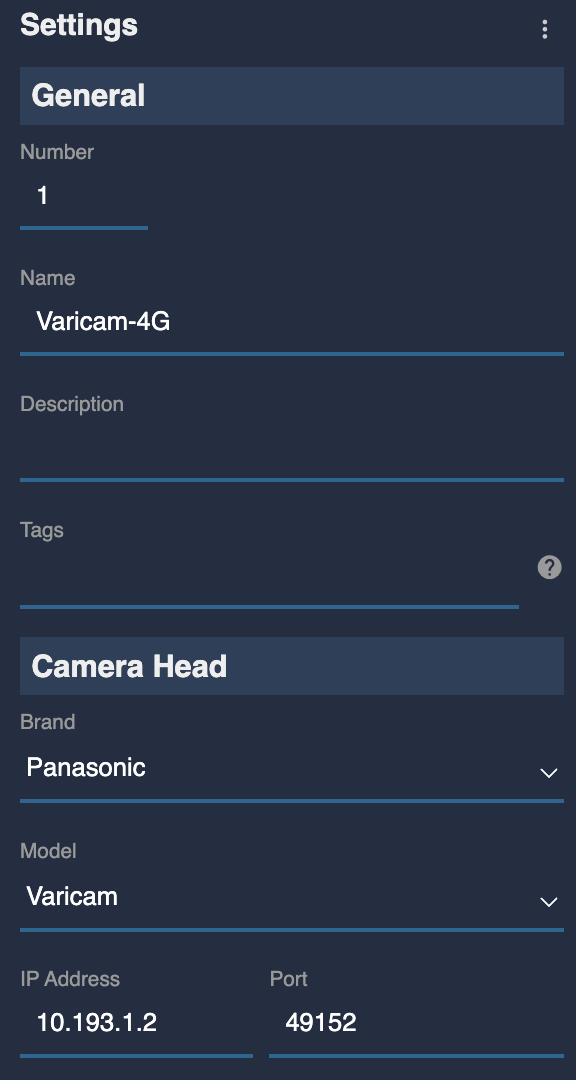
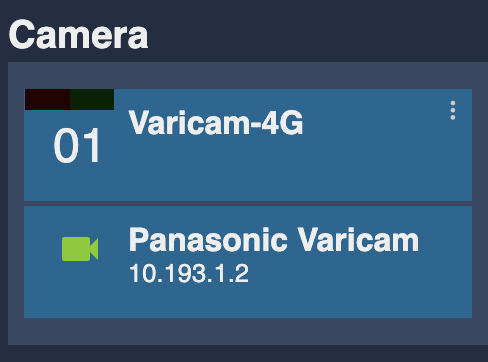
It should look like this:
Ensure your Varicam is plugged on the USB-Ethernet dongle of the RIO as in this example, we configured the range 10.193.1.1/16 on the USB dongle (not the LAN1).
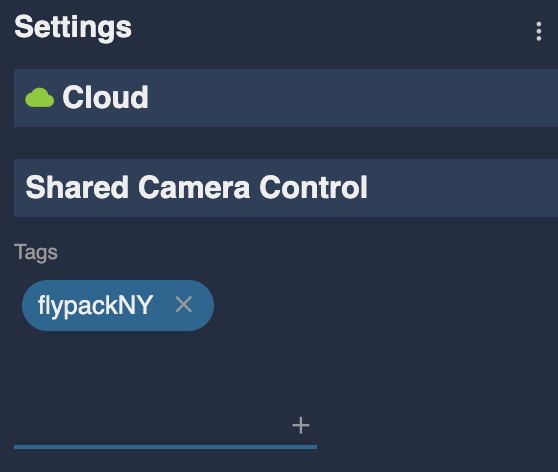
Now we configure the REMI, in the web UI, in REMI tab, add a new tag (here flypackNY):
Last step, connect your RIO to the Haivision data bridge:
In the WAN section:
- setup
InterfacetoLAN1 - setup
Modeto static - setup
IP Adressto192.168.10.2 - setup
Netmaskto255.255.255.0 - setup
Gatewayto192.168.10.1(the encoder IP)
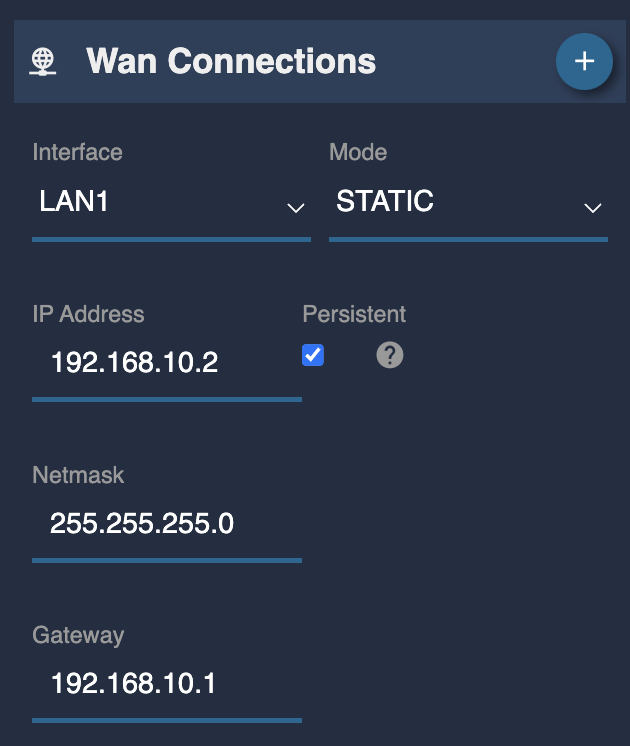
So here, we configure our LAN1 (onboard RJ45) as our WAN interface. It's connected to the encoder Ethernet to get data bridge tunneling
RCP/Decoder side
First step, put the RCP in the data bridge (Haivision).
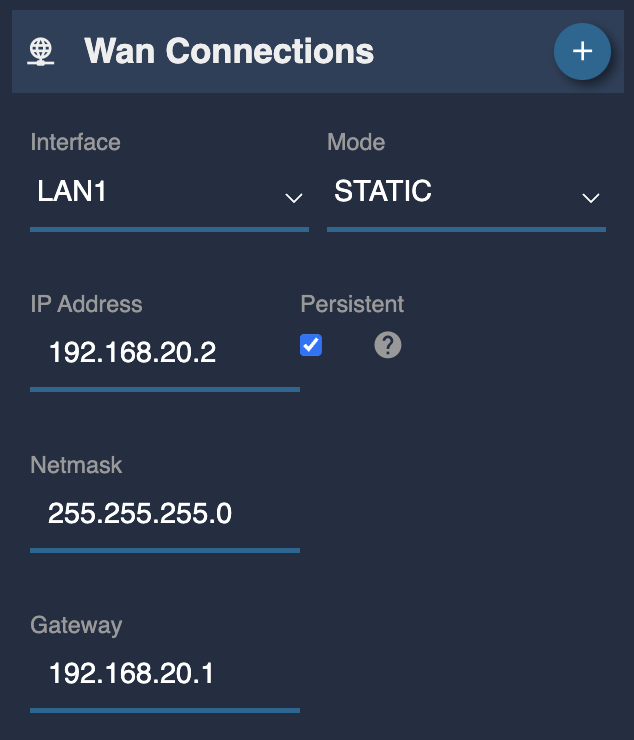
In the WAN section:
- setup
Modeto static - setup
IP Adressto192.168.20.2 - setup
Netmaskto255.255.255.0 - setup
Gatewayto192.168.20.1(the decoder IP)
Second step, put the RCP in the REMI (Cyanview):
Here we use the same tag as the RIO. RIO and RCP could have multiple tags, they will be linked if they have at least one in common. In your case, the top right green icon for cloud could be red, it's normal, it means that the RCP is not connected to the REMI server (but it's not needed here as we have a directly link between RCP and RIO).
Once the tag is added, you should see your RIO in the REMI middle section and your camera below the RIO:

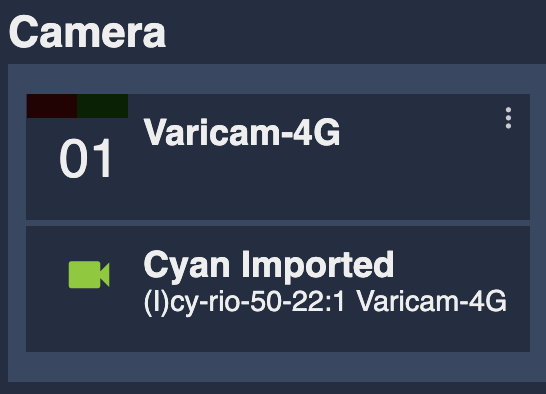
Click on the checkbox next to your camera to automatically import it from your RIO to your RCP.
If you go back to your Configuration tab, you should see your camera (imported from RIO through the data bridge):
If the camera is red in your configuration, it could means two stuff:
- your data bridge is broken (encoder/decoder not online/connected)
- your camera is not connected (changing battery, etc.)
To distinguish between the two, in REMI, you can see the status of the RIO/RCP link, should be green.
Tips
- once your imported your camera on your RCP (from your RIO), you can freely change camera name/number
- you can also update your cam on RIO side (name, number, model, etc.). The link is done and will stay until you remove the camera on one side or the other.
- once the data bridge is enabled, RIO/RCP static WAN IP is setup, you can access the RIO web UI from the RCP web UI. It's useful as you can just link the RIO/RCP properly and then configure your camera in a second step remotely. More info on this here