Sony Mirrorless Gimbal
This guide walks through the different blocks of a typical Sony mirrorless gimbal setup.
The goal is to highlight the workflow and the different bricks. The rigging and camera choice is up to you.
Wiring
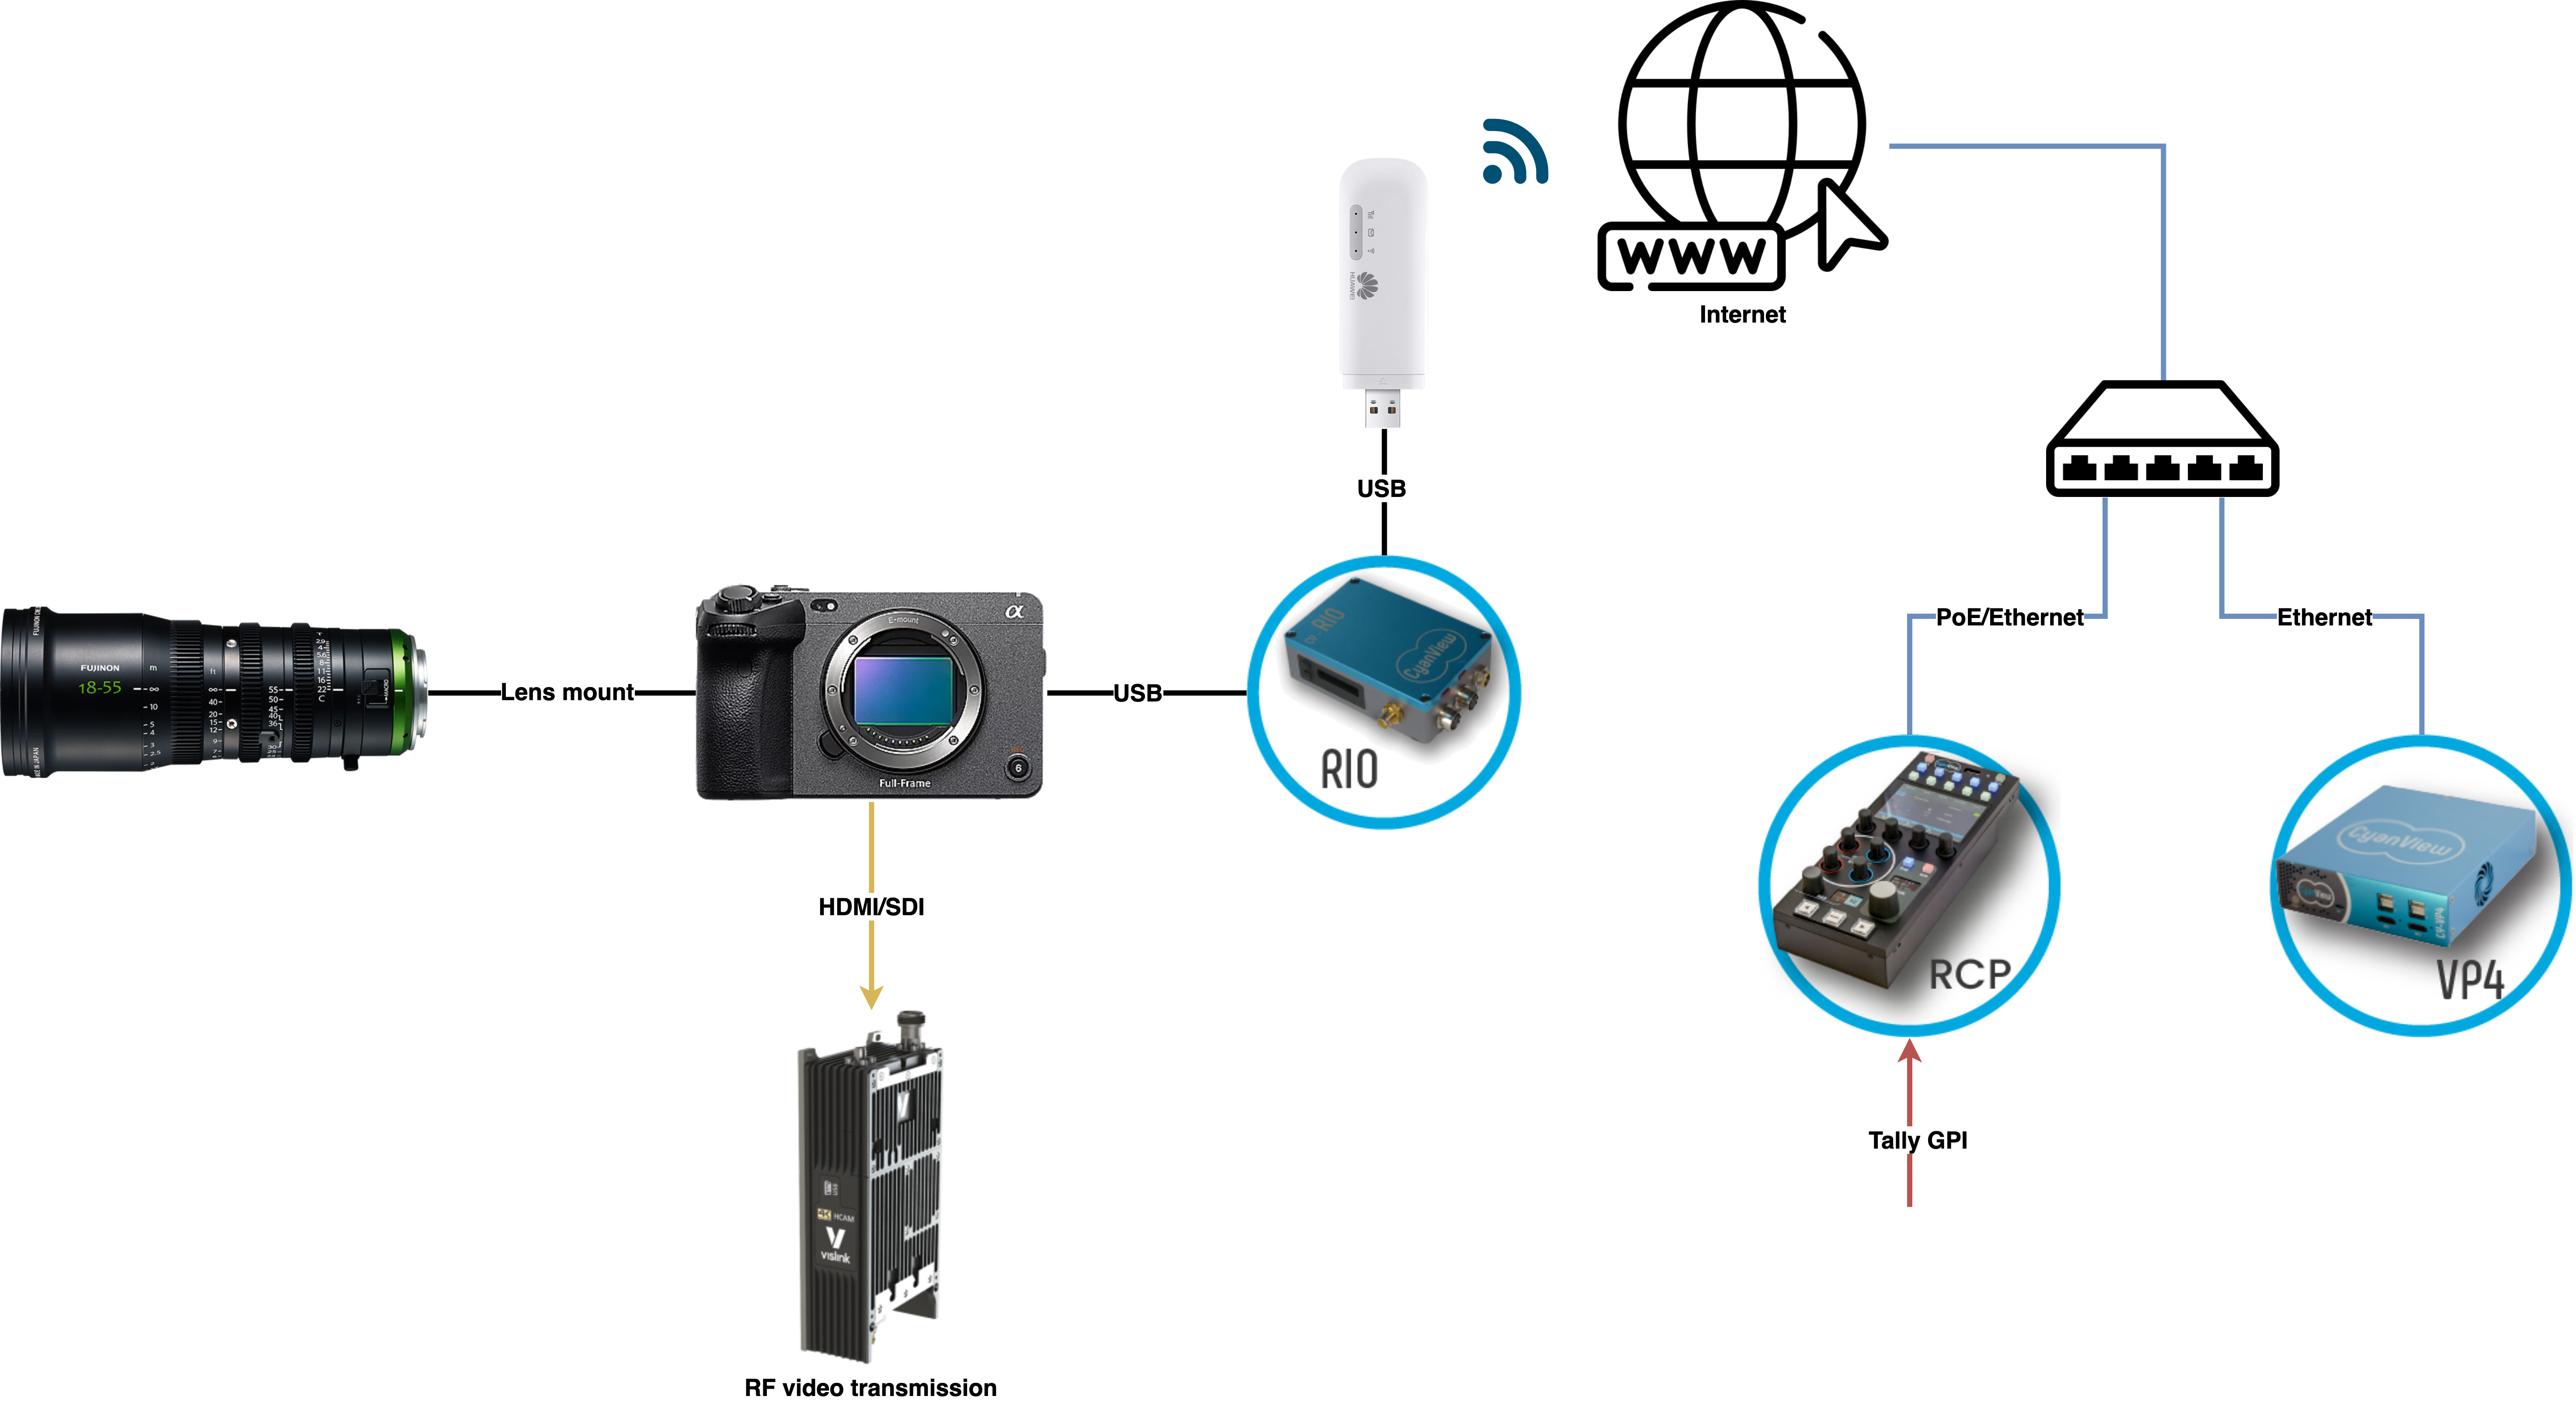
This is the typical setup:
- A Sony mirrorless camera controlled over USB
- A video transmission (RF)
- Control/Shading over 4G using RIO
- RCP controlling camera over 4G + VP4 for advanced shading/matching
Camera choice
On camera side, the RIO is connected to the camera via USB-C.
You can find more information on the Sony mirrorless control here.
While we support a lot of models, FX3 is the most popular as it's compact, active cooling, no viewfinder and 10-bit HDMI full size. FX30 is also a great option (cheaper, S35 sensor). A7S3 is the second most popular we see on the field. But the control is the same on all models, so the choice is more on the size/weight/features/price.
Pay attention that while the Sony mirrorless are controlled by USB-C, you can't control them over Wi-Fi or multi-port.
Video Transmission
We mainly see RF solutions:
- Vislink : solid, reserved bands
- Hollyland/DJI/Teradek : easy to set up and cheap
But you can also use a 4G encoder for more flexibility/coverage (Aviwest, LiveU, etc.)
The video transmission is a matter of choice/compromise and budget. But the control is independent of the video transmission.
Camera control
The RIO is connected to the camera using the USB-C port.
The RIO is connected to the Internet using 4G:
- 4G USB stick : compact, easy to set up, easy to rig (self powered) and cheap
- 4G/5G Ethernet router : more expensive, but more reliable (external antennas, etc.) like Teltonika RUT240, Netgear Nighthawk, etc.
While 4G is not stable on your smartphone, on our side, we don't need 4G (3G/2G is enough). We send just a few bytes, which is way less than any webpage you're trying to reload on your smartphone.
So it's totally possible to have 4G not working on your smartphone and working for camera shading.
Just pay attention that with 4G, you don't own the infrastructure, and you can't control the quality of service. So it could work in a stadium A and not work in a stadium B. It could work during rehearsal, but not during live. But usually, if you tested it in live, and it works in a stadium A, it will always work in this stadium A.
Remote shading with RCP
The RCP needs to connect to internet (our REMI cloud is hosted on AWS) to control the RIO/camera.
The global latency will depend on your internet connection (4G, etc.), but usually, it's around 30ms/60ms which is totally acceptable for shading.
Combining camera control with a color corrector (VP4)
As the mirrorless control is limited (exposure, white balance and REC), usually, people combine camera control + a color corrector to have more control.
You can simply have black by combining the camera with a VPro8, AJA FS-HDR, etc.
But usually people need more control and need to match this camera with the main cameras, so they use our VP4, which is a color corrector with advanced shading capabilities (multi-matrix, detail, coring, etc.)
On the RCP, you will have a single camera, combining camera control + VP4 control.
VP4 will compensate the lack of control of the camera:
- If you touch the exposure, we control the camera
- If you change the black or multi matrix, we control the VP4
Tally
A complete tally overview can be found here
The tally input can be IP (ATEM, TSL, etc.) or GPIO.
But usually, as this kit is brought alongside the Steadicam operator, they prefer the GPI for tally input as it's easier to set up (no IP setting, nothing to configure, easy to test a contact, etc.)
The tally output is usually propagated to the camera through the camera protocol. But mirrorless cameras don't have any tally, so you can use an external tally box connected to the RIO. Visible here
Setup
- Set up your 4G dongles : buy a SIM, configure it and check your laptop has internet with it. Follow this guide
- Set up your RIO/RCP with REMI/cloud : follow this guide
- Set up your camera on RIO/RCP : follow this guide
- Import your camera from RIO on your RCP : follow this guide
- Configure your VP4 : format and genlock : follow this guide
- Add the VP4 channel to your imported camera (on RCP)
From the field
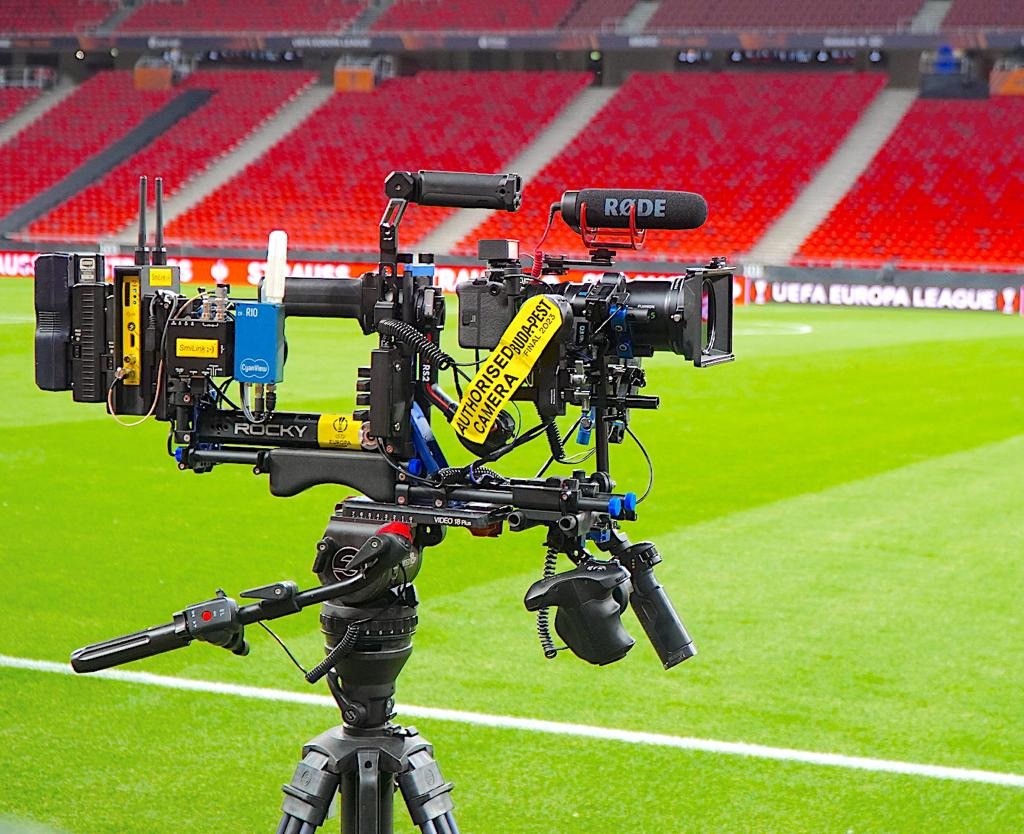
FX30 with Fujinon 18-55 mm
Andy from 4ACrew using its Rocky gear with Cyanview:
- FX30 camera
- Fujinon 18-55 mm lens
- RIO with ZTE 4G USB stick
- VP4
- RCP
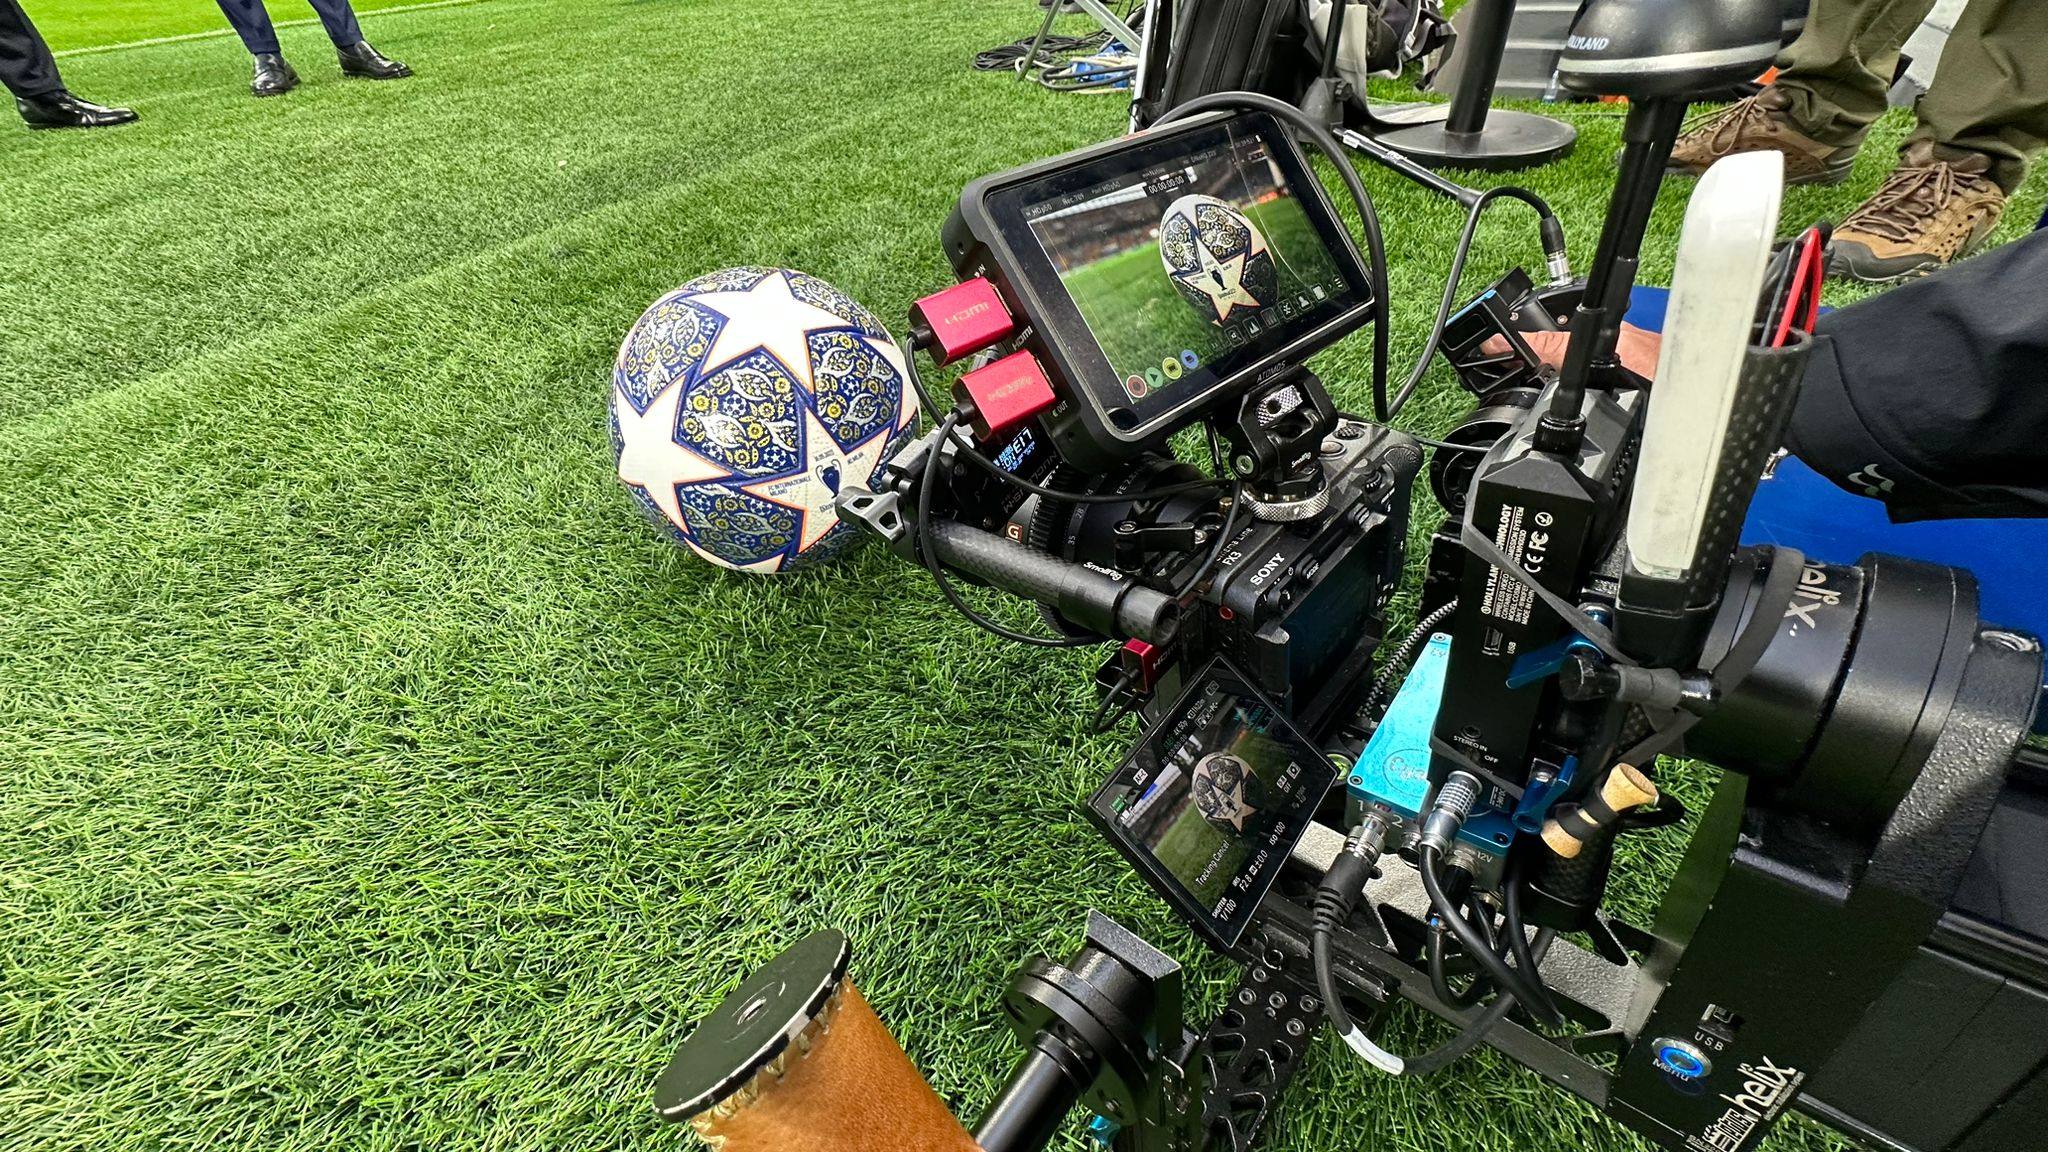
FX3 with Sony FE 16-35 mm F2.8 GM
Fabry (freelance) using its Cyanview kit:
- FX3 camera
- Sony FE 16-35 mm F2.8 GM lens
- RIO with Huawei 4G USB stick
- VP4
- RCP
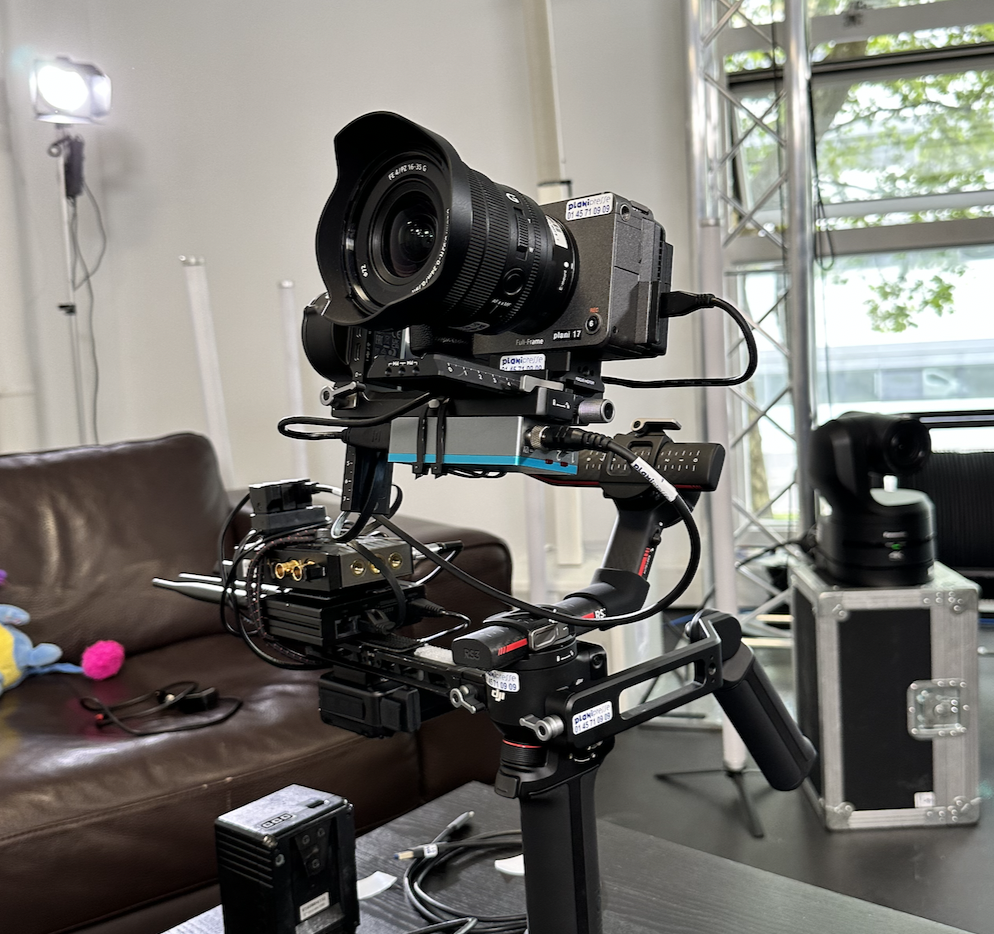
FX3 with RIO 4G using RUT240
- FX3 camera
- Sony FE PZ 16-35 mm F4 G lens
- RIO with Teltonika RUT240 4G router1
- Cyanview tally light2
- DJI RS3 pro gimbal
- CV-HD Pro800 for video transmission
- VP4
- RCP