CyanCamera
Download
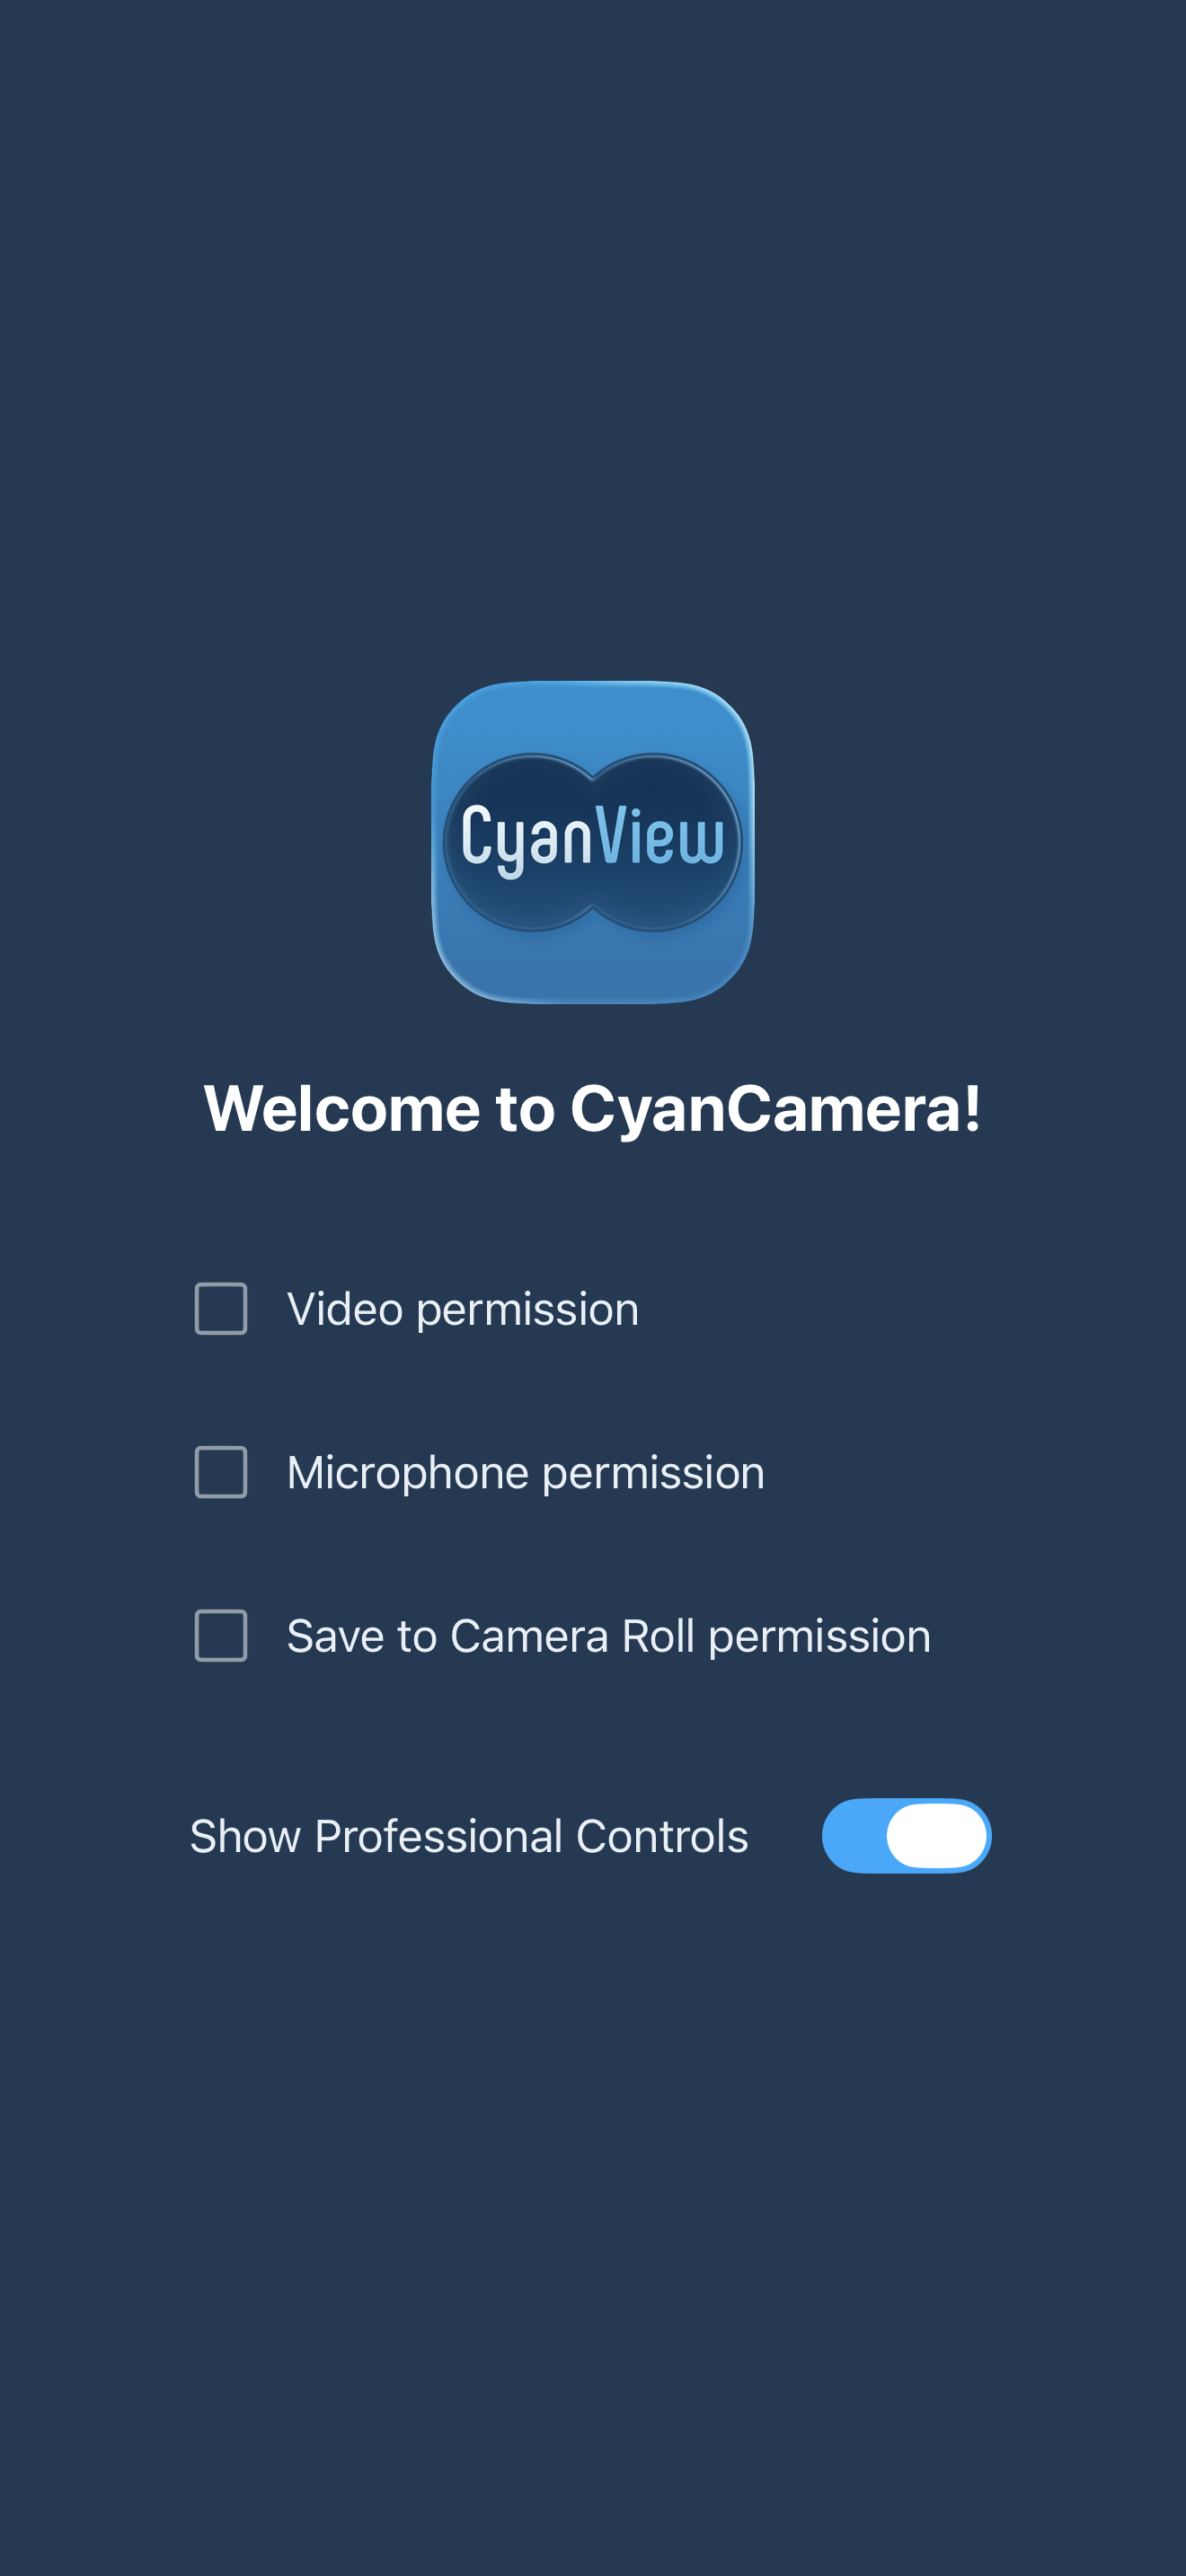
First time setup
You need to grant all permsissions in order to start using the app
Main controls
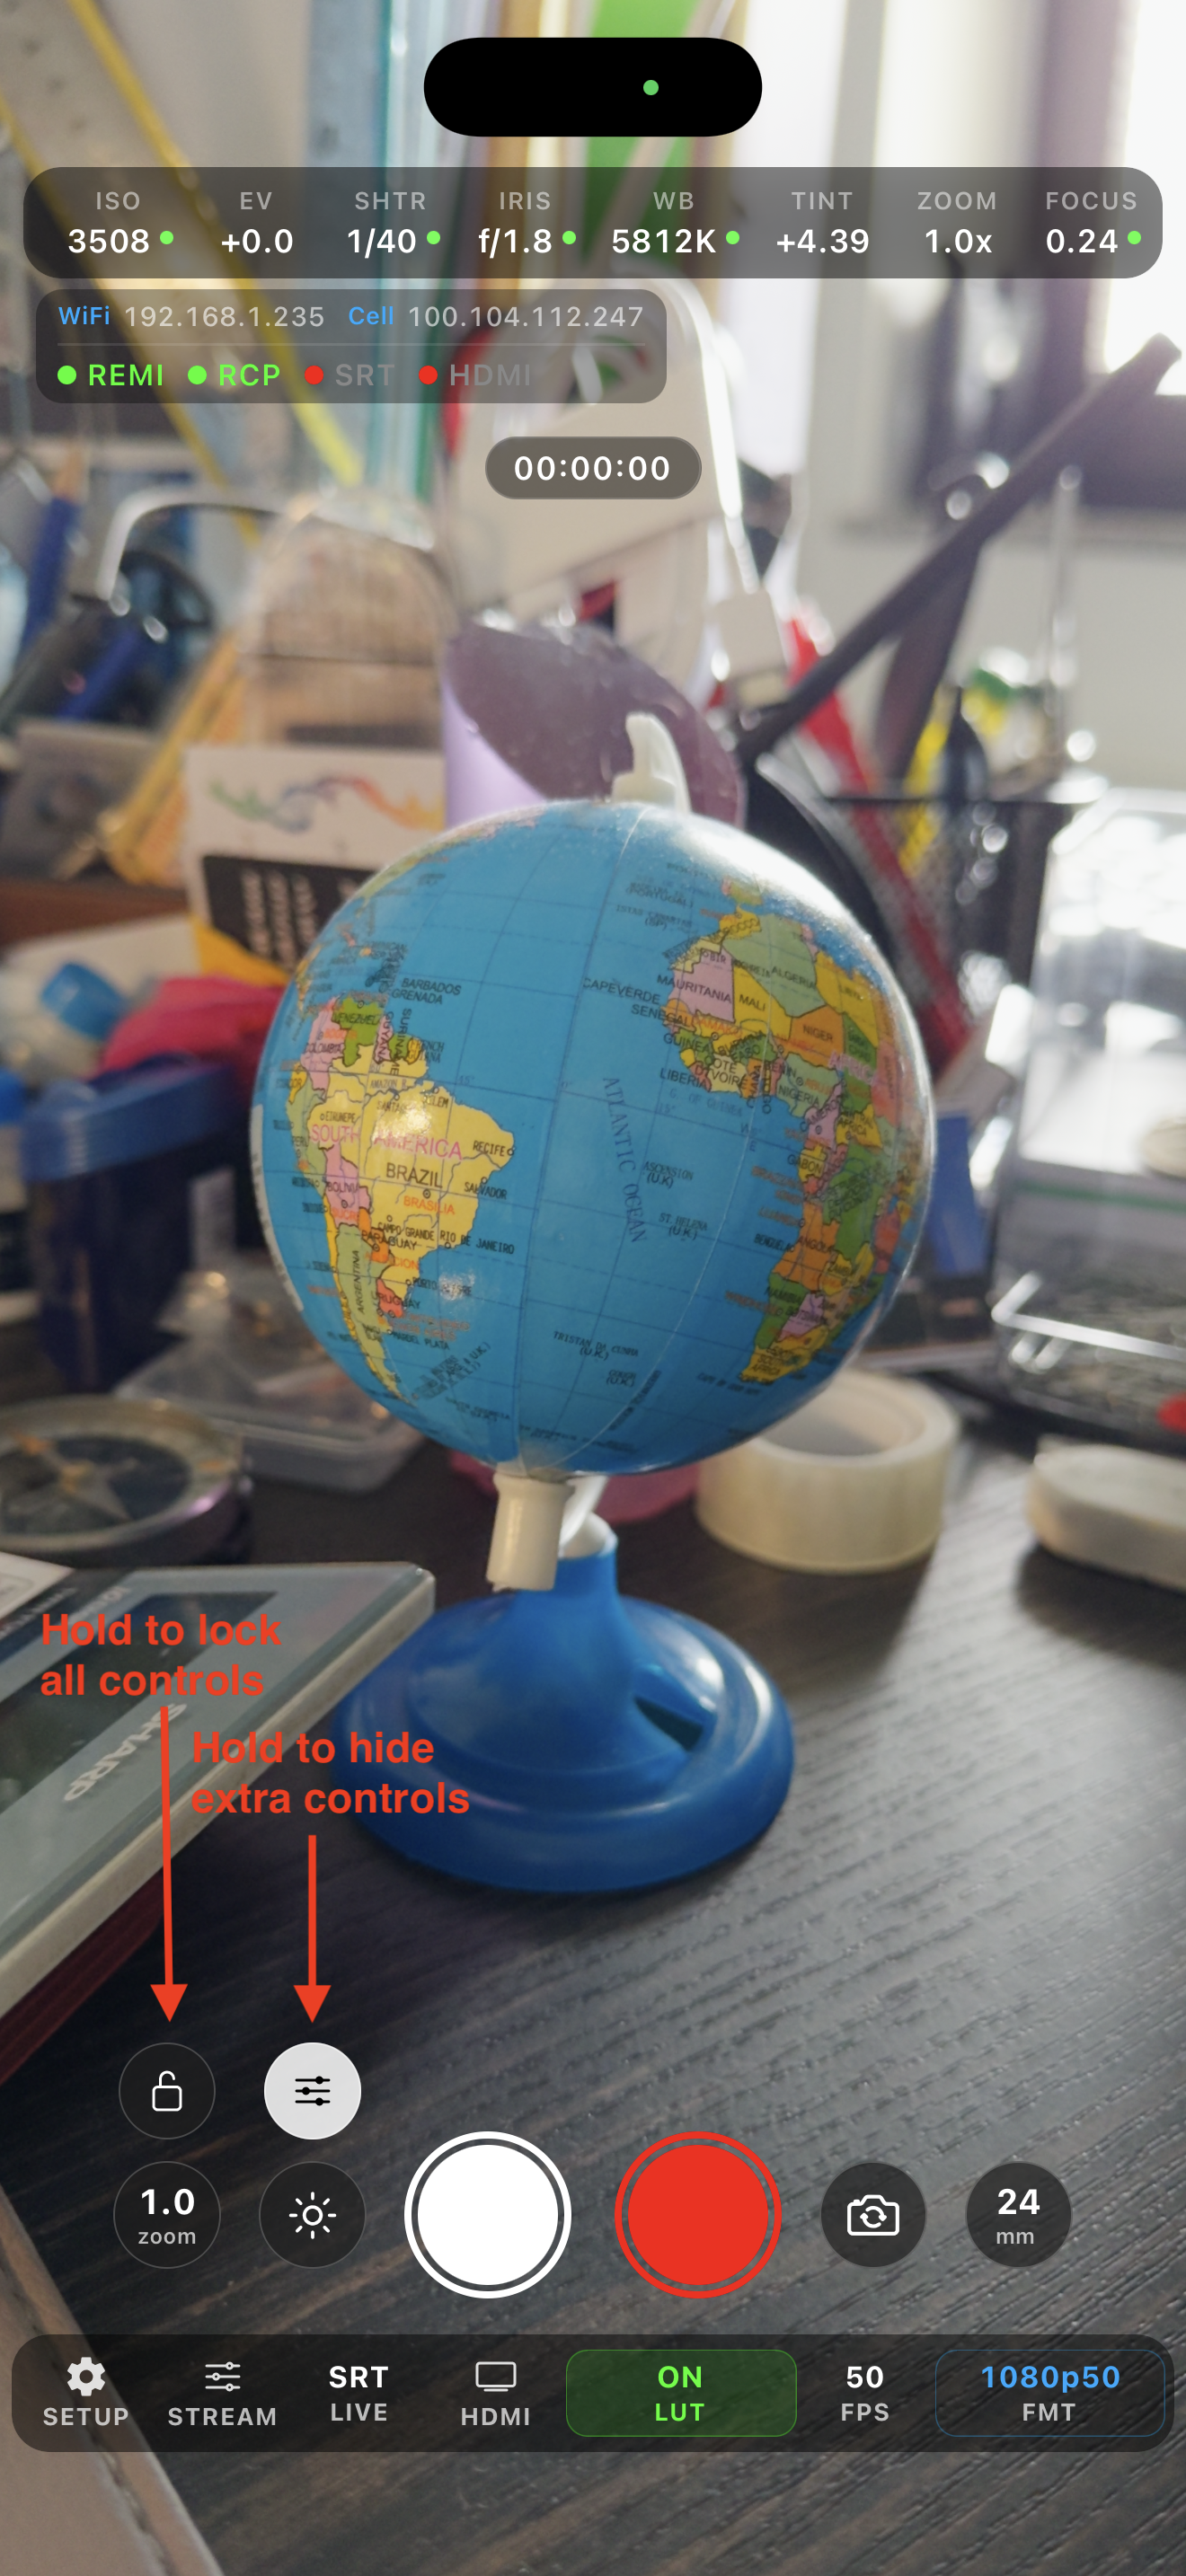
You have main controls on the right
- Start/Stop recording
- Take picture
- Flip lens front/back
- Switch lense (wide/main/tele)
- Quick zoom presets
- Flashlight / Flash rim
Pinch to zoom supported as well. Tap to focus keeps a manually locked exposure.
Recording stops only after you hold the record button for about 1.5 s, so a stray tap does not cut a take. A ring fills while you hold.
Lock and Zen mode
- Hold the lock button for 1.5 s to lock the screen.
Settings -> Lock Controlspicks what stops working while locked: record button, photo button, zoom/flash/flip/lens buttons, parameter bar, bottom controls, tap to focus and pinch to zoom. - Hold the controls button to hide the controls (Zen mode).
Settings -> Zen Modepicks what stays on screen: parameter bar, IP and status, bottom controls, scopes, audio levels, grid and frame guide, timecode.
And extra camera app control at the bottom:
- Main settings
- Stream settings
- Stream start / stop
- HDMI out start / stop
- 3D lut settings
- Format picker
If you control camera sensor value via RCP it will go to manual mode and turn indicator to orange. You can make it auto by taping on that value from phone app of via RCP. RCP supported controls:
- ISO
- EV
- Shutter
- Iris
- White balance + tint
- Lens
- Zoom
- Focus
- Flip front/back (custom button)
RCP -> Camera -> Custom - For lens switching and starting stream
Color Shading
You can tap on left bottom corner to enter luts menu.
- You can select
.cubefile from your device - You can chain it with RCP corrections on top
- RCP Corrections toggle synced with RCP -> Camera -> Custom -> CorrOff/CorrOn
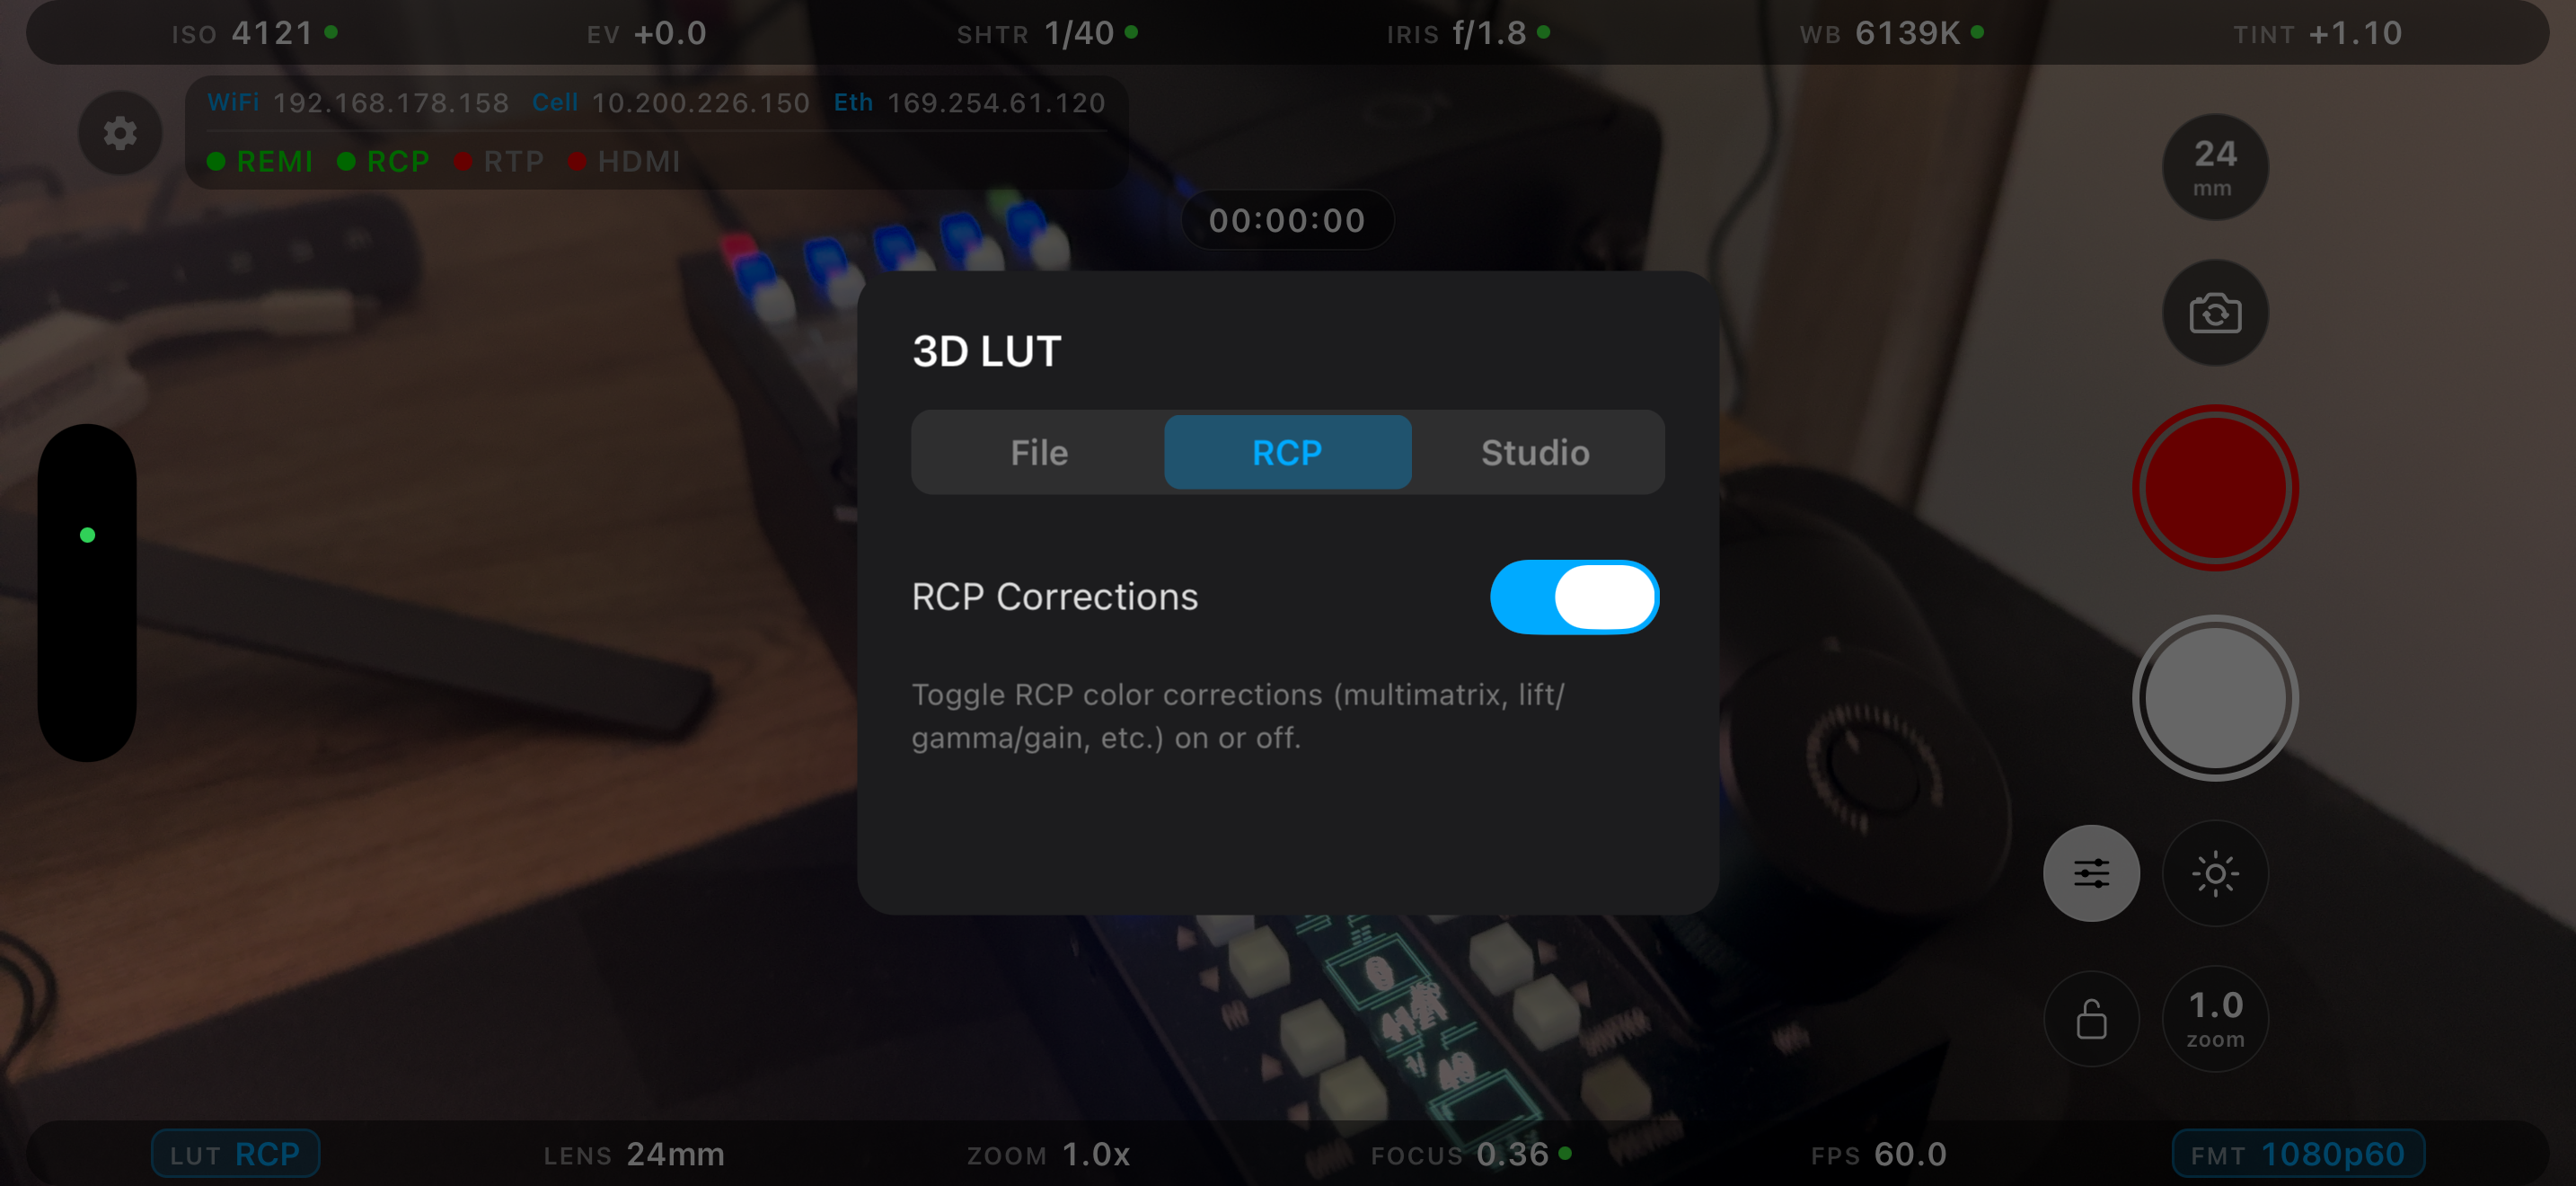
Currently supported from RCP:
- White balance RGB
- Gamma RGBM
- Black RGBM
- Master Black
- Hue/Saturation
- Multimatrix
- Local contrast (contrast around a pivot)
RCP corrections are forced off while HDMI is in Broadcast mode, because that output sends the ungraded sensor feed. The RCP hides the correction controls in that state.

| Mode | What is applied | Processing path | Output, HDR LUT off / on | Notes |
|---|---|---|---|---|
| Off | Nothing | Raw buffer passthrough | Source tags at 10-bit, Rec.709 at 8-bit | Log/HLG at 8-bit looks flat |
| RCP only | Lift, gamma, gain, saturation, hue, multimatrix | Core Image sRGB cube; Metal if HDR LUT on | 8-bit Rec.709 / 10-bit BT.2020 HLG | Corrections computed in scene-linear light for the active colour space |
| File LUT | The .cube only, RCP params stored but not applied | Metal two-pass on raw code values | Rec.709 at 8 or 10-bit / BT.2020 HLG at 10-bit | Typical Log to 709 conversion |
| Chain RCP → file | RCP grade, then the .cube | Composed cube (17³ into the file's size), Metal two-pass | Same as file LUT | Default whenever both are active; rebuilt on each RCP tick |
| Studio LUT | Whole Studio flow baked into one .cube | Same as file LUT, source "studio" | Same as file LUT | Re-pushed over the phone's WebSocket on each bound-grade change |
| Studio LUT + RCP | RCP grade, then the Studio cube | Chain, as above | Same as file LUT | RCP may grade twice, see below |
| Scope off for an output | Nothing on that output | Raw buffer for that output only | As "Off" | Per output: Monitor, Record, Stream |
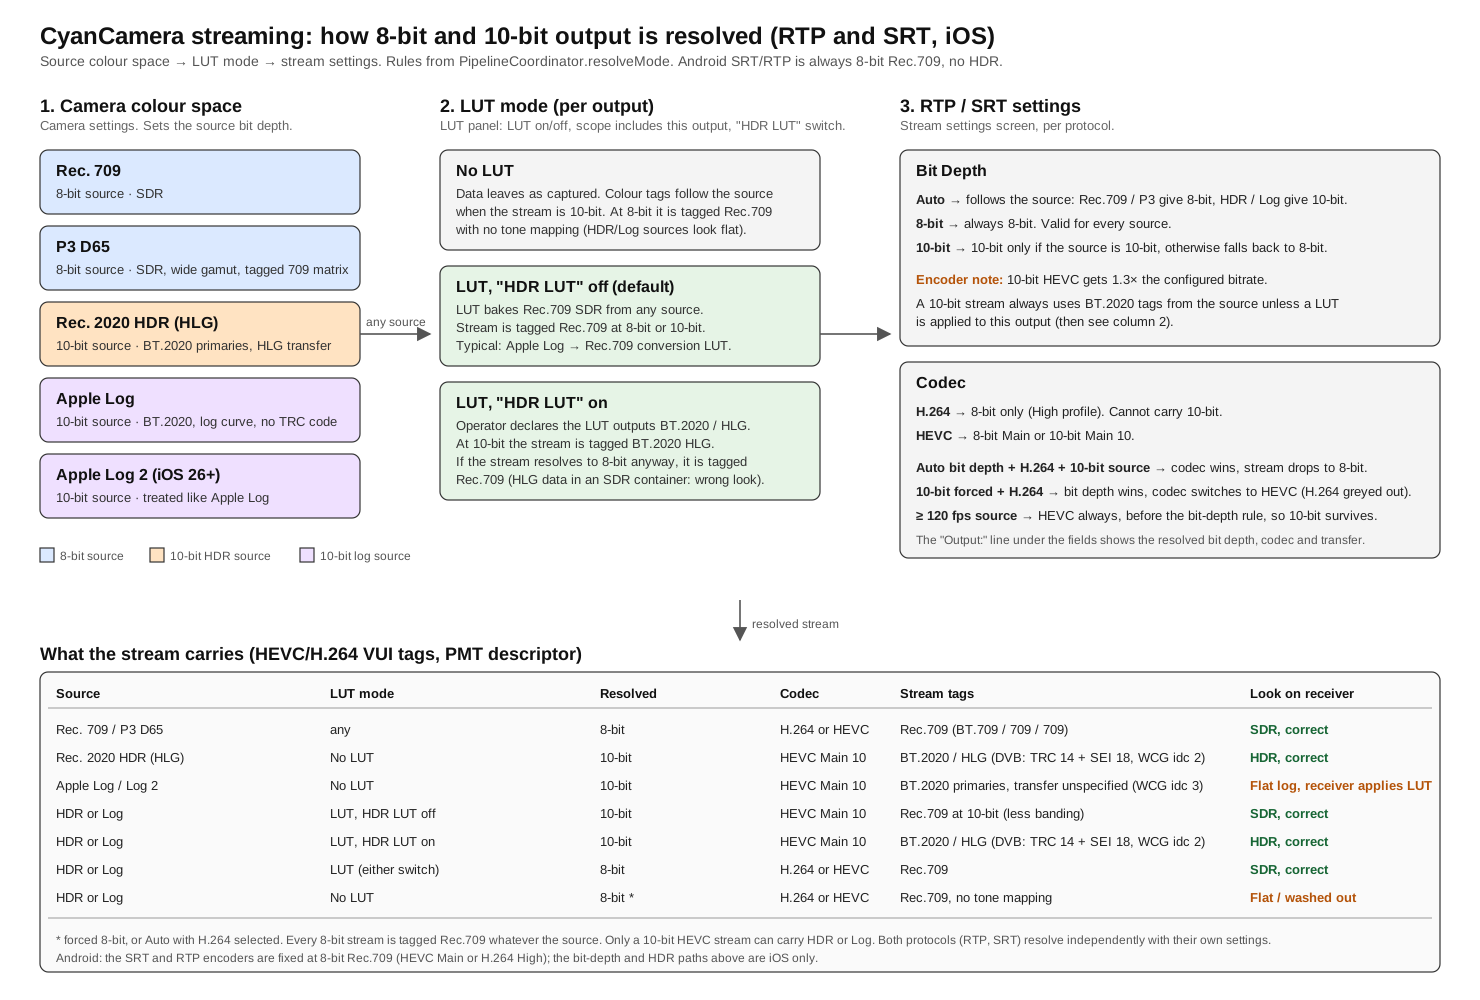
| Source | LUT mode | Resolved | Codec | Stream tags | Look on receiver |
|---|---|---|---|---|---|
| Rec. 709 / P3 D65 | any | 8-bit | H.264 or HEVC | Rec.709 (BT.709 / 709 / 709) | SDR, correct |
| Rec. 2020 HDR (HLG) | No LUT | 10-bit | HEVC Main 10 | BT.2020 / HLG (DVB: TRC 14 + SEI 18, WCG idc 2) | HDR, correct |
| Apple Log / Log 2 | No LUT | 10-bit | HEVC Main 10 | BT.2020 primaries, transfer unspecified (WCG idc 3) | Flat log, receiver applies LUT |
| HDR or Log | LUT, HDR LUT off | 10-bit | HEVC Main 10 | Rec.709 at 10-bit (less banding) | SDR, correct |
| HDR or Log | LUT, HDR LUT on | 10-bit | HEVC Main 10 | BT.2020 / HLG (DVB: TRC 14 + SEI 18, WCG idc 2) | HDR, correct |
| HDR or Log | LUT (either switch) | 8-bit | H.264 or HEVC | Rec.709 | SDR, correct |
| HDR or Log | No LUT | 8-bit * | H.264 or HEVC | Rec.709, no tone mapping | Flat / washed out |
Streaming
Currently supported protocols: RTP & SRT
You can hold rtp/srt indicator and get into stream settings menu: To start stream you you need to tap on indicator once.
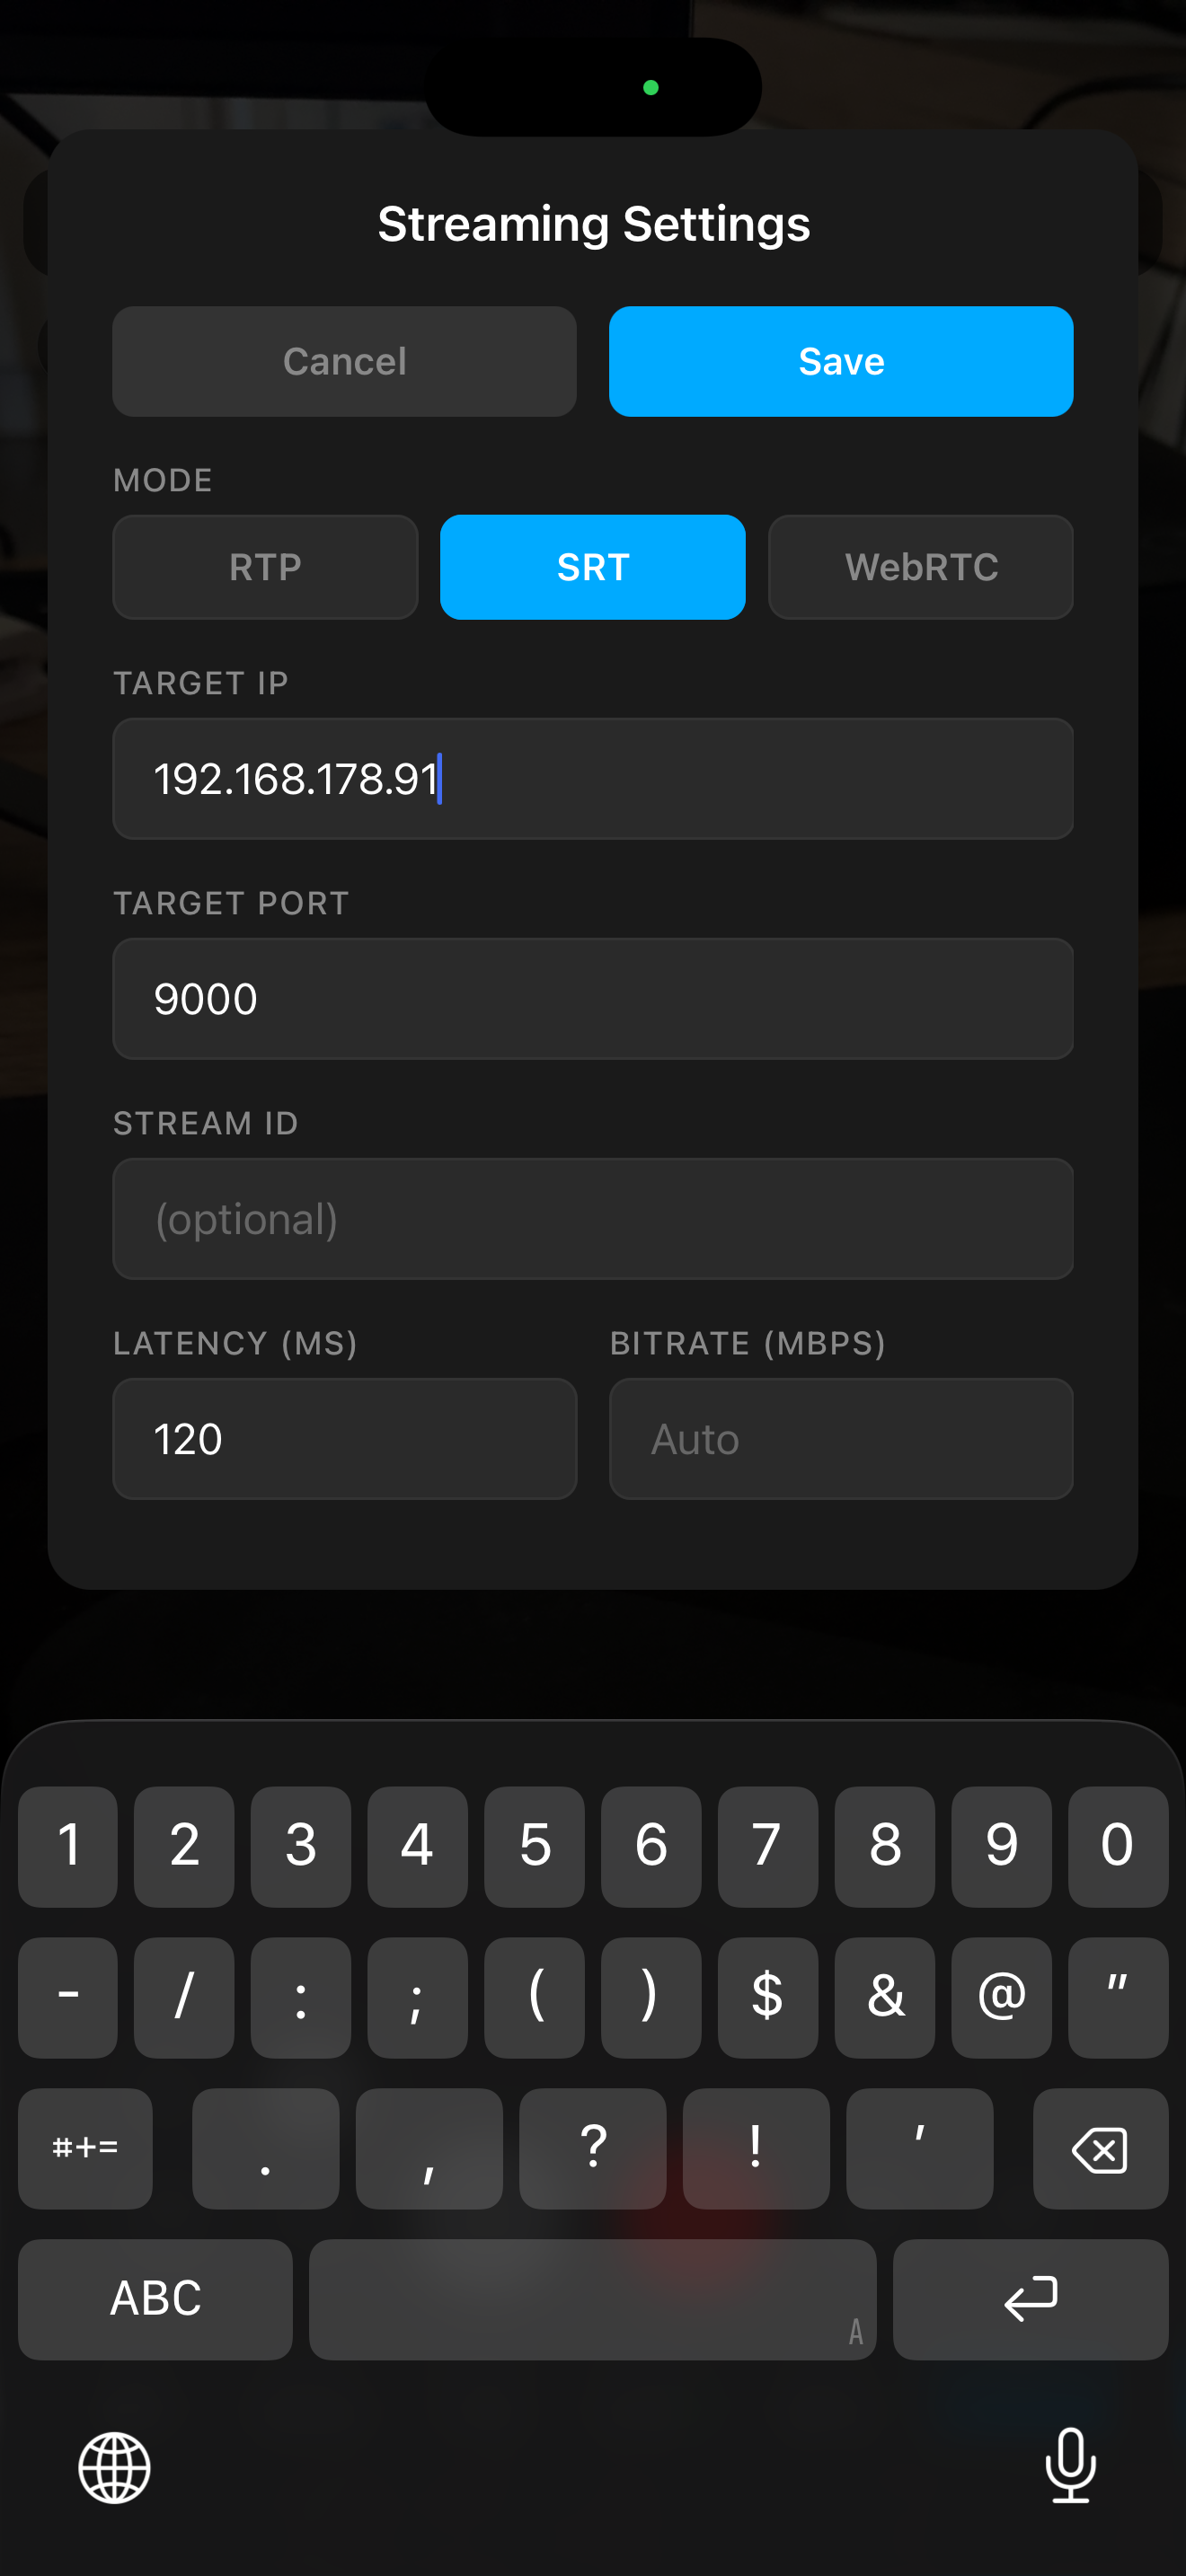
Here few server examples which require ffmpeg installed:
SRT Server + preview:
srt-live-transmit "srt://0.0.0.0:9000?mode=listener" "udp://127.0.0.1:5000" & ffplay -i "udp://127.0.0.1:5000"
SRT Sever + HDR preview:
mpv 'srt://0.0.0.0:9000?mode=listener' \
  --hwdec=videotoolbox \
  --vo=gpu-next \
  --target-colorspace-hint=yes \
  --loop-file=inf \
  --keep-open=always \
  --idle=yes \
  --demuxer-thread=yes \
  --network-timeout=0
RTP Server + preview:
ffplay -fflags nobuffer -flags low_delay -framedrop -probesize 32 -analyzeduration 0 -sync ext -protocol_whitelist file,udp,rtp -f sdp -i <(echo -e "v=0\nm=video 4444 RTP/AVP 96\nc=IN IP4 0.0.0.0\na=rtpmap:96 H264/90000")
Recording
Open Settings -> Recording. Recordings are .mov files on iOS and .mp4 on Android.
File name
Build the name from tokens: #camera, #reel, #position, #timestamp. Tap a token chip to add or remove it, or type the format directly. Fill in the Camera, Reel and Position fields below. The footer shows the next file name. Reel goes up by one with every recording; set it back to 1 to restart the count.
Save location
- Photo Library (Gallery on Android) by default.
- External Folder: pick an SSD, iCloud Drive or any Files location. The choice survives app restarts. Recommended for ProRes.
Codec (iOS)
| Codec | Notes |
|---|---|
| HEVC | Default. Efficient, small files. |
| ProRes 422 Proxy | Edit proxy, about 45 Mbps at 1080p |
| ProRes 422 LT | About 100 Mbps at 1080p |
| ProRes 422 | Broadcast standard, about 145 Mbps at 1080p |
| ProRes 422 HQ | Highest quality, about 220 Mbps at 1080p |
ProRes needs a ProRes-capable iPhone (13 Pro or later) and a 10-bit source: set Color Space to HLG or Apple Log first. Files are much larger than HEVC.
Bit depth (iOS)
- Auto: matches the source. HLG and Apple Log record 10-bit, Rec. 709 and P3 record 8-bit.
- 8-bit: smaller files, SDR.
- 10-bit: keeps HDR and LUT gradients banding-free. Needs a 10-bit source, otherwise falls back to 8-bit.
The Resolved: line under the options shows what you will actually get, for example 10-bit HEVC.
Bitrate (HEVC)
Auto, 40, 80, 120, 160 or 240 Mbps. The list is capped by resolution: 40 Mbps below 1080p, 120 Mbps at 1080p, 240 Mbps at 4K.
LUT in the recording
The LUT is only baked into the file when the Record scope is on in the LUT panel. With a LUT the file is Rec.709. Without a LUT a 10-bit HLG or Apple Log recording keeps its colour space, so grade it later.
Timecode and genlock (iOS 26, USB-C sync dock such as Blackmagic Camera ProDock)
Genlockin Settings locks the sensor to the dock's reference (iPhone 17 Pro or later). The status line under the switch readscalibratingfirst, thenLocked to reference. The indicators on the camera screen show the same states.TC Sourcepicks the timecode: Internal (phone clock, time of day, not shared with other cameras) or an external source. External sources are LTC from the dock and MIDI timecode (MTC) over USB or the network. A saved source that is unplugged stays listed asNot connected. If the sync fails,Retry Timecode Syncskips the wait.- Network MIDI: turn on
TC Source -> Receive MIDI Timecode. On a Mac connect from Audio MIDI Setup (MIDI Studio > Network), on Windows use rtpMIDI, then play MTC. To test without MIDI software, use the script below. - The timecode is written as a timecode track into every recording.
TC Offset (frames)shifts it if your reference is early or late.
Test MIDI timecode without MIDI software
The script below sends MTC over rtpMIDI from any computer with Python 3, no install needed. Save it as mtc.py.
- On the phone, turn on
TC Source -> Receive MIDI Timecode. - Find the phone's session port, usually
5004. On a Mac:
dns-sd -B _apple-midi._udp
dns-sd -L "<session name>" _apple-midi._udp
- Run the script with the phone's IP. Optional: frame rate (24, 25 or 30, default 25) and a start timecode. Without a start timecode it sends the computer's time of day.
python3 mtc.py 192.168.1.42
python3 mtc.py 192.168.1.42:5004 30 10:00:00:00
- On the phone, pick
MTC TestinTC Source. The status goes to synchronized and the timecode on screen matches the one the script prints. A start timecode like10:00:00:00makes it easy to see that the phone uses the external source.Ctrl+Cends the session.
mtc.py
import datetime, random, socket, struct, sys, threading, time

host, _, port = sys.argv[1].partition(":")
port = int(port or 5004)
fps = int(sys.argv[2]) if len(sys.argv) > 2 else 25
rate = {24: 0, 25: 1, 30: 3}[fps]
ssrc, token = random.getrandbits(32), random.getrandbits(32)

def ts():
    return int(time.monotonic() * 10000)

while True:
    ctrl = socket.socket(socket.AF_INET, socket.SOCK_DGRAM)
    ctrl.bind(("0.0.0.0", 0))
    data = socket.socket(socket.AF_INET, socket.SOCK_DGRAM)
    try:
        data.bind(("0.0.0.0", ctrl.getsockname()[1] + 1))
        break
    except OSError:
        ctrl.close()

invite = struct.pack("!H2sIII", 0xFFFF, b"IN", 2, token, ssrc) + b"MTC Test\0"
for sock, p in ((ctrl, port), (data, port + 1)):
    sock.settimeout(1)
    for _ in range(10):
        sock.sendto(invite, (host, p))
        try:
            if sock.recvfrom(1024)[0][2:4] == b"OK":
                break
        except socket.timeout:
            pass
    else:
        sys.exit(f"no answer from {host}:{p}")
    sock.settimeout(None)
print("connected")

def ck(count, t1, t2, t3):
    return struct.pack("!H2sIB3xQQQ", 0xFFFF, b"CK", ssrc, count, t1, t2, t3)

def listen(sock, p):
    while True:
        pkt = sock.recvfrom(1024)[0]
        if pkt[2:4] == b"CK" and len(pkt) >= 36:
            count, t1, t2 = pkt[8], *struct.unpack("!QQ", pkt[12:28])
            if count == 0:
                sock.sendto(ck(1, t1, ts(), 0), (host, p))
            elif count == 1:
                sock.sendto(ck(2, t1, t2, ts()), (host, p))

for sock, p in ((ctrl, port), (data, port + 1)):
    threading.Thread(target=listen, args=(sock, p), daemon=True).start()

seq = 0
def send(msg):
    global seq
    seq = (seq + 1) & 0xFFFF
    data.sendto(struct.pack("!BBHII", 0x80, 0x61, seq, ts() & 0xFFFFFFFF, ssrc) + bytes([len(msg)]) + msg, (host, port + 1))

def split(frames):
    s = frames // fps
    return (s // 3600) % 24, (s // 60) % 60, s % 60, frames % fps

if len(sys.argv) > 3:
    h, m, s, f = map(int, sys.argv[3].split(":"))
    start = ((h * 60 + m) * 60 + s) * fps + f
    t0 = time.time()
else:
    now = time.time()
    tod = (now + datetime.datetime.now().astimezone().utcoffset().total_seconds()) % 86400
    start = int(tod * fps) + 1
    t0 = now + start / fps - tod

h, m, s, f = split(start)
send(bytes([0xF0, 0x7F, 0x7F, 0x01, 0x01, rate << 5 | h, m, s, f, 0xF7]))
q, last_sync = 0, 0
try:
    while True:
        wait = t0 + q / (fps * 4) - time.time()
        if wait > 0:
            time.sleep(wait)
        piece = q % 8
        h, m, s, f = split(start + (q - piece) // 4)
        value = [f, s, m, rate << 5 | h][piece // 2]
        send(bytes([0xF1, piece << 4 | (value >> 4 if piece % 2 else value & 0x0F)]))
        if piece == 0 and q % (fps * 4) < 8:
            print(f"{h:02}:{m:02}:{s:02}:{f:02}", flush=True)
        if time.monotonic() - last_sync > 5:
            data.sendto(ck(0, ts(), 0, 0), (host, port + 1))
            last_sync = time.monotonic()
        q += 1
except KeyboardInterrupt:
    bye = struct.pack("!H2sIII", 0xFFFF, b"BY", 2, token, ssrc)
    ctrl.sendto(bye, (host, port))
    data.sendto(bye, (host, port + 1))
Android
Recordings are Rec.709 at a fixed bitrate. Capable devices offer H.264 8-bit or HEVC 10-bit; the external folder works the same way.
HDMI output
Connect a USB-C to HDMI adapter and tap the HDMI button in the bottom row to start or stop the output. The icon lights up while the output is on and a display is connected.
Settings -> HDMI Mode picks one of three outputs:
| Mode | What you get | Latency | LUT, de-squeeze, rotation |
|---|---|---|---|
| Preview | Panel's native refresh, usually 60 Hz. 23.98 content shows as pulldown. | Lowest | Applied |
| Video Feed (default) | The HDMI link is driven at the capture rate, so 23.98 or 59.94 come out with exact cadence (iOS 26). | Adds a little | Applied |
| Broadcast | Sensor feed sent straight to the DisplayPort link with SMPTE ancillary data, including lens metadata. Exact cadence. | Lowest | Not applied, RCP corrections off too |
Broadcast needs iOS 27 and a supported capture format; the option is greyed out otherwise. The format picker marks presets that do not support Broadcast. In Broadcast, paint goes to the ColorBox and de-squeeze applies to the on-device monitor only.
- The LUT on HDMI follows the
Monitorscope in the LUT panel, which covers preview and HDMI together. Without a LUT an HLG source is sent as HDR. HDMI Audioin Settings plays the microphone input through the HDMI audio while the output is on, for monitoring on the external display.- Android : a single mode, the LUT-processed feed full screen on the external display.
REMI setup
REMI is the protocol the CyanView RCP and gateway use to control cameras. The phone runs a REMI server on TCP port 7447; the gateway connects to the phone. One gateway at a time.
Camera number
Settings -> Camera Number (1 to 255) is what the camera shows up as on the RCP. The device is announced as <number> <name>, for example 1 CyanCamera.
Local network
Put the phone on the same network as the gateway and add it as a REMI device with the phone's IP address and port 7447. The phone re-announces itself every few seconds until the gateway subscribes.
Cloud (remote RCP)
When the RCP is not on the same network, Settings -> REMI relays REMI through CyanView's cloud:
Camera Name: the name shown on the RCP.Tag: must match the tag configured on the gateway or RCP side. Several RCPs can share one tag.Region: Auto, EU or US, or Manual to enter your own host and port.Connect/Disconnect. The status reads Disconnected, Connecting or Connected, and the fields lock while connected.
VISCA over IP
Settings -> REMI -> VISCA over IP accepts VISCA lens commands on UDP port 52381 (editable while off).
What the RCP controls
ISO, EV, shutter, iris, white balance and tint, lens, zoom and focus. Taking a value on the RCP puts it in manual and the phone shows it in orange; tap the value on the phone, or use auto on the RCP, to go back to auto. Colour corrections (white balance RGB, gamma, black, hue, saturation, multimatrix, local contrast) go into the phone's LUT engine, see Color Shading.
Settings -> RCP Knob Stepssets how much one RCP knob step changes each value.Settings -> On RCP Losspicks what happens when the RCP disconnects: restore the last manual values, or go back to auto exposure.- The RCP's Gain Limit and Auto Exposure Range set the phone's exposure limits, see Settings.
Custom buttons (RCP -> Camera -> Custom)
| Button | Action |
|---|---|
| RTP, SRT | Start or stop the stream in that protocol |
| 13mm, 24mm, 77mm (your lenses) | Switch lens |
| bit-, bit+ | Stream bitrate down or up by 0.1 Mbps while streaming |
| Flip | Switch between front and back camera |
| CorrON / CorrOFF | RCP colour corrections on or off, shows the current state |
Blackmagic Zoom Demand / Focus Demand (iOS)
Plug a Blackmagic Zoom Demand and/or Focus Demand into the phone over USB-C. They need the firmware released with iPhone support. No setup is needed.
- Zoom Demand rocker: zooms, speed follows how far you push it.
- Speed dial: scales the zoom speed.
- Long press the first button with the rocker at rest: re-centres the rocker.
- Focus Demand wheel: focus.
One Zoom Demand per phone. Turn on Settings -> Zoom -> Soft Zoom Ramp for broadcast-servo style starts and stops.
Settings
Use the search bar at the top of Settings to find any option. Stepper rows repeat when you hold + or -, and a reset button brings the default back.
Exposure Limits (iOS)
Limit Auto Exposure keeps auto exposure inside a Min/Max ISO and Fastest/Slowest shutter window, like an RCP-controlled camera. Manual and RCP control are never limited. An RCP can set the window through Gain Limit and Auto Exposure Range.
Zoom (iOS)
- Base Lens:
Free Zoom(full range, lenses switch while zooming) or a fixed lens that zooms to 2x its focal length. Physical Zoom Only(Free Zoom only): no digital crop, zoom changes only by switching lens.Soft Zoom Ramp: eases start and stop on RCP zoom moves. Pinch zoom stays direct.
Widgets
RGB histogram, RGB parade, vectorscope, audio levels, grid and frame guide (preset or custom ratio, cross marker, mask and mask level). Highlight Scope enlarges one scope. Scope Refresh Rate trades smoothness against battery and heat; 60 Hz needs 60 fps capture.
Monitor
Shutter in Degrees: shows shutter as an angle everywhere, including Exposure Limits.Always Show Controls,Lock Horizontal,Lock Portrait,Monochrome Settings Icons.Swipe Twice to Exit(iOS): a single swipe on the home indicator does not leave the app.
Export, import and reset
Export Settingssaves every setting, the RCP corrections and the active LUT to a JSON file.Import Settingsreplaces all settings with an exported file, then restarts the app.Reset Entire Apperases all settings, imported LUTs, stream and REMI setup. Recordings are kept.
Settings API
Settings -> Settings API runs a REST server on the phone. See Settings API.
Settings API
Settings -> Settings API -> REST API runs a REST server on port 8090, at http://<phone-ip>:8090. It is on by default. When you turn it off, it stays off across restarts and imports. Reset Entire App turns it on again. While it is on, the page lists the phone's addresses.
There is no authentication: anyone on the same network can read and replace the settings, including the SRT passphrase. Turn it off when you do not need it.
Endpoints
| Endpoint | Does |
|---|---|
GET /api/settings | Returns the export JSON, the same file as Export Settings |
PUT /api/settings | Imports the JSON, then restarts the app. POST is accepted too |
GET /api/rcp-steps | Returns the RCP knob steps |
PUT /api/rcp-steps | Sets RCP knob steps, no restart. POST is accepted too |
GET /api/status | Battery, temperature and thermal state, read-only |
Export and import
curl -o phone-settings.json http://<phone-ip>:8090/api/settings
curl -X PUT -H 'Content-Type: application/json' --data-binary @phone-settings.json http://<phone-ip>:8090/api/settings
The import answers 200 {"status":"ok","restarting":true}, and the app restarts about 0.5 s later. The API comes back after the restart, so wait a few seconds before the next request. The request must send Content-Length (curl --data-binary does this). Chunked uploads get 411. The body limit is 32 MB.
Export format
| Field | Content |
|---|---|
exportedAt | ISO 8601 time of the export |
app | version, build |
device | platform, osVersion, current video preset |
camera | Live sensor values and RCP corrections (ISO, shutter, white balance, focus, zoom, iris, lift/gamma/gain, saturation, hue). null when the camera screen is not open. Export only, not applied on import |
stream | Effective RTP and SRT settings with defaults filled in: mode, rtp (target, preset, codec, bitrate, bitDepth, control), srt (target, config, preset, bitDepth, autoRetry) |
lut | Active 3D LUT: name, source, uri, encoding (cube text or base64 for Studio binary LUTs), data. null when no LUT is active |
native | microphoneInput, externalFolderPath |
settings | Every stored app setting by key. JSON values are decoded. This includes the stored manual camera values, the RCP corrections and the RCP knob steps (cyan_encoder_steps) |
Import behaviour
settingsandstreamare written together, then stored settings that are not in the file are removed. A key edited undersettingswins over the same value instream.- From the start of the import until the app restarts, nothing else in the app can save settings, so old values cannot be written back.
- The
lut.datais saved to the app'simported-luts/folder, and every reference to the oldlut.uripoints to the new file. Imported LUTs in the library that do not exist on this phone are removed. - The microphone mode is restored only for
auto,builtinandexternal. A specific input and the external recording folder are tied to the original phone and are not restored. - The REST API on/off switch, the REMI identity, the welcome screen state and the stream auto-resume flag keep the importing phone's values.
- The SRT passphrase is in the export as plain text.
RCP knob steps
The change per knob click, the same values as Settings -> RCP Knob Steps. A PUT can send all keys or only the ones to change. The new steps apply at once, and the response is the full set after the change.
curl http://<phone-ip>:8090/api/rcp-steps
curl -X PUT -H 'Content-Type: application/json' --data '{"wbNormal":500,"ev":0.25}' http://<phone-ip>:8090/api/rcp-steps
{"isoNormal":1,"isoFine":1,"wbNormal":200,"wbFine":1,"tint":0.001,"ev":0.1,"focusNormal":0.02,"focusFine":0.001}
| Key | Unit | Range |
|---|---|---|
isoNormal | 1/3 stop | 1 to 6 |
isoFine | ISO | 1 to 50 |
wbNormal | K | 50 to 1000 |
wbFine | K | 1 to 100 |
tint | tint units | 0.001 to 0.05 |
ev | EV | 0.05 to 1 |
focusNormal | lens position (0 to 1) | 0.005 to 0.1 |
focusFine | lens position (0 to 1) | 0.001 to 0.01 |
The knob steps are also in the full export, so /api/settings and Export Settings / Import Settings include them.
Status
Read-only, for monitoring. Poll it as often as you need.
curl http://<phone-ip>:8090/api/status
{"battery":{"level":82,"state":"charging","lowPowerMode":false},"thermal":"nominal","batteryTemperature":31.5}
| Field | Content |
|---|---|
battery.level | 0 to 100, or null when the phone does not report it |
battery.state | unknown, unplugged, charging or full |
battery.lowPowerMode | Low Power Mode (iOS) or Battery Saver (Android) is on |
thermal | nominal, fair, serious or critical. On Android, light and moderate throttling are fair, severe is serious, critical or worse is critical. Android below 10 always reports nominal |
batteryTemperature | Battery temperature in °C (Android). null on iOS, which does not give apps a temperature |
Errors
The body is always {"error": "<reason>"}.
| Status | Cause |
|---|---|
| 400 | Body is not JSON, JSON without a settings object, or invalid RCP knob steps (unknown key, not a number, out of range) |
| 403 | PUT or POST sent from a browser (has an Origin header), or a Host header that is not an IP address or localhost |
| 404 | Unknown path |
| 405 | Method not allowed (/api/status takes only GET) |
| 409 | Settings import while recording, or any PUT while an import is running |
| 411 | Chunked transfer encoding |
| 413 | Body over 32 MB |
| 500 | Import failed while writing settings |