Wi-Fi Halow
Introduction
Wi-Fi Halow is a long range (up to 2km LOS), low bandwidth (around 1Mbps) wireless IP link on unlicensed UHF frequencies. Although standardised by the Wi-Fi Alliance, it should not be confused with traditional Wi-Fi. This is not going to be used by phones or computers and so Halow is not going to be affected by the crowd attending events like 2.4GHz or 5GHz traditional Wi-Fi. As such, this can be used on larger events without any change of performance when the public gets in.
As this solution uses unlicensed frequencies, some other equipment could be using the same frequency and create interference. This will not give you the guarantee that licensed frequencies has. Multiple channels are available though and the system has been reported to work reliably with large crowds compared to other solutions like regular Wi-Fi or cellular.
Multiple manufacturers provide solutions compatible with the standard but we only tested the radios from Alfa Networks at this point.
It is possible to use the radios in 2 different modes:
- One access point and multiple client nodes
- IP mesh mode: all nodes communicate together and can extend the range (this so far only works reliably if you have 2 or 3 cameras)
Supported frequencies based on regions:
- 847MHz (TW)
- 866MHz (EU)
- 915MHz (US)
- 922MHz (KR)
- 924MHz (JP)
bandwidth : 1/2/4 MHz
The typical round trip latency between nodes is 10-20ms if you test with the ping command. This can affect the responsiveness of some protocols, but usually it's just fine for shading.
Devices
| Tube-AH (AHM27292U) | Halow-U (AHUC7292U) |
|---|---|
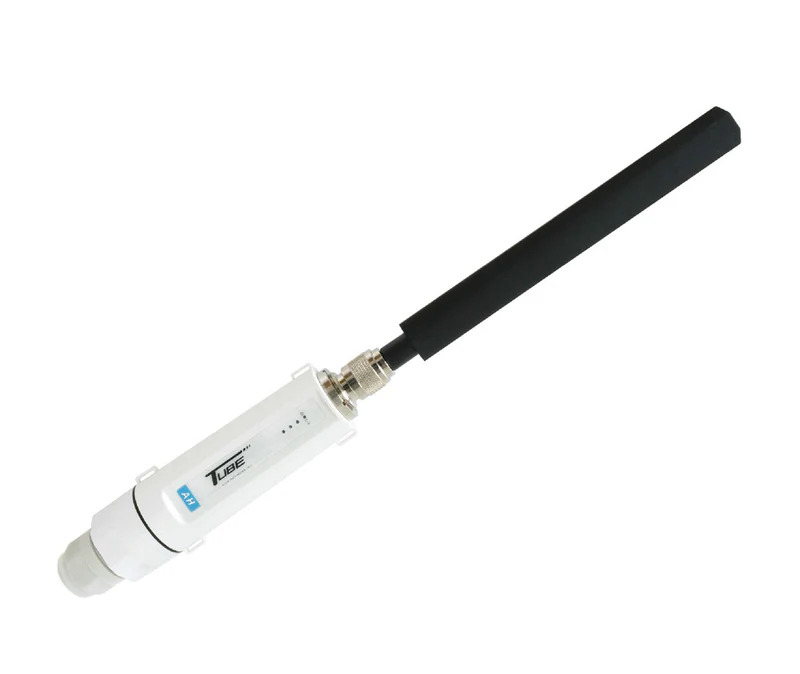 | 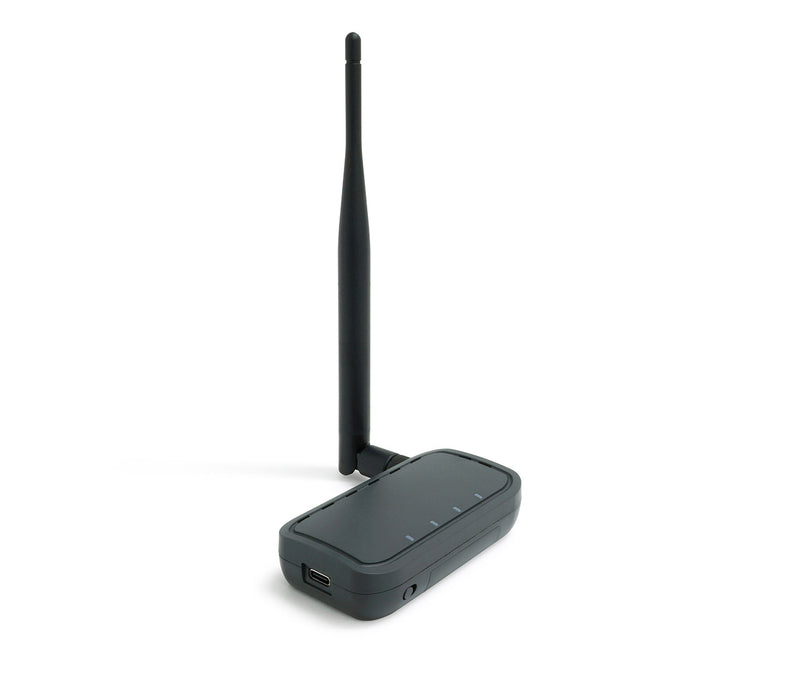 |
| connectivity: passive PoE Ethernet RJ45 (12-36 V DC) | connectivity: USB-C |
| Can be used as an access point or a node on a camera | Can be plugged directly into a RIO. Very few cameras also support a direct connection. This can also be used as an intermediate mesh node powered by a USB battery |
| antenna: Type-N | antenna: female SMA |
| size: +/- 30cm x 4cm | size: +/- 9cm x 5cm x 2cm |
Where to buy
- USA: Rokland has these products in stock. They ship outdated firmware so make sure to update it to start with.
- Europe: VARIA System sells the Tube-AH and Halow-U with a 2-month lead time
- Australia: RFShop sells the Tube-AH and Halow-U
- For bulk orders: You can directly contact Alfa Networks for a quote. Please note that bulk orders may have a 3-week lead time, higher shipping fees, and import taxes.
- Limited Stock: We also have a small stock of these products with 868MHz antennas for Europe, intended to help our clients evaluate the solution quickly. Please note that we do not intend to become an official reseller, nor do we offer demo equipment or support for these products.
Workflow
TODO
Configuration
The radios are configured through a webpage. Each radio comes with the same factory default IP which is 192.168.100.1. This IP address is only used to configure the radio itself, it is not used for the IP network nor the communication between radios.
The configuration of each radio will consist of:
- Changing the default IP address and disabling the DHCP server (credentials: admin|admin)
- Selecting the operational mode: AP or Station for point-to-multipoint, or Mesh Node
- Choosing a frequency channel
- Assigning a Wi-Fi Halow network name
- Installing the firewall on the radios used as access point
Rokland ships products with an old and different firmware using the standard OpenWRT interface. If you don't see the same interface as the screenshots below, start by updating the firmware to the latest version.
Configuration through the radio webpage
The factory IP of the radio is the same for all devices, so you should only configure them one at a time, changing it's IP to a unique IP before powering another radio.
- Connect and power the radio
- For the Tube-AH, simply connect it to a switch. Make sure it's powered (the LEDs should turn on)
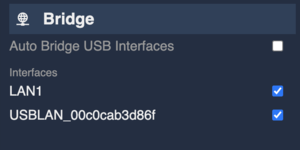
- For the Halow-U, connect it to a RIO or RCP over USB, make sure to use a cable that carries data and not only power! The "IP Connections" block should show the new USB connection in red, red is expected. Towards the bottom of the settings on the right column, tick the USB interface to include it in the
Bridge. Adding the interface to the bridge will make the radio accessible from the LAN port of the RIO or RCP like if it was an ethernet radio connected to a switch.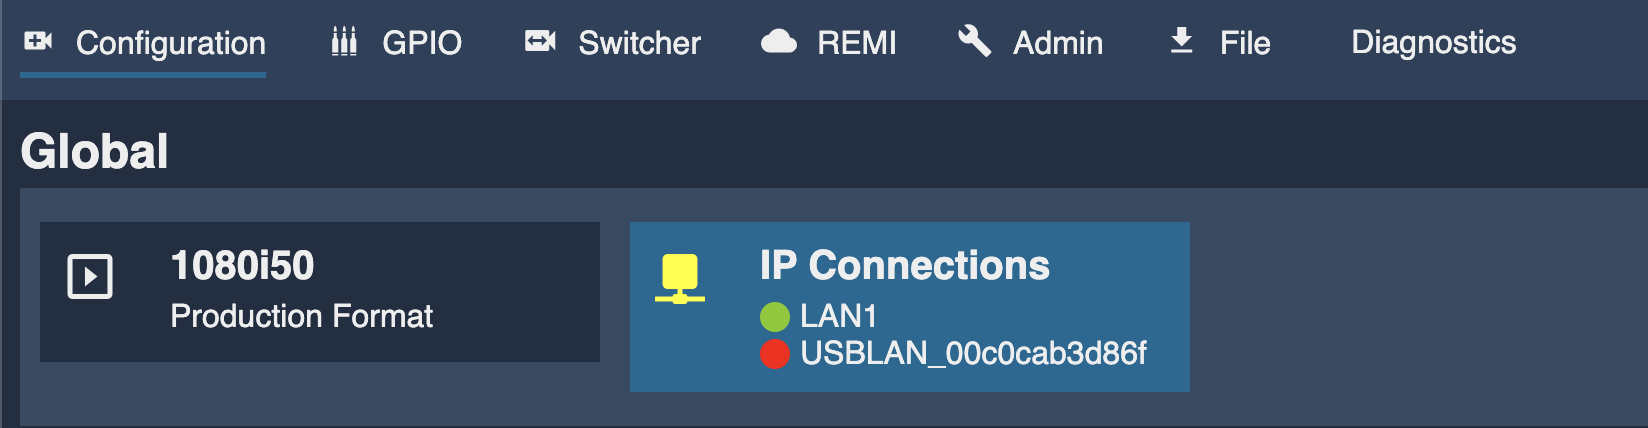
-
The factory IP of the radio is
192.168.100.1so you should set a static IP in the same range on your computer. Now the radio has a DHCP server enabled by default but we will disable it so it's probably not a good idea to rely on this. -
Load the configuration webpage at http://192.168.100.1 The credentials are
admin | admin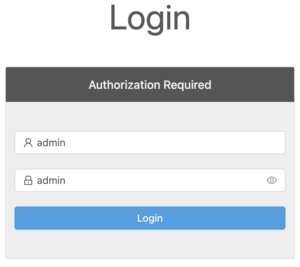
If you can't access the webpage, check you network configuration until you can
ping 192.168.100.1. Do a reset of the device in case it had been used and configured before. -
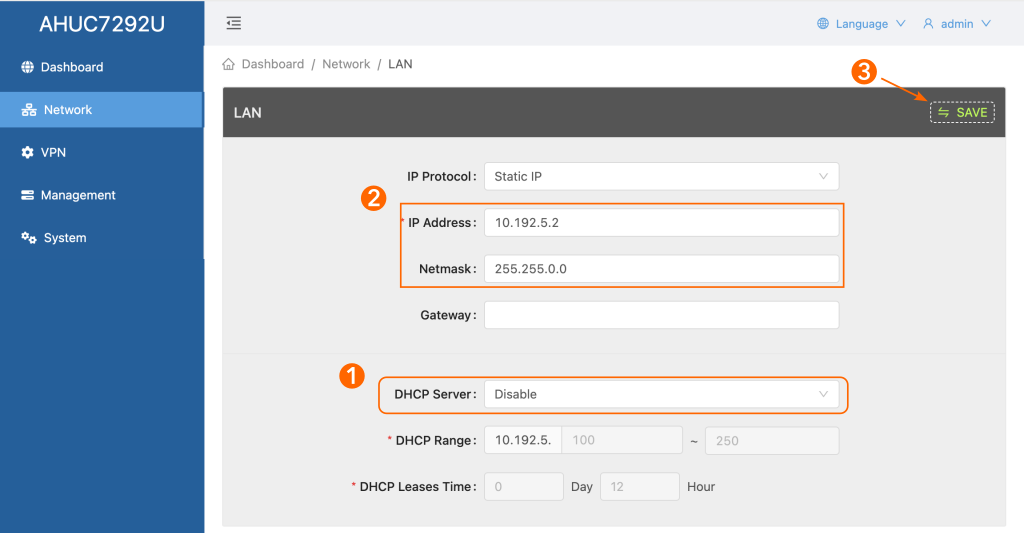
From the Network section on the left (this doesn't work from the Dashboard section), first disable the DHCP server. Then change the IP address and netmask. Click on Save on the top right.
We suggest to use the 10.192.5.xxx range. Our devices start from 10.192.10.0 so any network below 10 is not going to create IP conflicts. We see some advantages in using a range accessible from our factory IPs as we will be able to continue to develop our configuration and monitoring applications in the future. If you choose the 10.192.5.xxx range, the netmask should be 255.255.0.0 so any device starting with 10.192 will be able to access it. Label each unit to make sure they all have a different IP.
-
Set your wireless network:
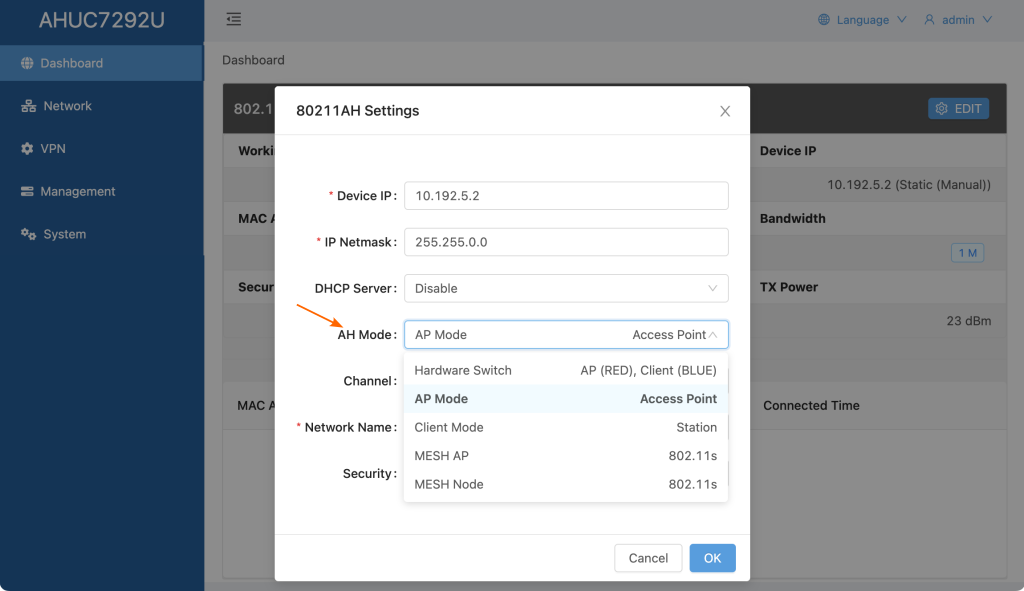
- Click the
EDITbutton on the top right - Choose the
AH Modeto eitherAP ModeorClient Mode (Station)for Point-to-MultiPoint setups, orMESH Nodefor Mesh networks.MESH APis technically identical to Node so just ignore it. Also don't selectHardware Switchon the Halow-U version, the switch can be toggled so easily that this will just create issues.
- Set a network name. SSIDs can be up to 32 characters long. This includes letters, numbers, spaces, and special characters such as hyphens (-), underscores (_), and periods (.). SSIDs are case-sensitive! A typical error we often see is to set the name lowercase on one device and capitalized on another.
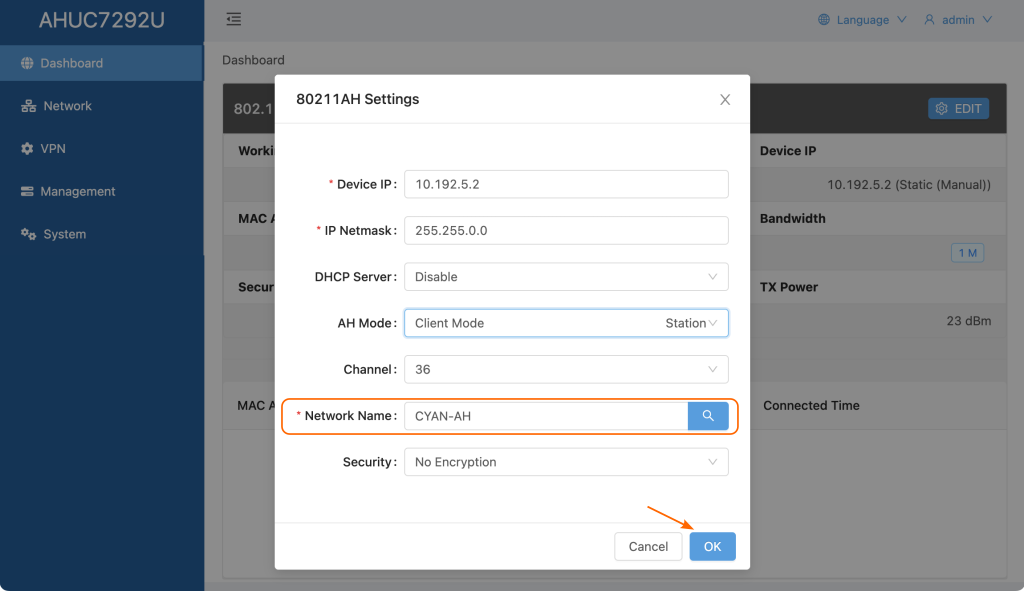
-
Click on OK to save
-
Note: we didn't try yet the security options
-
Once you have 2 devices configured with the same network name, they should connect wirelessly. Beware of network loops at this stage!
Network loops will bring your network down!If you have 2 devices connected to the same switch, either directly or through a RIO bridge, this will create a network loop which will bring your network down. A netork loop is created by connected a cable between 2 ports of the same switch for example: the network becomes overwhelmed with broadcast traffic, consuming all available bandwidth and preventing normal communication. A Wi-Fi Halow link is like a cable so conecting 2 radios to the same switch creates a loop. In the same way, connecting the RJ45 of a RIO together with a USB Halow-U will loop back through the wireless access point.
To avoid this, only connect your single AP radio to the switch, or in Mesh mode a single MESH Node. Also disconnect the RJ45 of all RIOs which have a USB Halow-U connected. They should now be reachable through the wireless network. To change between wireless and wired, simply connect one of the USB Halow-U or the RJ45 but not both. It is recommended to reboot the RIO after changing between wireless and wired when troubleshooting. This ensures a proper reinitialization of the network and routes on the internal bridge, especially when some DHCP servers are running or network loops have happened.
Configuration scripts on RCP or RIO
We designed a custom webpage on the RCP and RIO with a few more options to configure and monitor the Alfa Network Halow radios.
This page is accessible on port 5000 of an RCP or RIO: simply add :5000 to the end of the IP address on the webpage address. For a serial such as CY-RCP-40-151, the main GUI will be available at http://10.192.40.151 and the special page is accessible at http://10.192.40.151:5000
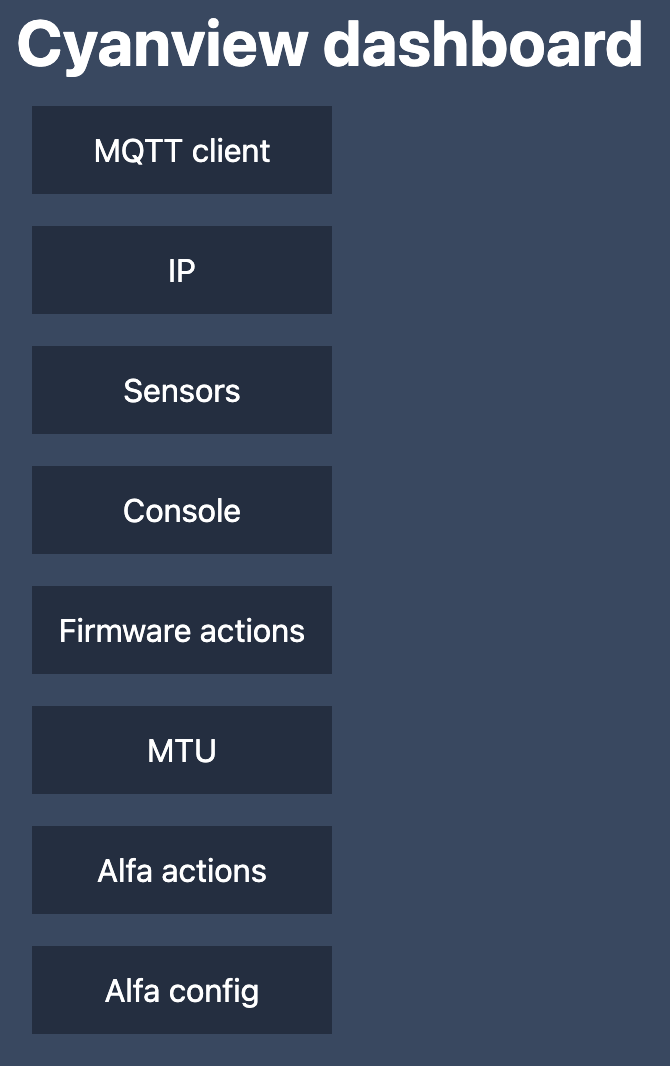
If you don't see Alfa actions and Alfa config at the bottom of the page, you have to update your RCP or RIO by downloading the latest release here
Each script or action works similarly: input the IP address of the radio in the top field and run the selected action.
-
Changing the region
warningAlthough this configuration page was meant to be able to change the IP address, it seems there are some bugs that have to be solved so for now, use the manual configuration to change the IP address of the radios.
In the Home page, select
Alfa Config. Start by loading the settings of the radio by fillinf the IP address of the radio and click onLoad.A few settings can be changed here which are not available in the Alfa GUI. The important ones are:
- Zone is the region, DE is for Europe, the other labels are correct. If you change the region, the frequency bands available are adjusted. You will also have to get an antenna tuned for this new band.
- Power can be used to decrease power. By default the radios are set at 23dBm, any value between 23 and 30 are the same. You can select other values between 0dBm and 23dBm.
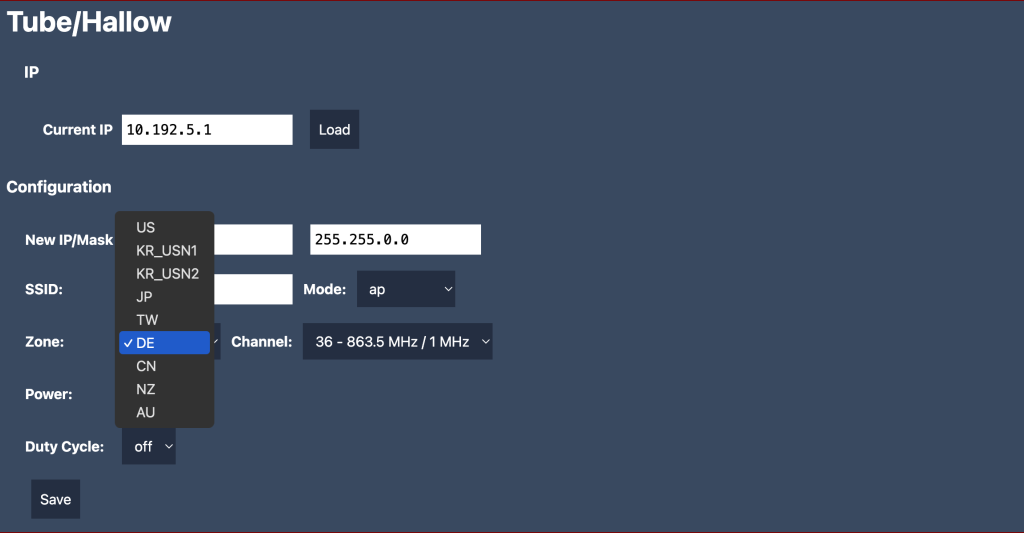
Click on
Saveto save your changes. These are not applied yet though, a power cycle of the radio is necessary afterwards.Pay attention that by selecting a frequency, you also select a bandwidth. Camera control doesn't require a lot of bandwidth so we never tested anything else than the 1MHz bandwidth. This is more than enough for this application and minimizes the possible interference.
-
Adding a firewall on the radios
We created some firewall rules to cut any broadcast traffic off the radios as the wireless network performance quickly decreases when you add more nodes. ARP requests still go through so it's recommended to minimize the amount of equipment on the LAN shared with the wireless network nonetheless. The
setup-firewallaction is available in theAlfa actionssection.This action only has to be performed once, the firewall will only be removed if you do a factory reset of the device or use the
remove-firewallaction.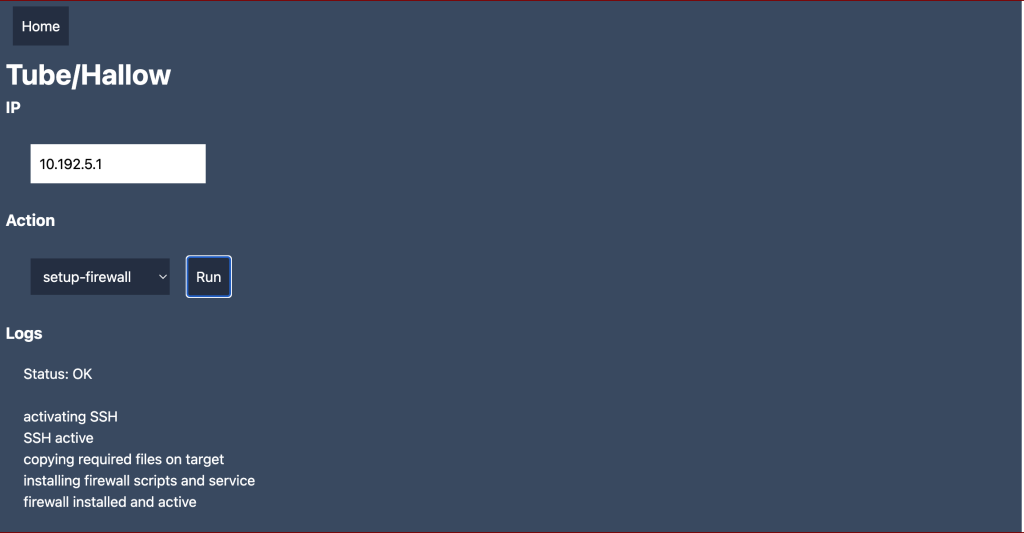
-
Scanning the bands to find the best channel
Run the
scan-bandsaction to get a list of all channels and a percentage of activity on the frequency band. The lower the number the better. The last 2 lines before OK will indicate the optimal frequency and optimal channel, which is channel 36 on this test. You can run the test multiple times to see if the conditions change and figure out the best channel to use.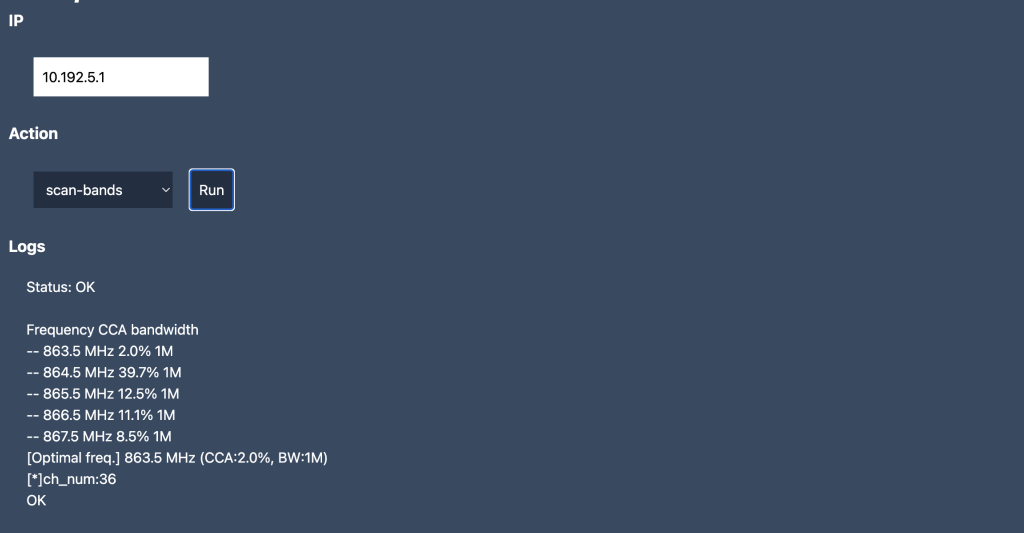
If the radios don't connect together, it is good to execute this scan and check that there are no interferences on the current channel. Changing to another channel will be easier with all radios momentarily connected to the network one by one. It is possible to change channels while wireless connected as the changes are saved but not applied. Once all radios have been changed, they can then be power cycled without requiring to be connected on the LAN directly.
Monitoring
Dashboard of the main radio
The Dashboard section of the radio webpage will show your connections.
Note: at this point the status of these connections doesn't seem very reactive, they can persist long after some radios are shut down. We have yet to understand how this works and find a reliable way to get this diagnostic.
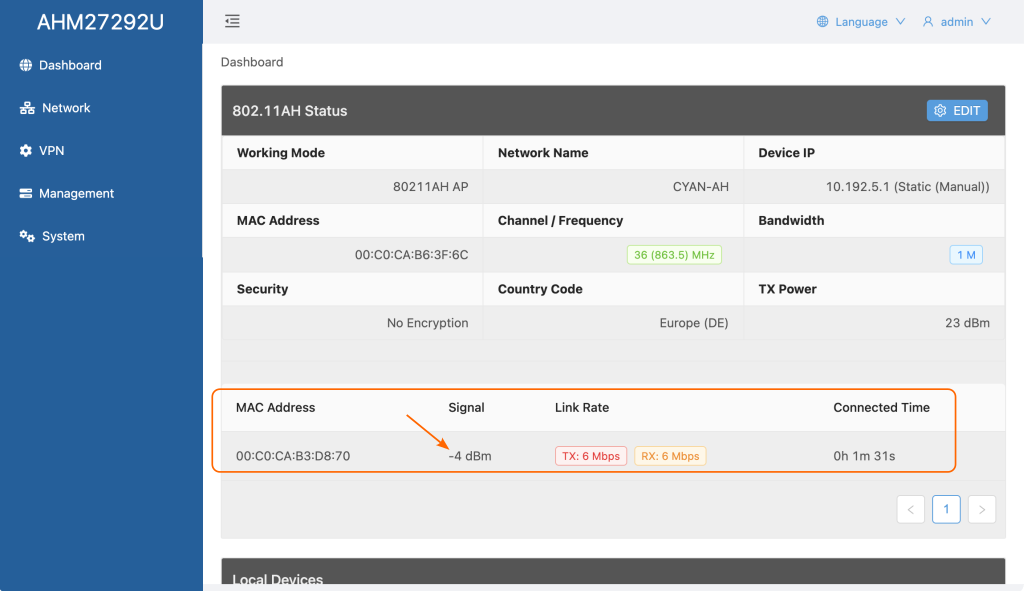
Signal quality is indicated for each wireless link. Here are some references:
- Good : 0 to -70dbm
- Low : -70dbm to -80dbm
- Weak : -80 to -90dbm
- Too low : -90 and below
Although it is possible to access each webpage and monitor all the nodes from a computer, each webpage runs a regular status update and takes a lot of the wireless bandwidth, more than needed by most camera control protocols. It is recommended to only monitor the page of the main node, either the AP or the Mesh Node connected to the LAN. This one doesn't affect the wireless bandwidth at all as the communication only goes through your LAN switches.
LEDs
On Halow-U:
The first LED is either blue or red depending on the switch position. Except the color, the switch doesn't have any other effect as long as you don't select it under AH Mode.
It takes around 1 minute and 15 seconds for the device to boot and get all 4 steady LEDs. At that point you should be able to ping the unit through the RIO bridge or the wireless link.
| LED 1 red/blue | LED 2 green | LED 3 green | LED 4 green | Duration | |
|---|---|---|---|---|---|
| 1 | steady | steady | off | steady | 15 seconds |
| 2 | steady | blinking slowly | off | steady | 1 minute |
| 3 | steady | steady | steady | steady |
On Tube-AH:
It takes 30 seconds for the LEDs to reach their status of Blue - green - green. It takes another 30 seconds before the unit activates the network so the total boot time is around 1 minute.
| Network LED | Wifi LED green | Power LED green | Duration | |
|---|---|---|---|---|
| 1 | steady | off | steady | 10 seconds |
| 2 | blinking green | off | steady | 20 seconds |
| 3 | steady blue | steady | steady |
REMI through the firewall
If you have a firewall installed on Tube-AH or Halow-U radios, the automatic discovery of the RIO from the RCP will also be blocked as these use broadcast messages. So any RIO connected through wireless won't be visible on the REMI page.
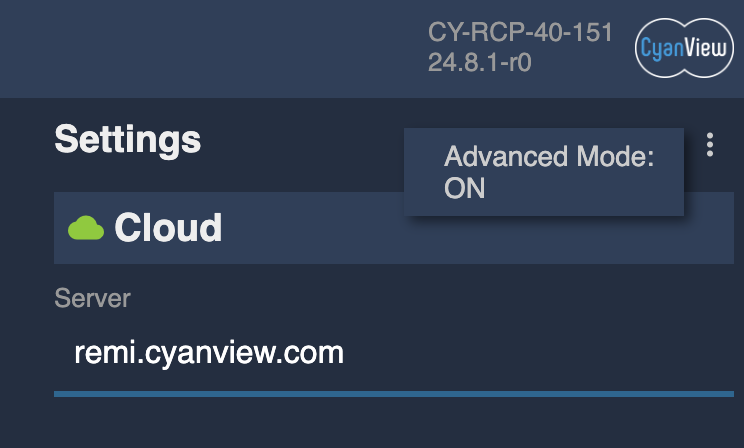
In this case, the IP address of the RIO has to be manually added on the RCP. In the REMI tab of the RCP, activate the Advanced Mode in the top right corner 3-dot menu.
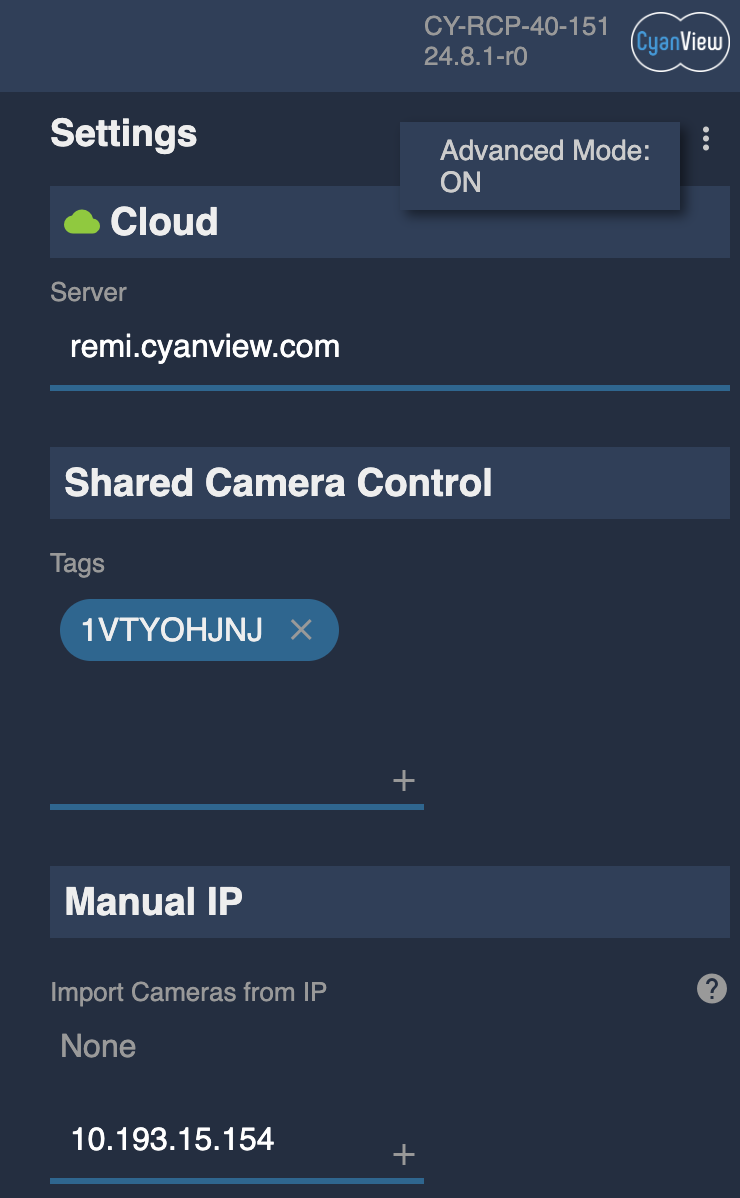
Add the IP address of all RIOs which are going to be wireless. Set them in the Manual IP section and click on + for each.
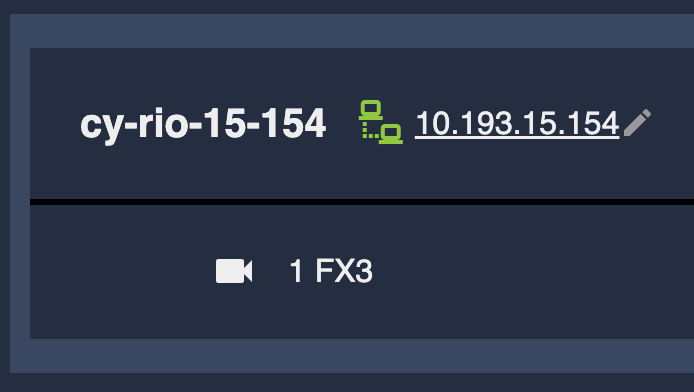
As soon as the RIO will be on the network, it should appear on the left section and the IP address will be removed from the manual list.
Troubleshooting
Latency
You should have a latency of 10-20ms, even with multiples radios. If you have more than that, try to improve the placement of the antennas and monitor the signal level (RSSI).
If the signal level gets too weak in MultiPoint mode, You can give a try to the mesh mode if you have only a few wreless cameras.
Device reset
If you lost the IP address of the device, a factory reset using the reset buttons will restore the 192.168.100.1 default IP. If you still have access to the GUI, you can also reset the device that way.
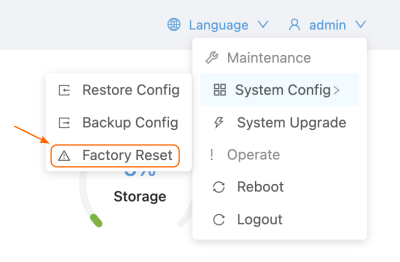
From the webpage
The option is under the admin menu on the top right.
Using the reset button
- Power on the device and wait for the status led to stop flashing (about 70 seconds)
- Press and hold the reset button for 10 seconds
- Wait for the device to reboot completely with factory settings (approximately 2 minutes and 30 seconds).
A reset of the device will also remove the firewall rules if these have been installed, so it is necessary to reinstall them after a reset.
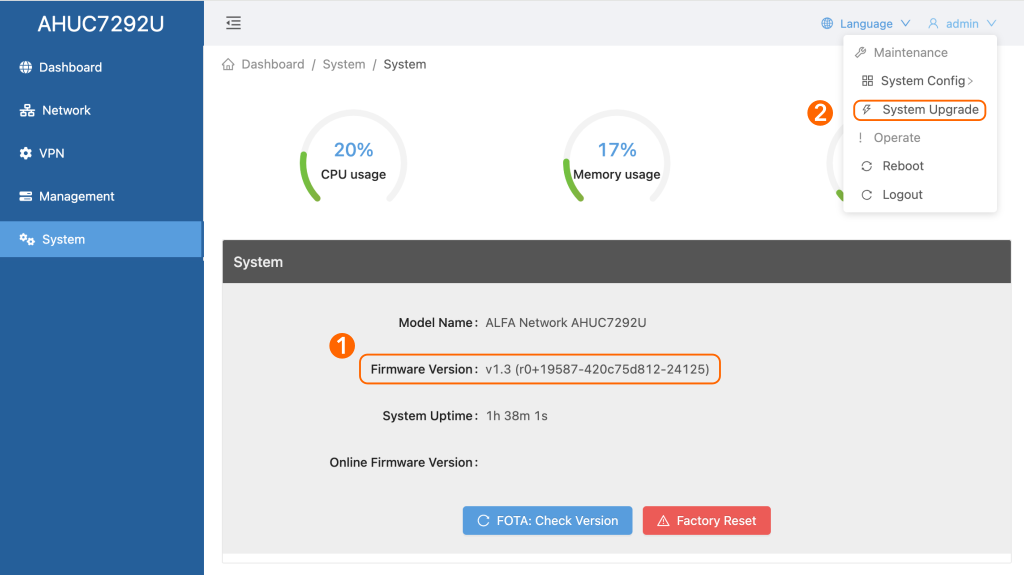
Firmware update
The latest firmware from Alfa Networks is v1.3
You can check it from the System section on the left [1] and update it if necessary using the admin menu on the top right [2] with the firmware files available below.
Downloads:
If the webpage doesn't look like the Alfa Networks version and indicates OpenWRT, the firmware can still be updated. We don't have at this time some screenshot of procedure on how to do it though.