RCP Controls
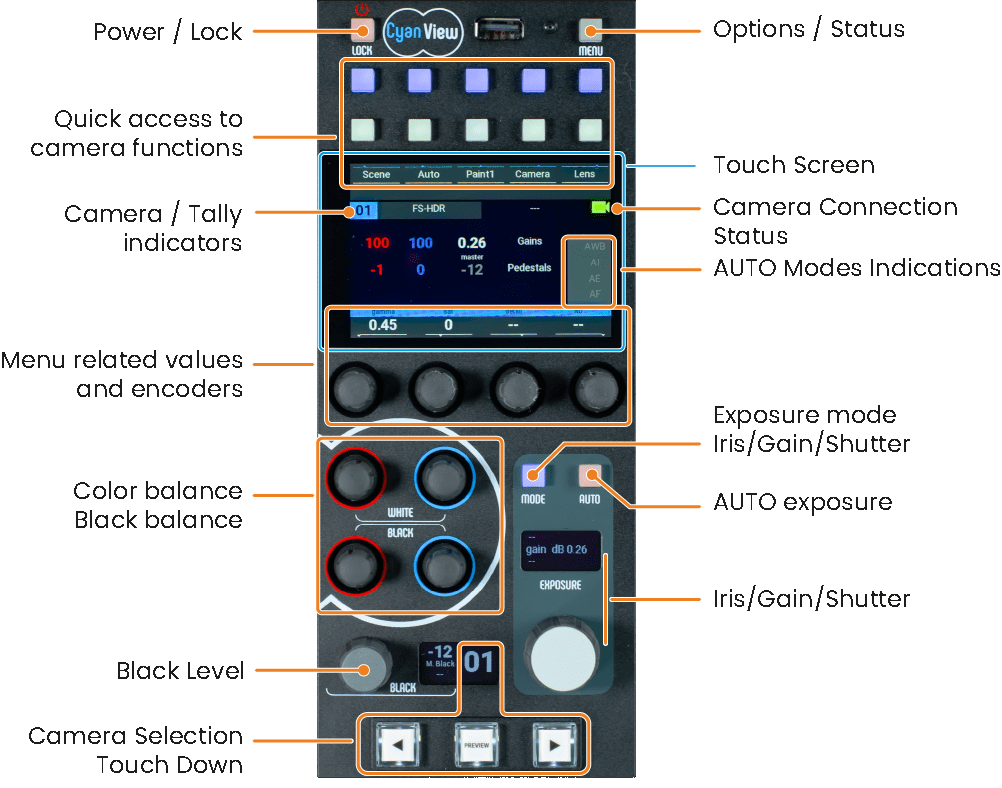
LOCK Button
- lock/unlock
A 1 second press locks/unlocks the RCP panel.
When the RCP is locked, the screen is dimmed, but is still refreshed with information.
In this mode, the buttons and encoders have no effects.
- Power ON/OFF
5 seconds press then release switches OFF the RCP controls.
Switched ON by pressing the Power/Lock button again.
MENU Button
The RCP MENU shows information on IP addresses, software versions, GPIO status and other diagnostic information.
Network
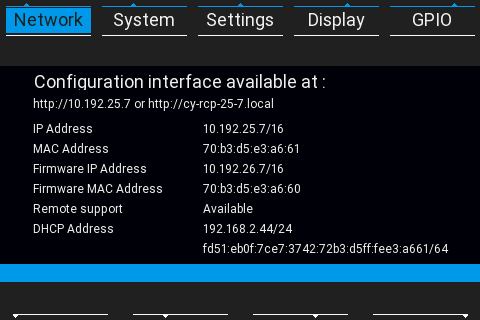
- IP Address, your RCP's fixed ip, can be ping to verify the network access.
- MAC Address, allows to setup your network component like firewall or switches.
- DHCP Address, IP address received from the network DHCP server if available.
- Remote support status: available or not.
System Screen
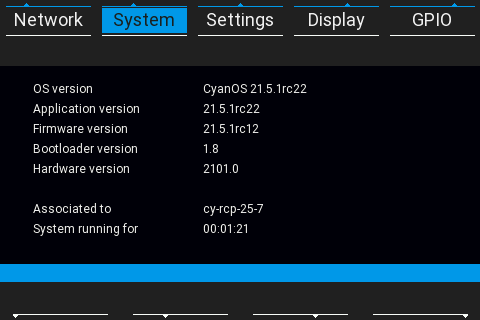
Shows version of the different software components of the RCP.
- OS version
- Application version
- Firmware version
- Bootloader version
Settings
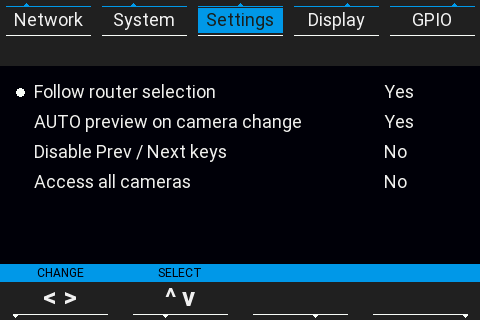
This menu allows to set the preview behavior :
- Follow router selection : When set to "Yes", the RCP will automatically display the camera selected by the router.
- AUTO preview on camera change : When set to "Yes", a preview commands, able to control a router, is sent when the camera is changed on the RCP.
- Disable Prev / Next keys : When set to "Yes", the Next / Prev buttons will acts like the Preview button. In this mode, it is not possible to change the camera with the Next / Prev buttons anymore. Usefull for single camera configuration.
- Access all camera : When set to "No", only camera in a restricted list are accessible from the RCP. For future use.
Display
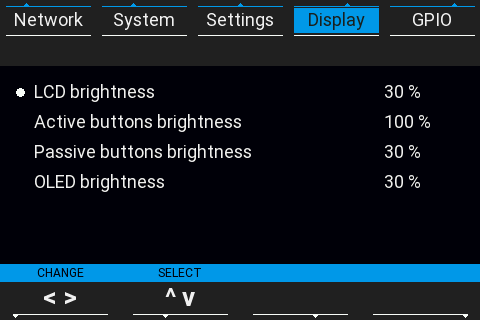
This menu allows to set the brightness settings of the RCP.
GPIO
The GPIO presents a status of the 8 port of each GPIO is represented by 1 or 0.

See GPIO page for more information about GPIO possibilities.
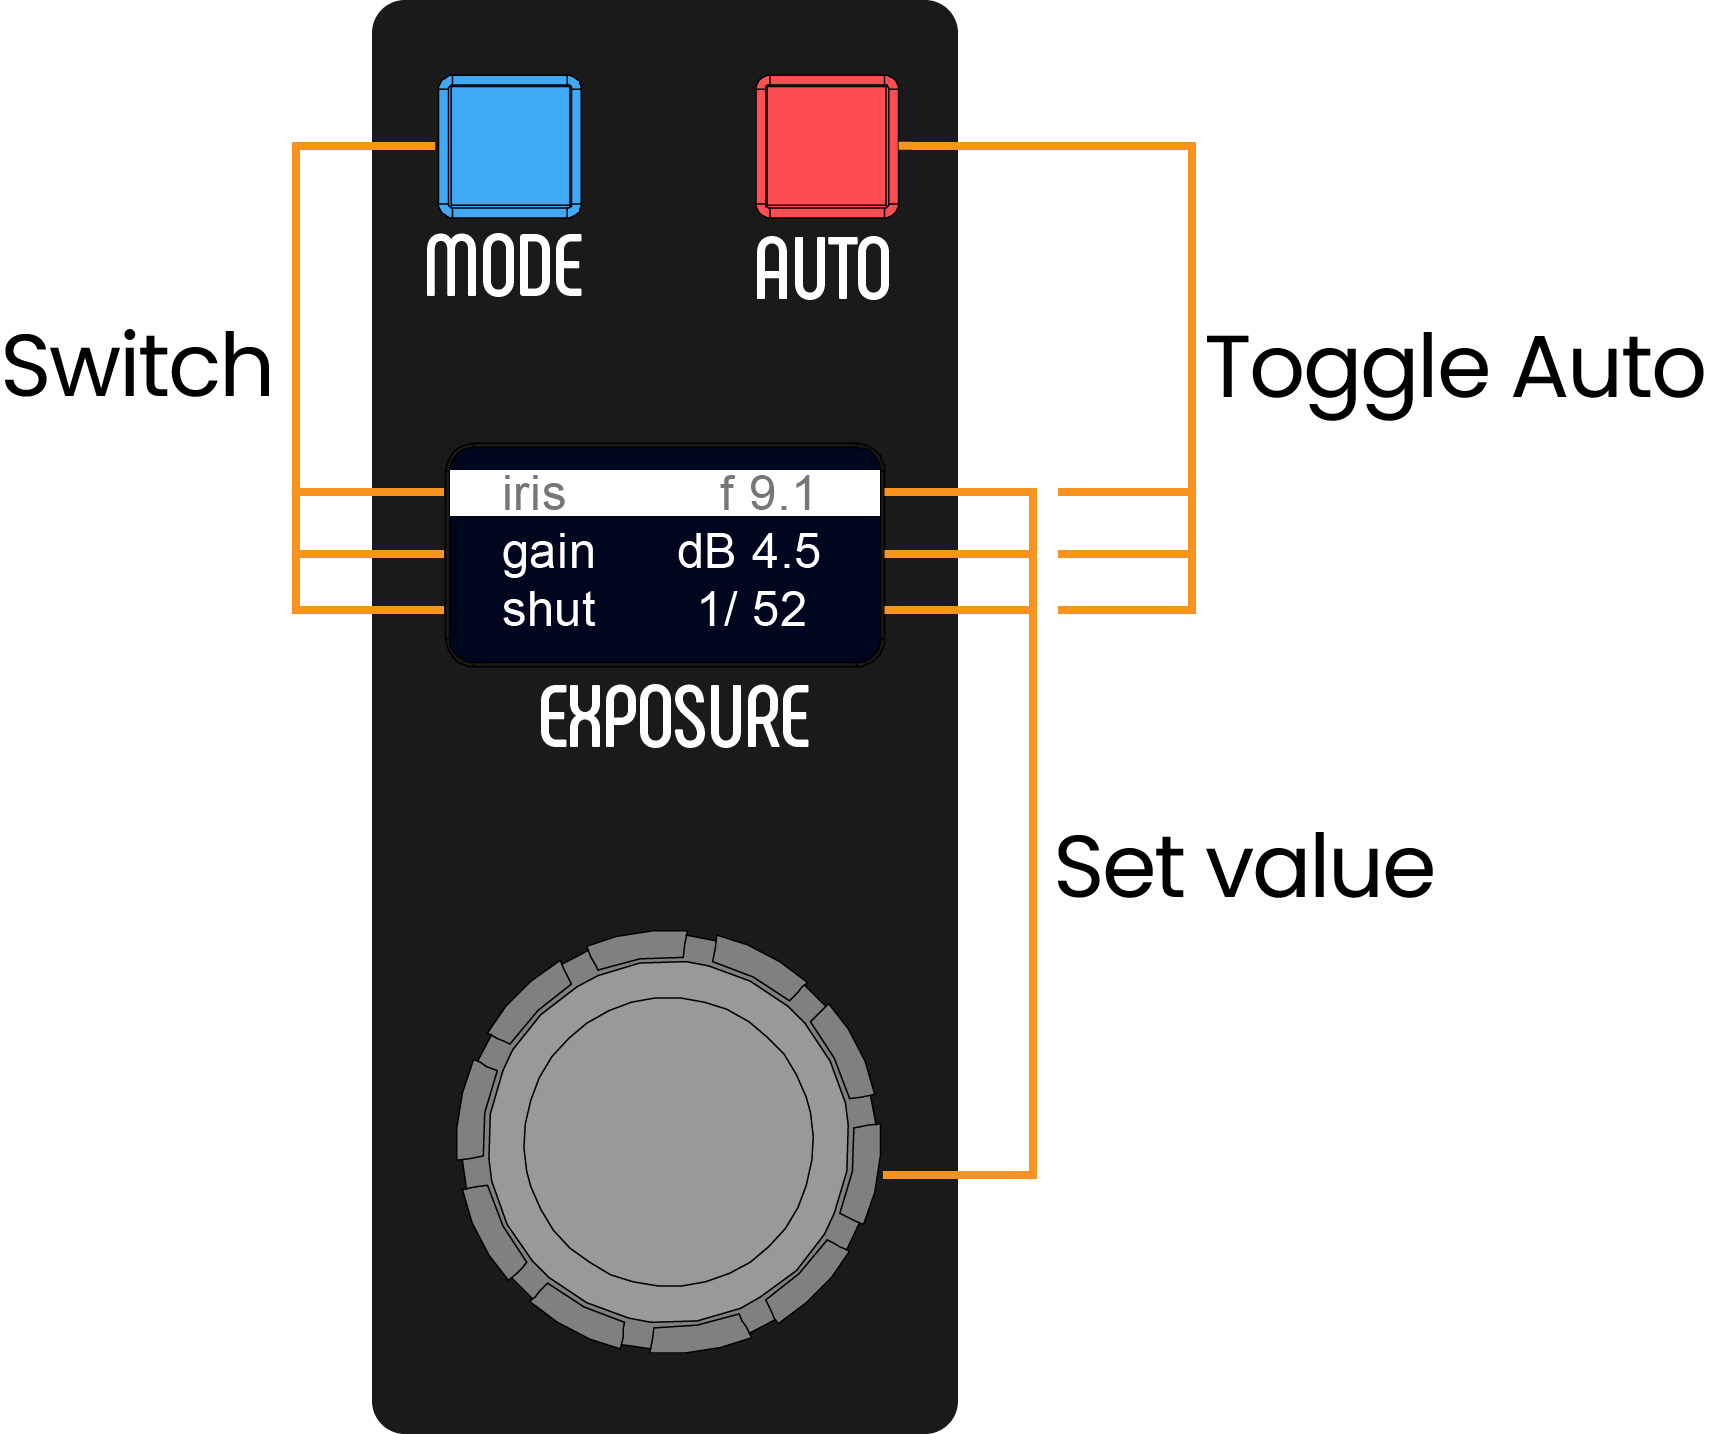
Exposure Control
Rotate the encoder to set the Iris, Gain, or Shutter exposure.
Press the MODE button to switch between Iris, Gain, and Shutter exposure modes.
When no active mode (no highlighted mode on display), defaults exposure mode will be Iris if available on the camera, otherwise it will be Gain mode.
Press the AUTO button to Toggle the Iris, Gain, or Shutter auto exposure.
RCP Screen
Screens Overview
|
| |
| ||
|
| |
| ||
|
|
 Main
Main Scene
Scene Auto
Auto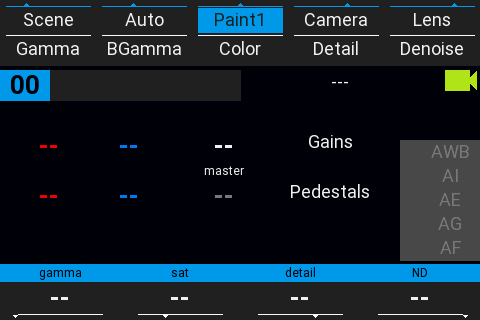 Paint1
 Paint2
 Camera
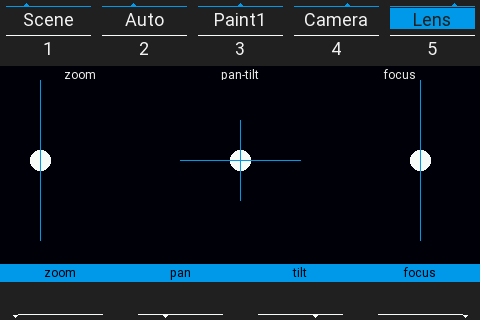 Lens
Lens Lens2
Lens2Screen Navigation
Demonstration on how to access the different RCP screens.
Values represented by '--' are functions not supported by that camera model.
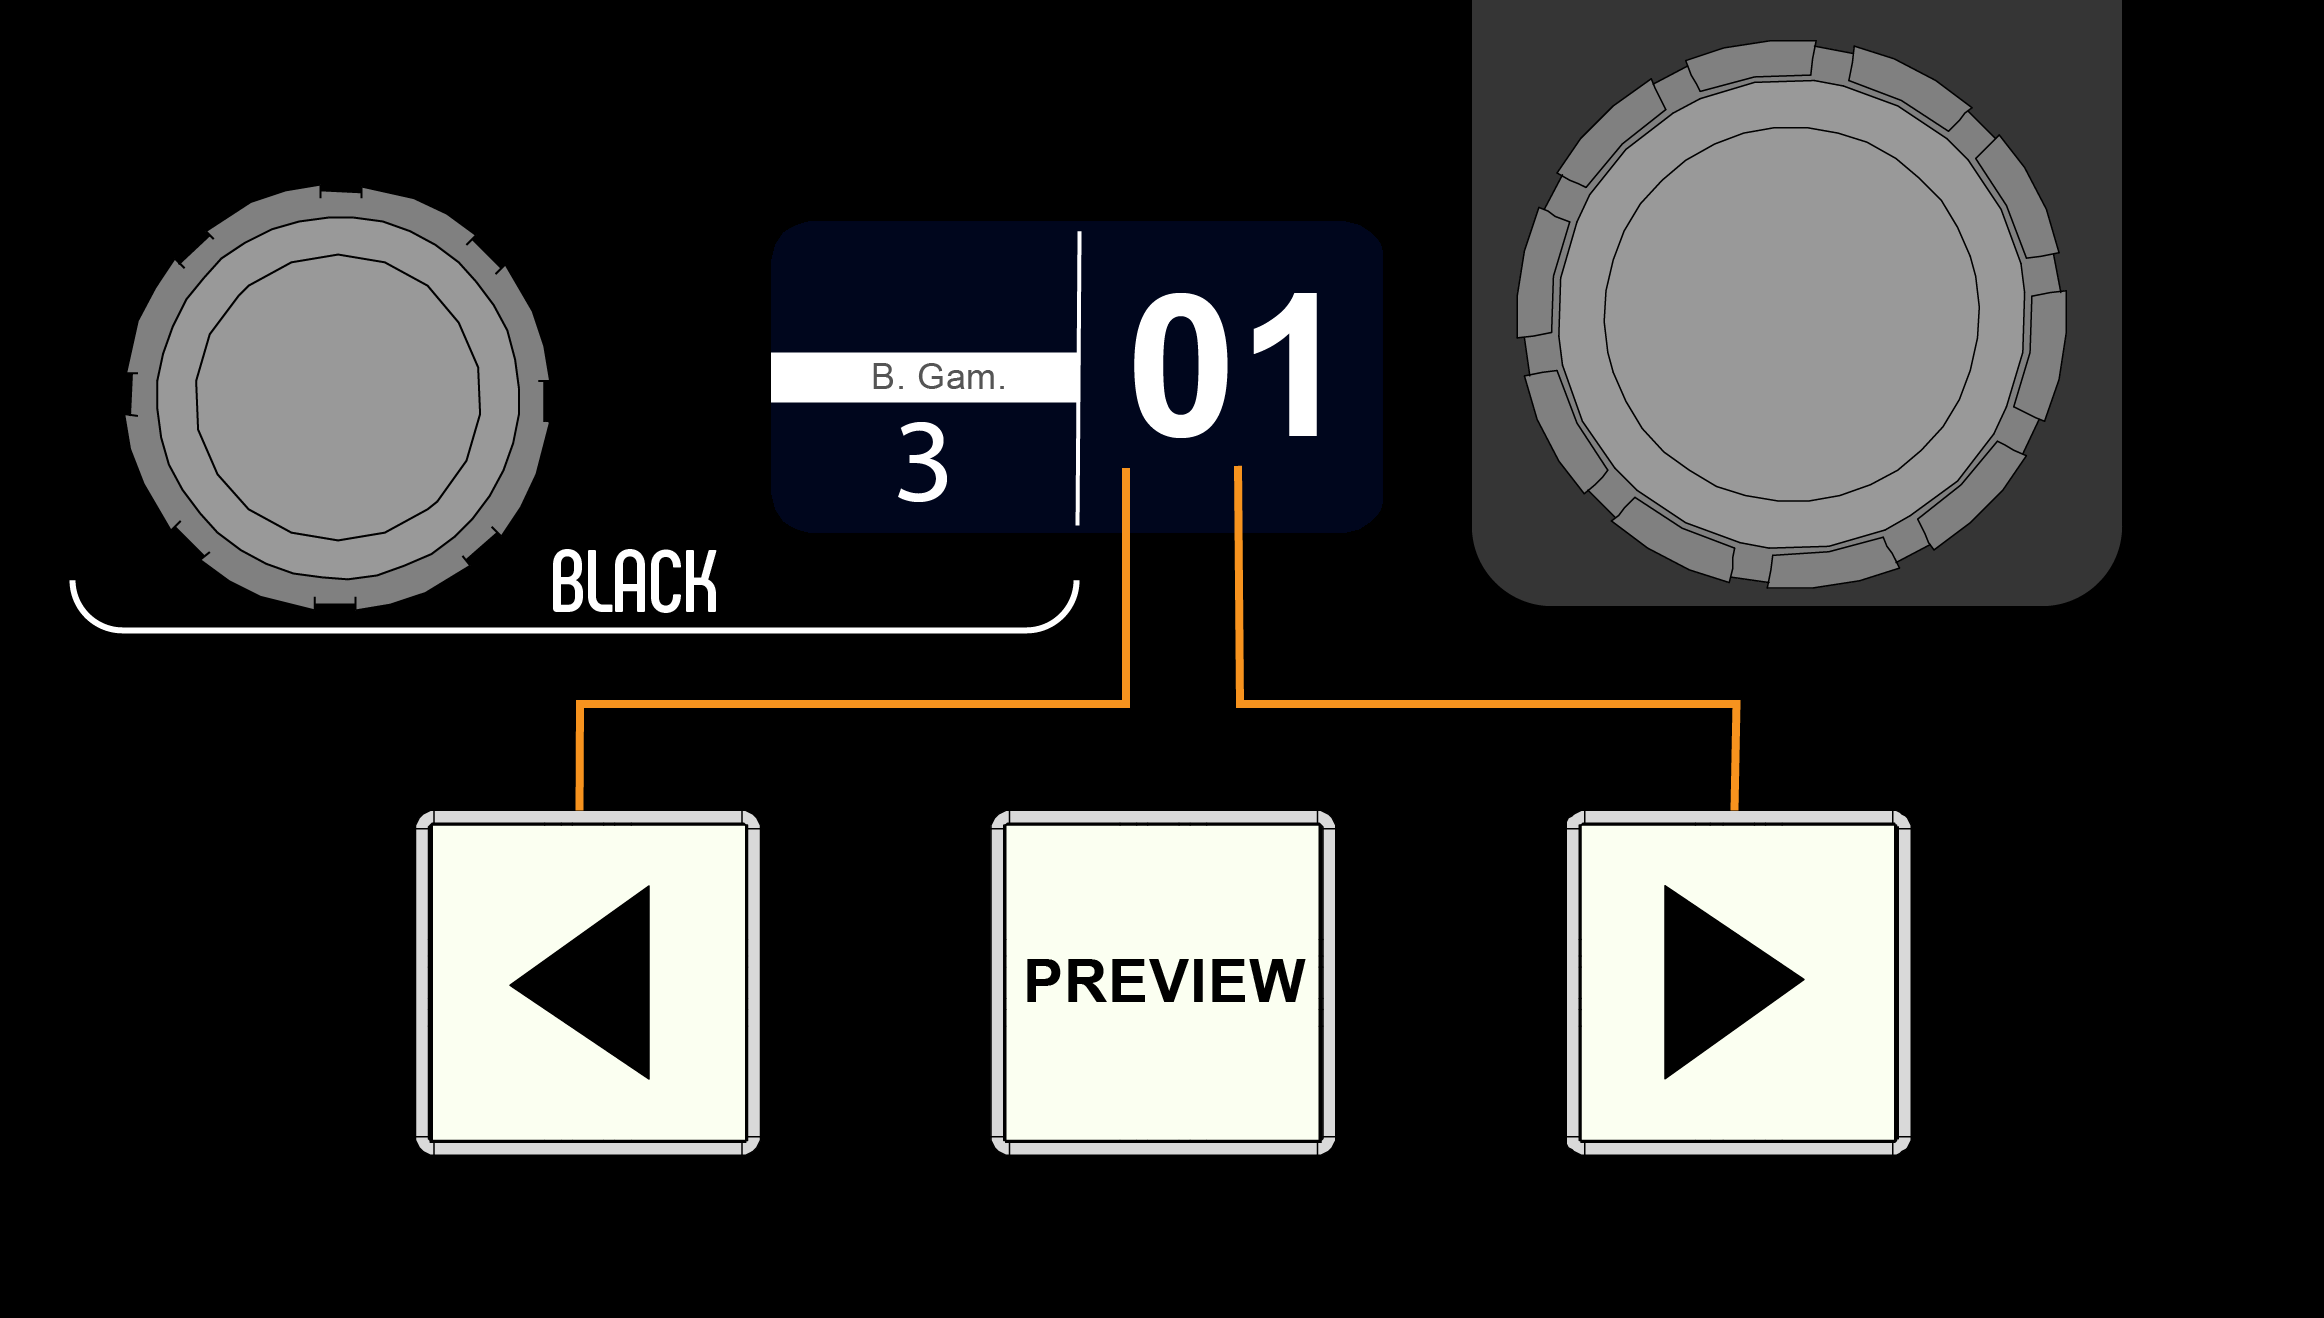
Preview
Change the active camera by pressing the left or right buttons.
If a router integration has been configured, switching camera on the RCP will also switch the router to the same camera.
GPIO
The PREVIEW button can a preview/touch-down signal via the RCP GPIO or recalls the selected camera on the router.