WiFi Nano AP setup
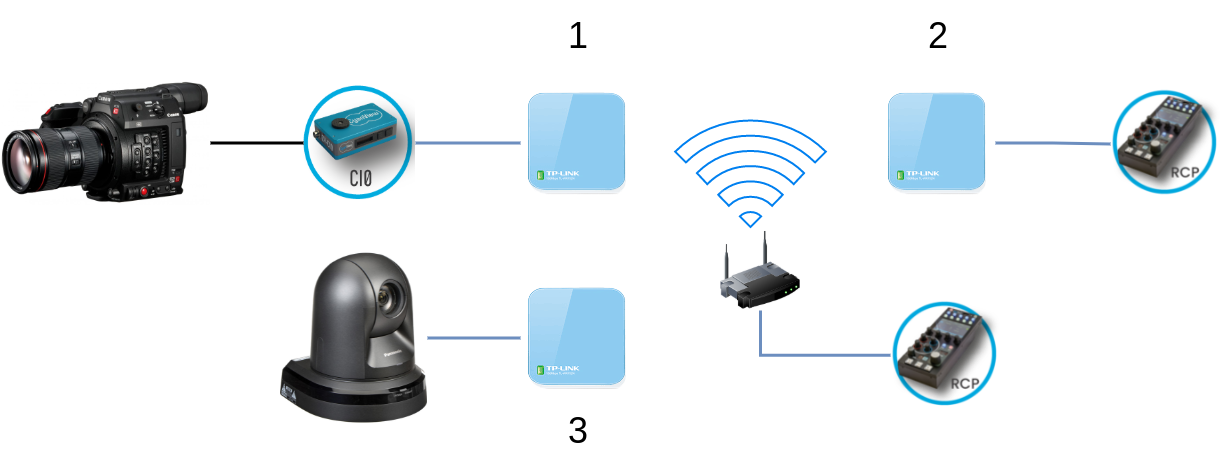
This guide is intended to provide a WiFi connectivity to Cyanview devices:
- CI0 : to control a camera over WiFi (Blackmagic, etc.)
schema 1 - RIO : to get internet using WiFi
- RCP : to connect to a LAN using WiFi
schema 2 - IP/Ethernet Camera : to control it over WiFi (PTZ, BGH1, etc.)
schema 3
You have various way to achieve that, the one presented here is using a TP Link nano router.
Setup
You can find the documentation here
- [step 1] Connect your TPLink to its USB power supply
- [step 2] Connect your device to the ethernet port of the TPLink
- [step 3] Check on the sticker to find the SSID/Password and connect to it with your laptop
- [step 4] Navigate to http://tplinkwifi.net/ and login using the password (default is admin/admin)
Now, you should setup the TPLink in Client mode:
- It will connect to a WiFi AP
- And act as a bridge between Ethernet and WiFi
You should ensure to setup this parameter:
- Connect the TPLink to the good WiFi AP
- Mode should be
Client - Keep
Smart IPto have the bridge mode
Your setup should look like this:
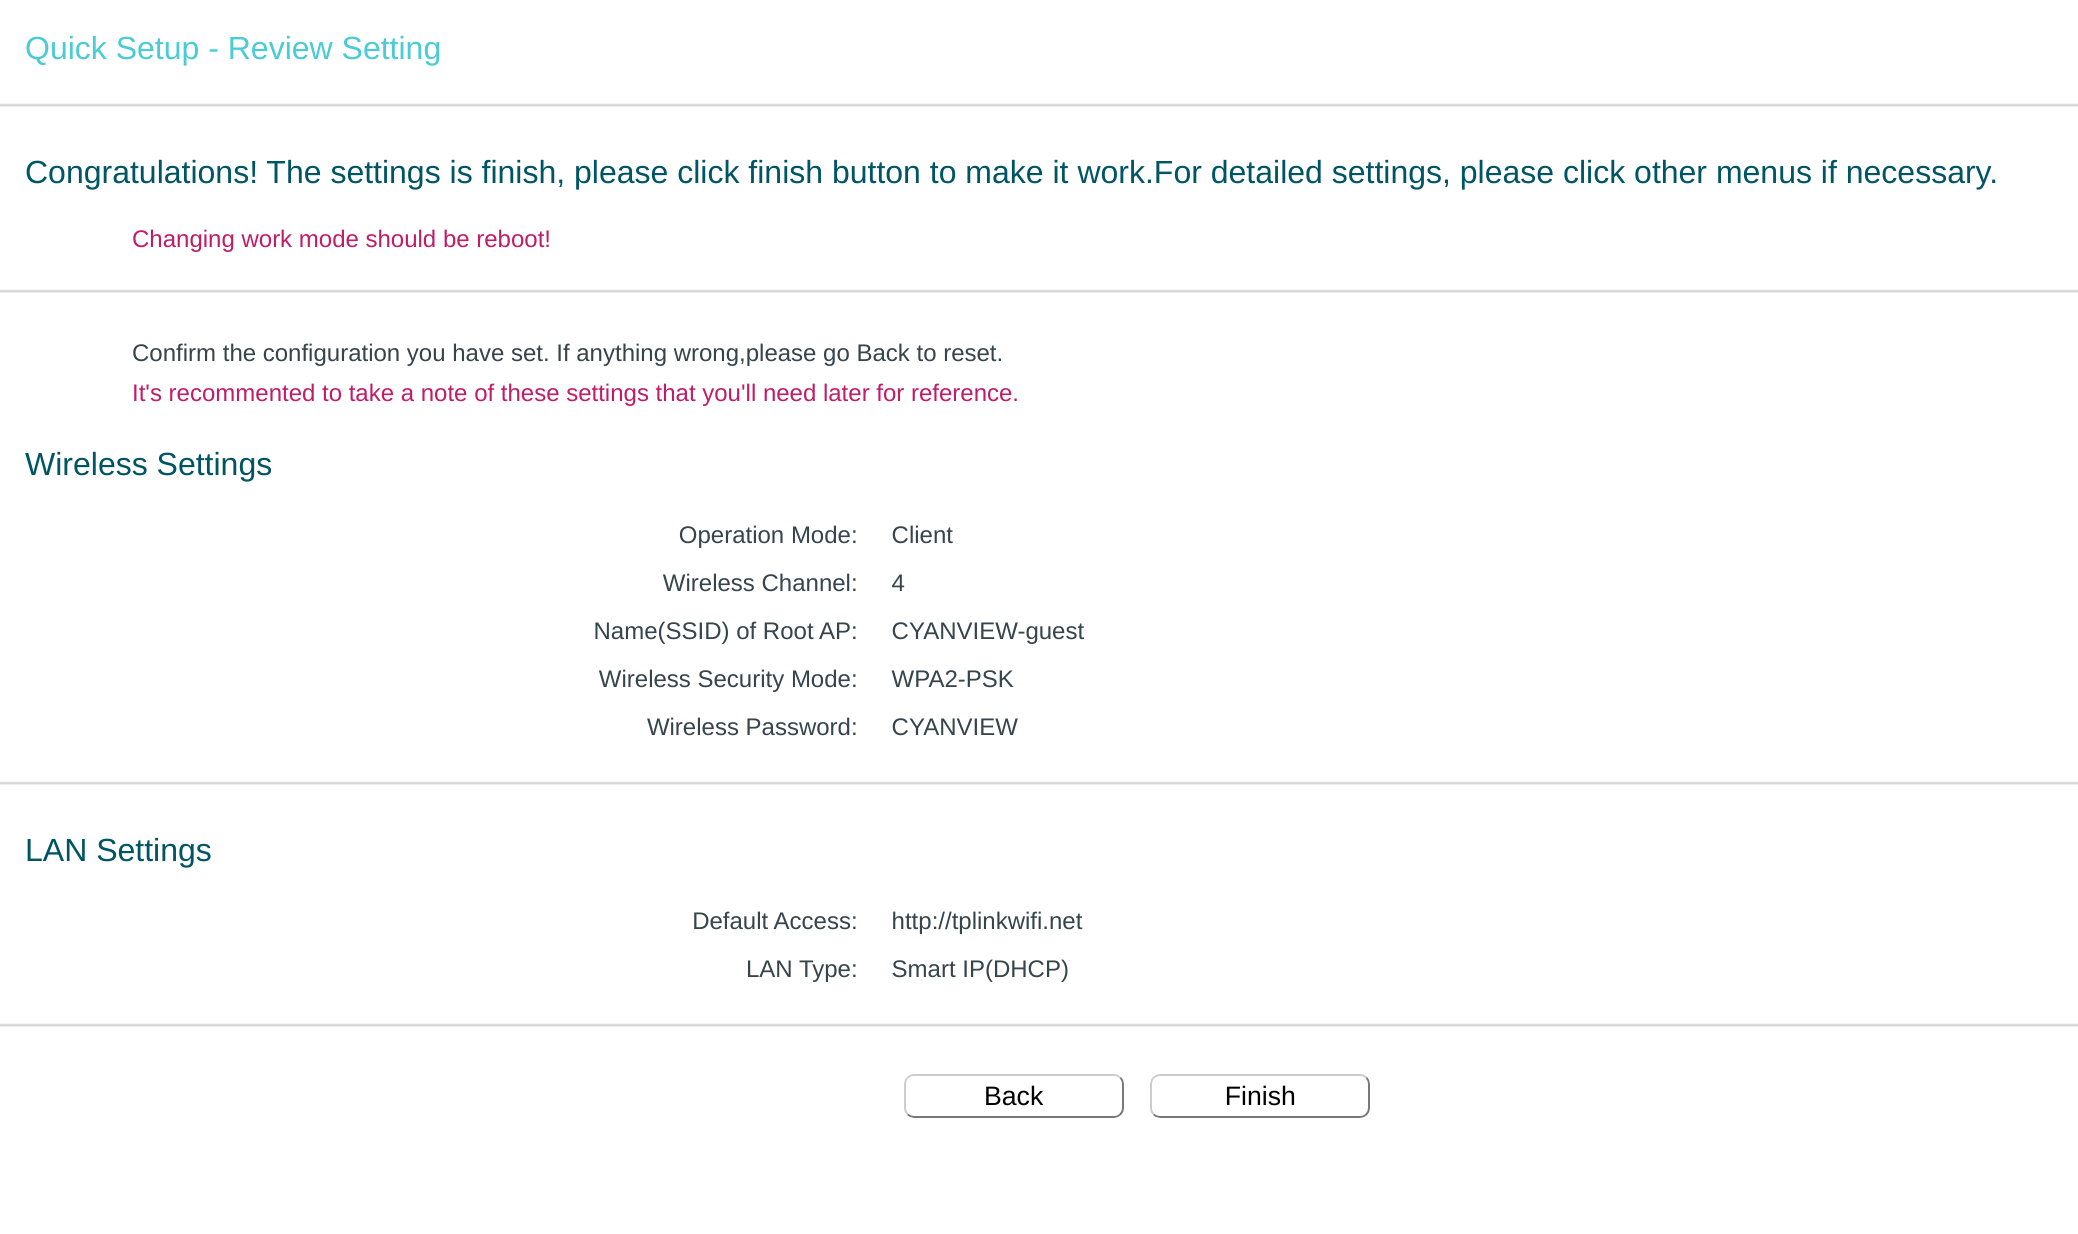
After validating, the TPLink will reboot, you will be disconnected and the setup is applied.
Now every device plugged on the ethernet will be accessible over WiFi.